Sensor 部署
用戶端部署
連線方式
在進行端點部署前,需要先了解環境中的端點能夠透過那些方式連線到 Vision
One
如果端點無法直接連線至網際網路則需要考慮透過 Service Gateway 或是 Proxy
連線出去
並建議建立兩個或以上的 Service Gateway 或 Proxy 避免連線異常中斷
Service Gateway Forward Proxy Service (FPS)
部署前需要先參考設定 Service Gateway 所需要的防火牆設定
Deploy a Service Gateway and Configure Firewall Exceptions
並依照 Service Gateway 底下的端點會開啟哪些功能去開啟防火牆設定
Firewall exceptions: Singapore - all exceptions
Service Gateway 各個功能會用到的 Port
Ports used by the Service Gateway virtual appliance
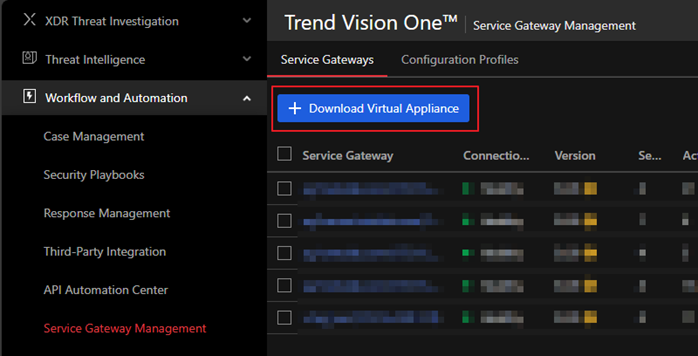
在 Workflow and Automation 的
Service Gateway Management 中點擊
Download Virtual Appliance
在彈出的右側欄選擇 Service Gateway 類型以及
Registration Token 記得先複製
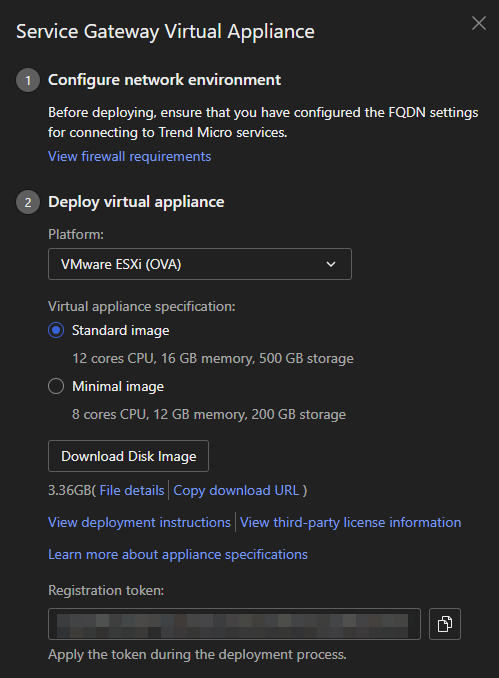
可以先參考 System Requirements 的說明後進行選擇
Service Gateway appliance system requirements
依照 Disk image type 部署完畢後,使用下列資訊登入:
帳號:admin
密碼:V1SG@2021
登入成功後會要求變更密碼

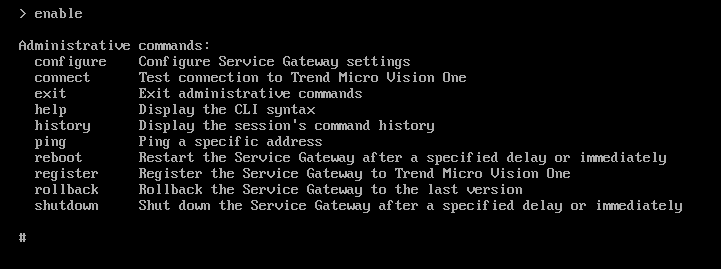
輸入 enable 進入 administrative commands
首先設定 Service Gateway 的 IP、Gateway、DNS
Configure network primary ipv4.static <interface>
          <ip_cidr> <gateway> <dns1> [dns2] [cni]

透過稍早複製的 Registration Token 註冊
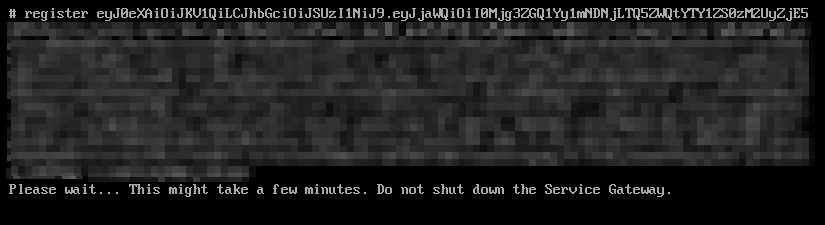
完成後即可在 Service Gateway Management 看到該
Service Gateway 回報

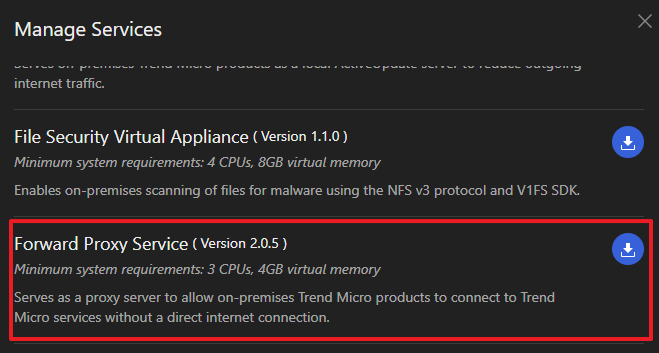
點擊 Service Gateway 的名稱進入後找到
Manage Services

在 Manage Services 中找到
Forward Proxy Service (FPS) 並下載安裝
Note
可以同時安裝
Generic Caching Service (GCS) 讓用戶端透過 Service
Gateway 下載時建立快取
讓其他用戶端下載相同資料時可以節省對外流量
等待 Service 安裝完成


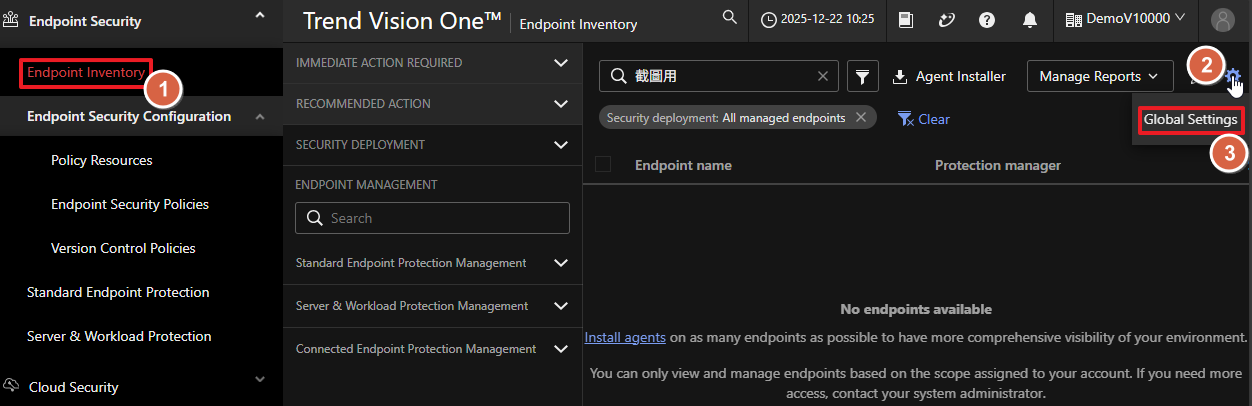
完成後在 Endpoint Security 的
Endpoint Inventory
中點擊齒輪圖示後點擊 Global settings
在 Agent Installer Proxy Settings 中
Service Gateway:
Forward proxy enabled 數字應該增加
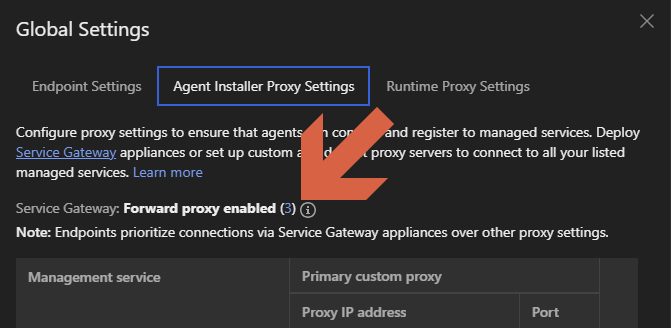
Note
請在確認 Forward proxy 啟用且具有該服務的
Service Gateway 的
Connection status 為
Healthy 的情況
下載 Agent Installer 以確保最新的設定有包含在 Agent Installer 中
Custom proxy
在 Endpoint Security 的
Endpoint Inventory
中點擊齒輪圖示後點擊 Global settings
在 Global settings 找到
Agent Installer Proxy Settings 為需要 Proxy
的服務設定
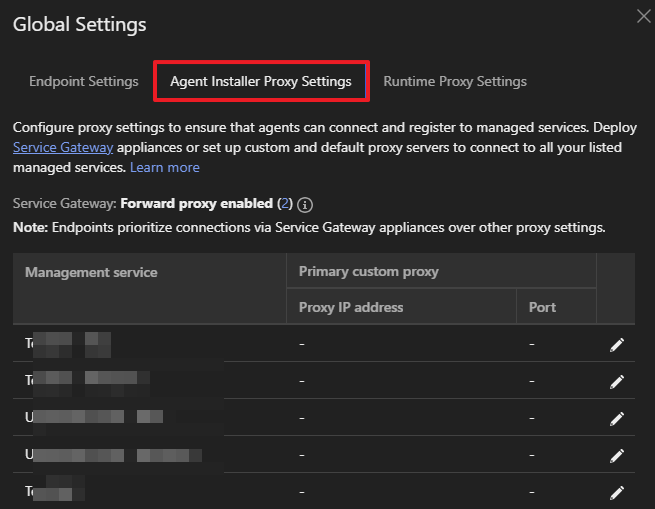
設定完成後請下載新的 Agent Installer 並透過新的 Installer 安裝
Standard Endpoint Protection (SEP)
Windows
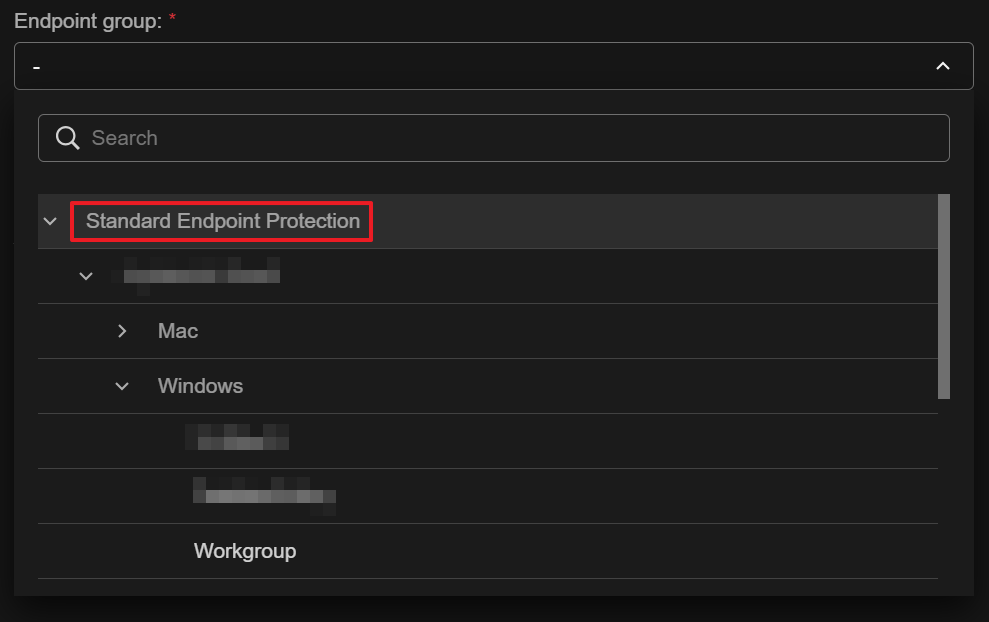
請至 Endpoint Inventory 點擊
Agent Installer,在彈出的右側欄,依序完成以下設定後下載
Agent Installer:
-
Deployment method:選擇
Installer package
-
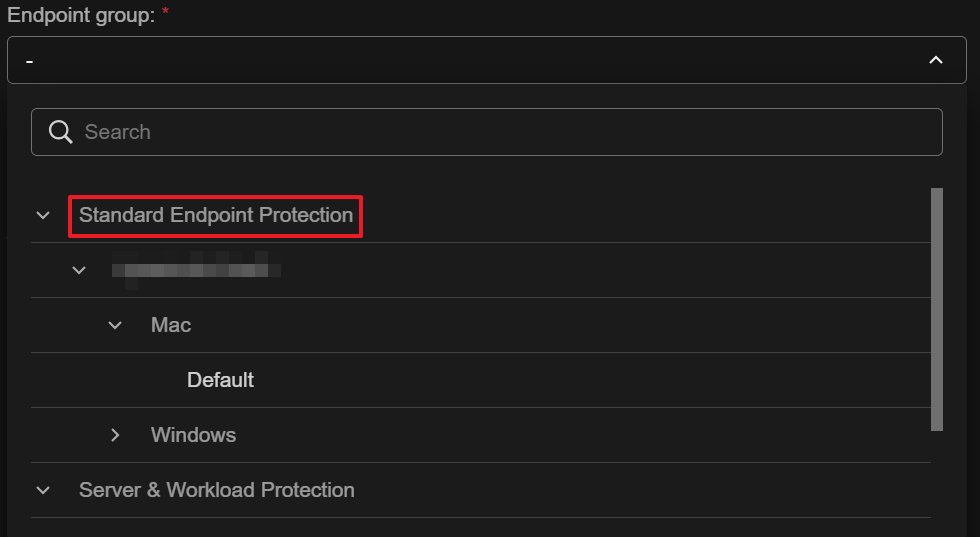
Endpoint group:選擇端點歸屬的
Endpoint Group 必須屬於
Standard Endpoint Protection 管理的
Endpoint Group
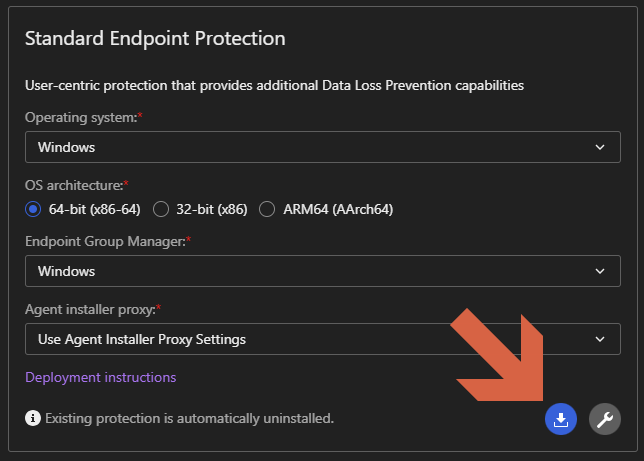
- Operating system:選擇對應的作業系統
-
Agent installer proxy:
-
此選項僅影響「安裝過程」中的連線,與 Agent
安裝完成後的日常運作設定 (Runtime Proxy Settings) 無關。
-
預設為
Use Agent Installer Proxy Settings
依序測試所有已知 Proxy 並找到可用的,順序參考:Agent Installer Proxy Settings
- 僅在需強制指定安裝期間的連線通道時才需更改。
-
點擊右下角的 下載圖示 取得安裝檔。
下載取得 TMStandardAgent_Windows_x86_64_Windows.zip
Warning
解壓縮取得的檔案請保持它們的名稱與相對位置
請勿重新命名、變更或移動安裝套件中的任何檔案或資料夾,避免安裝過程中找不到檔案。
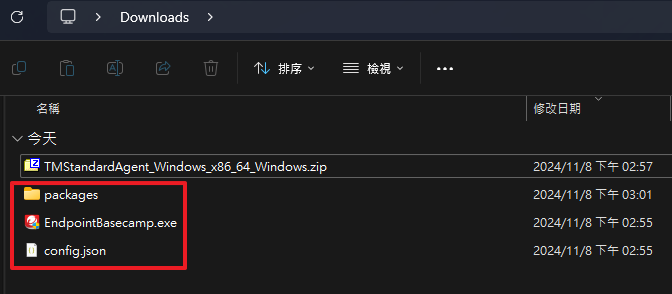
以系統管理員身分執行
EndpointBasecamp.exe 並等待安裝完成
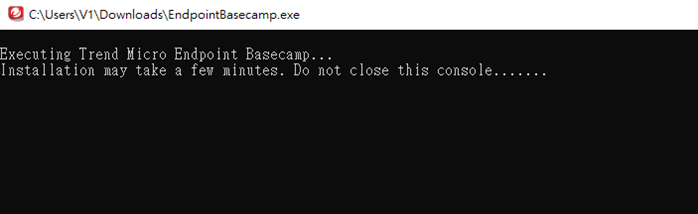
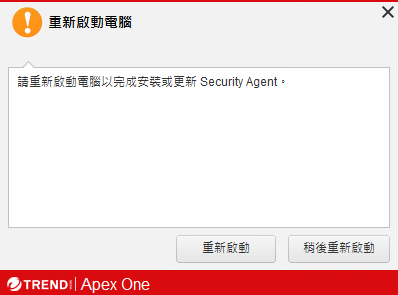
安裝完成後可能會需要重新啟動,agent會在右下方彈出提示。
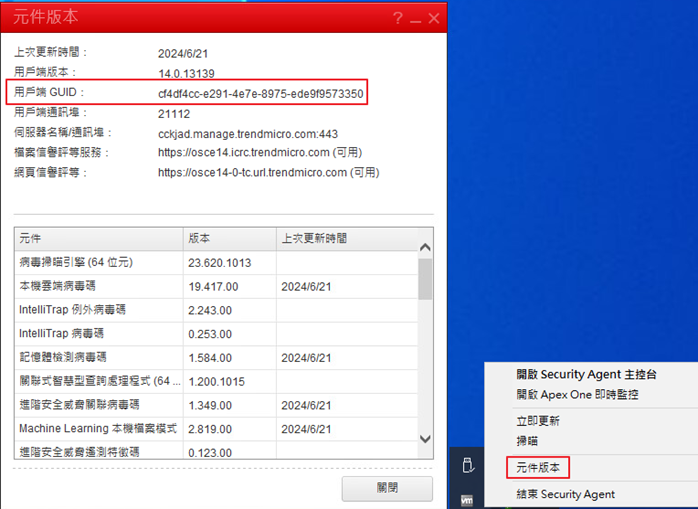
在元件版本中可以看到用戶端 GUID
macOS
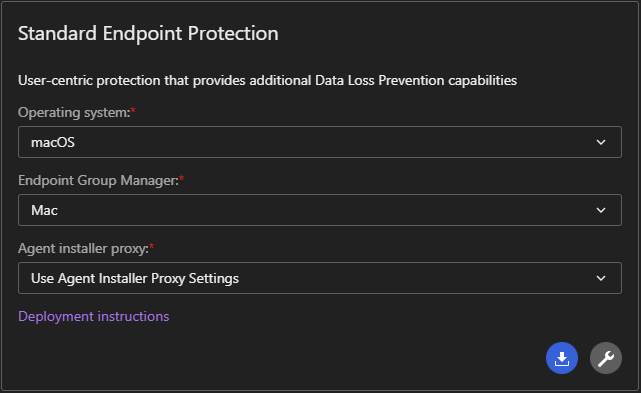
請至 Endpoint Inventory 點擊
Agent Installer,在彈出的右側欄,依序完成以下設定後下載
Agent Installer:
-
Deployment method:選擇
Installer package
-
Endpoint group:選擇端點歸屬的
Endpoint Group 必須屬於
Standard Endpoint Protection 管理的
Endpoint Group
-
Operating system:自動鎖定 macOS
-
Agent installer proxy:
-
此選項僅影響「安裝過程」中的連線,與 Agent
安裝完成後的日常運作設定 (Runtime Proxy Settings) 無關。
-
預設為
Use Agent Installer Proxy Settings
依序測試所有已知 Proxy 並找到可用的,順序參考:Agent Installer Proxy Settings
- 僅在需強制指定安裝期間的連線通道時才需更改。
- 點擊右下角的 下載圖示 取得安裝檔。
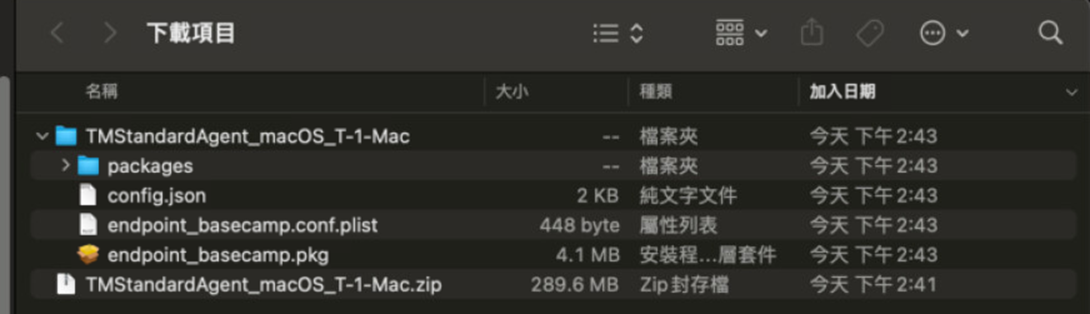
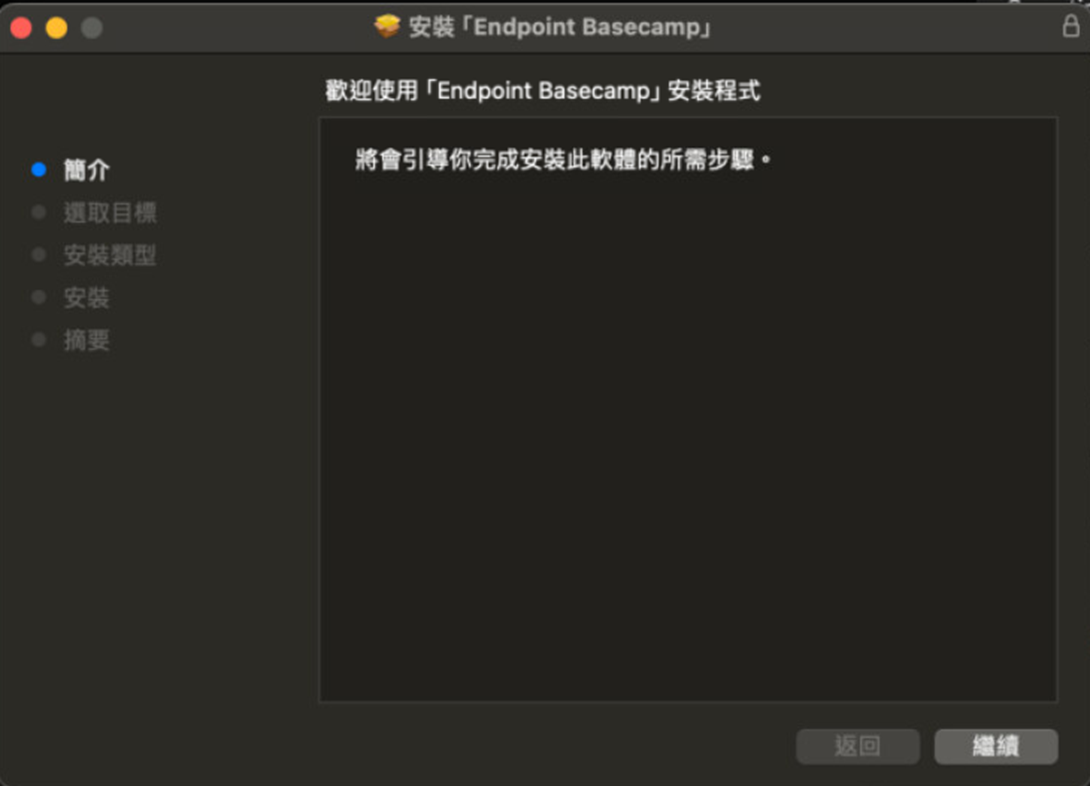
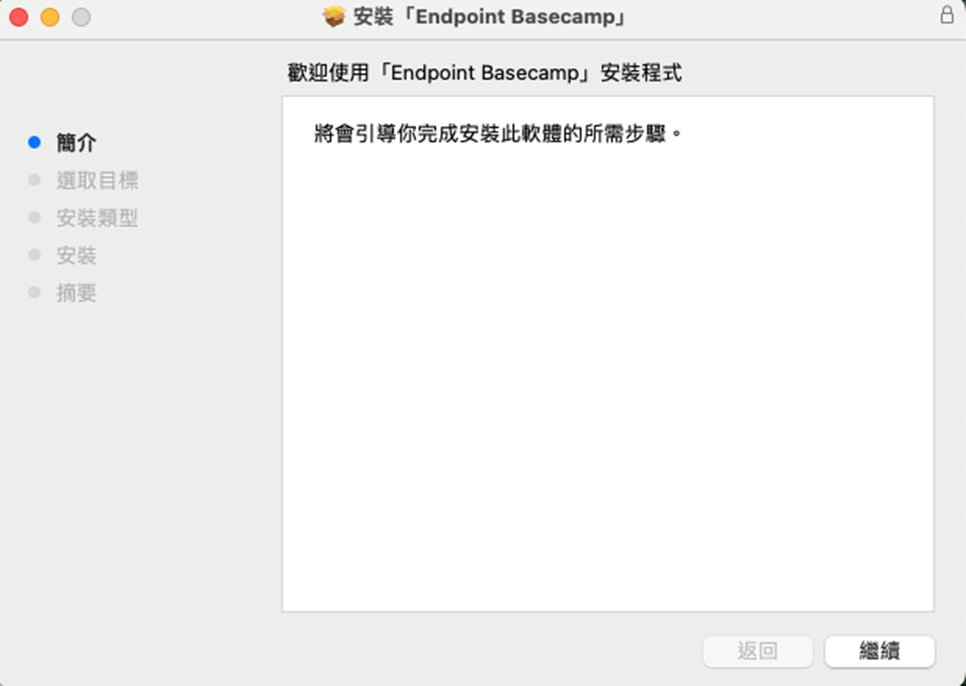
點擊 endpoint_basecamp.pkg 安裝
點擊 繼續
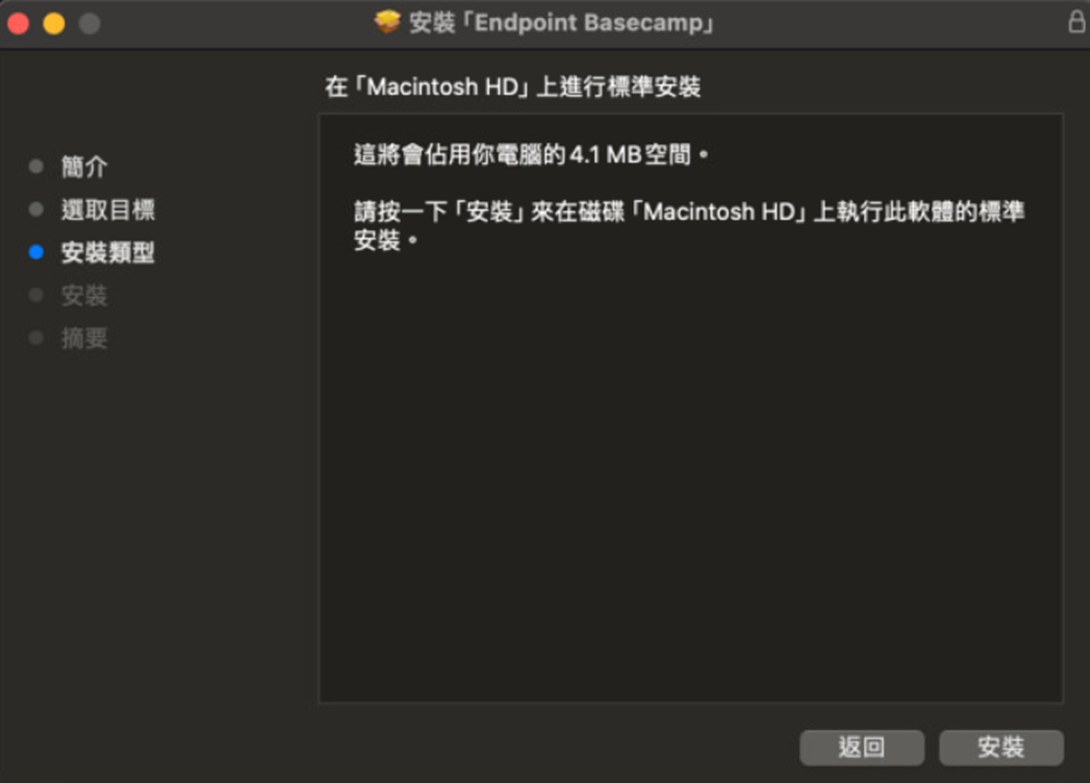
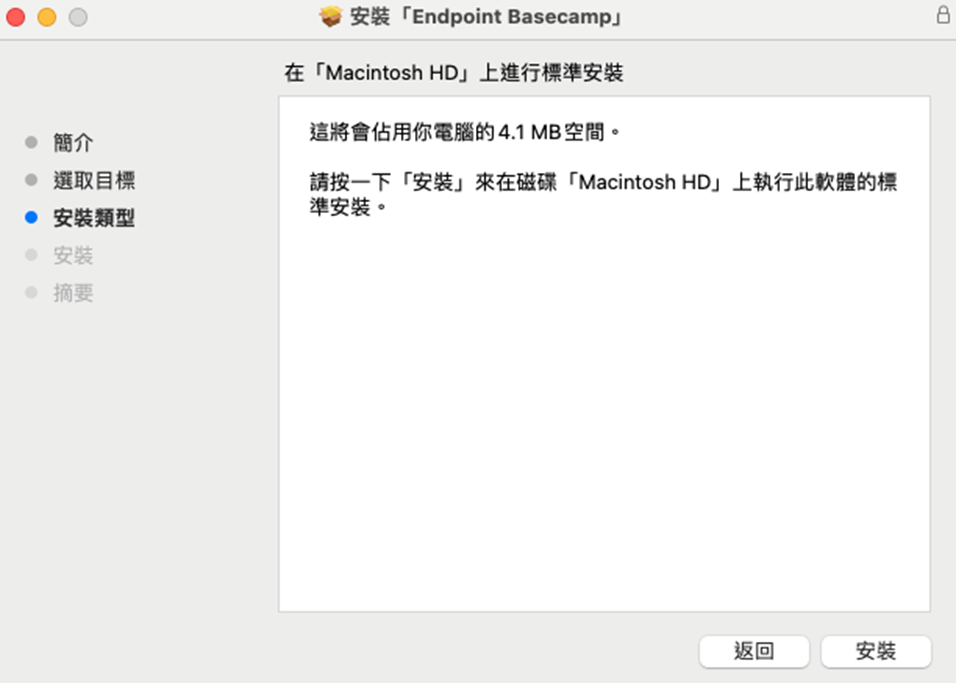
點擊 安裝
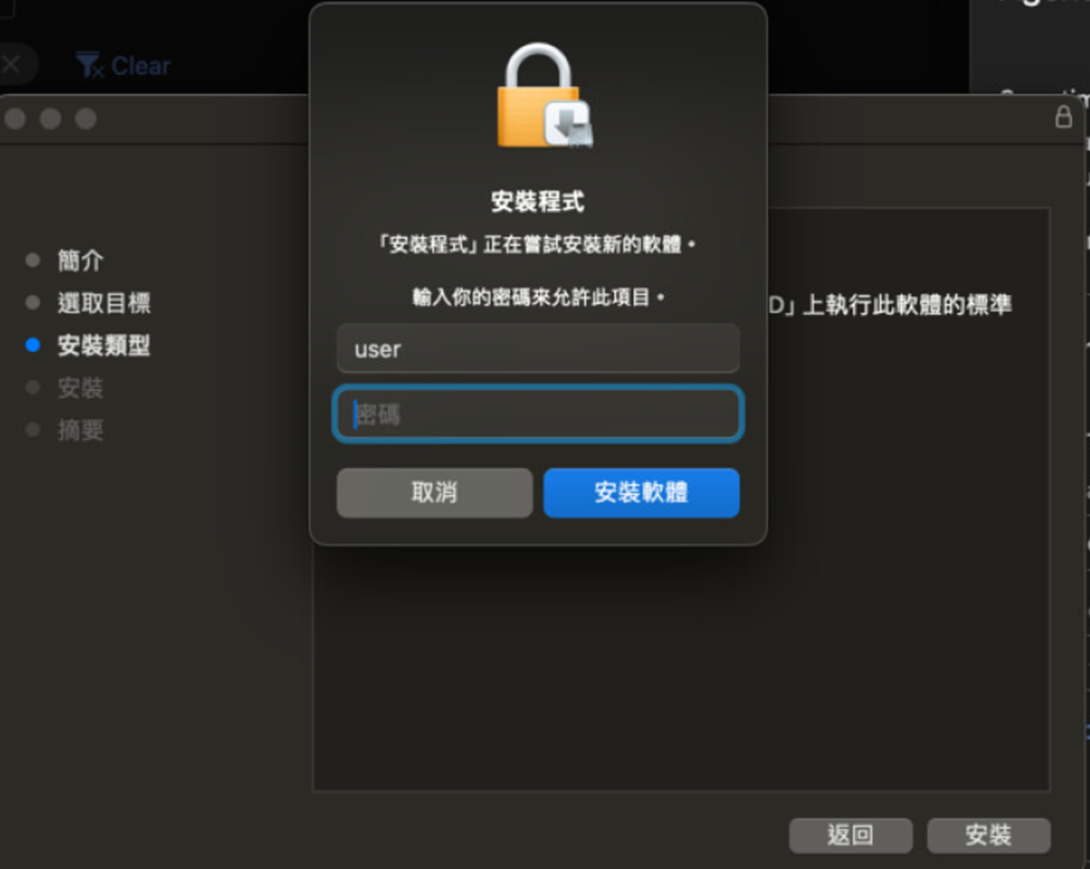
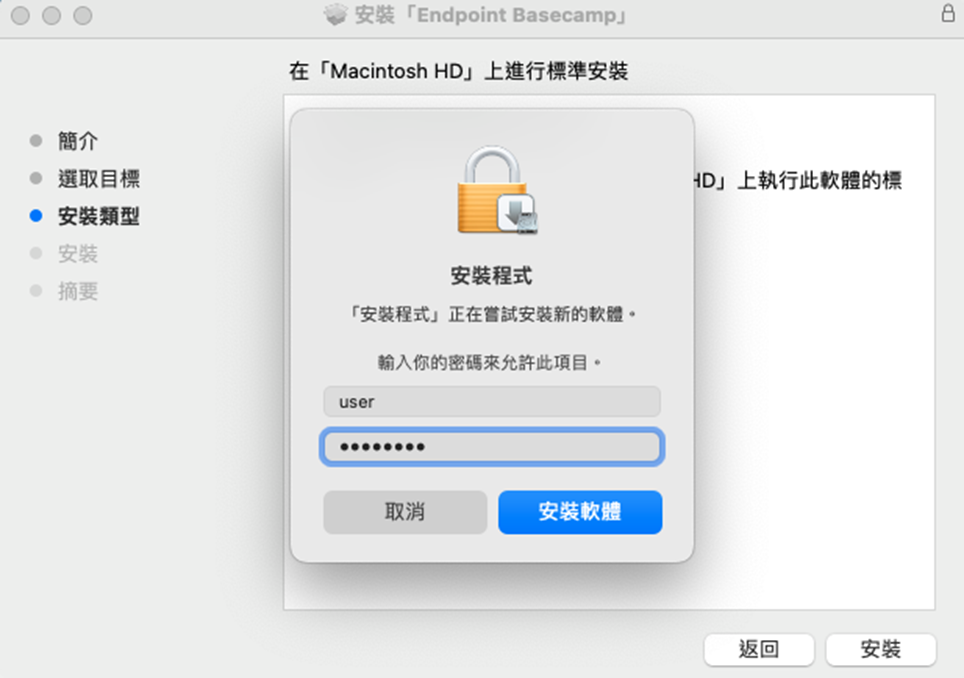
輸入密碼並點擊 安裝軟體
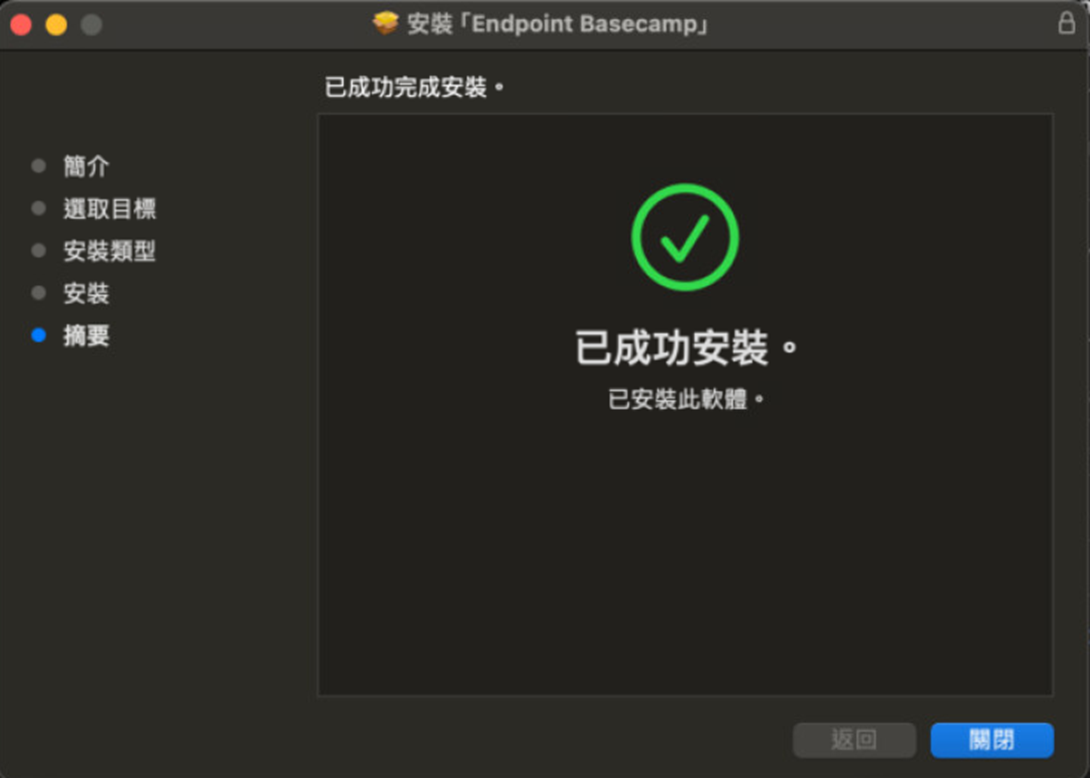
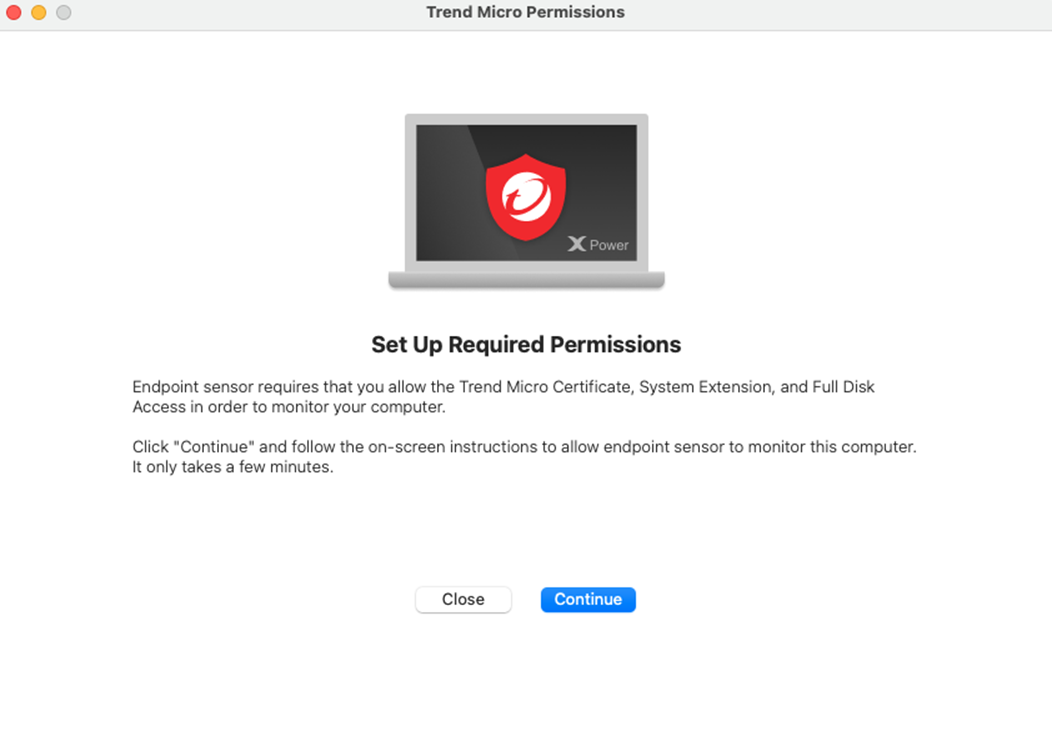
完成安裝
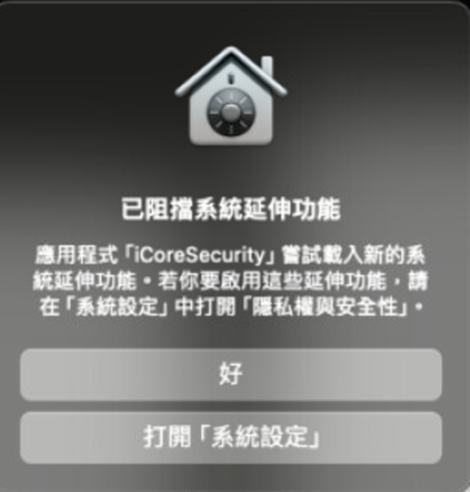
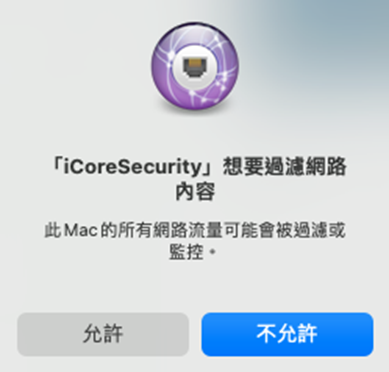
彈出需要權限的視窗
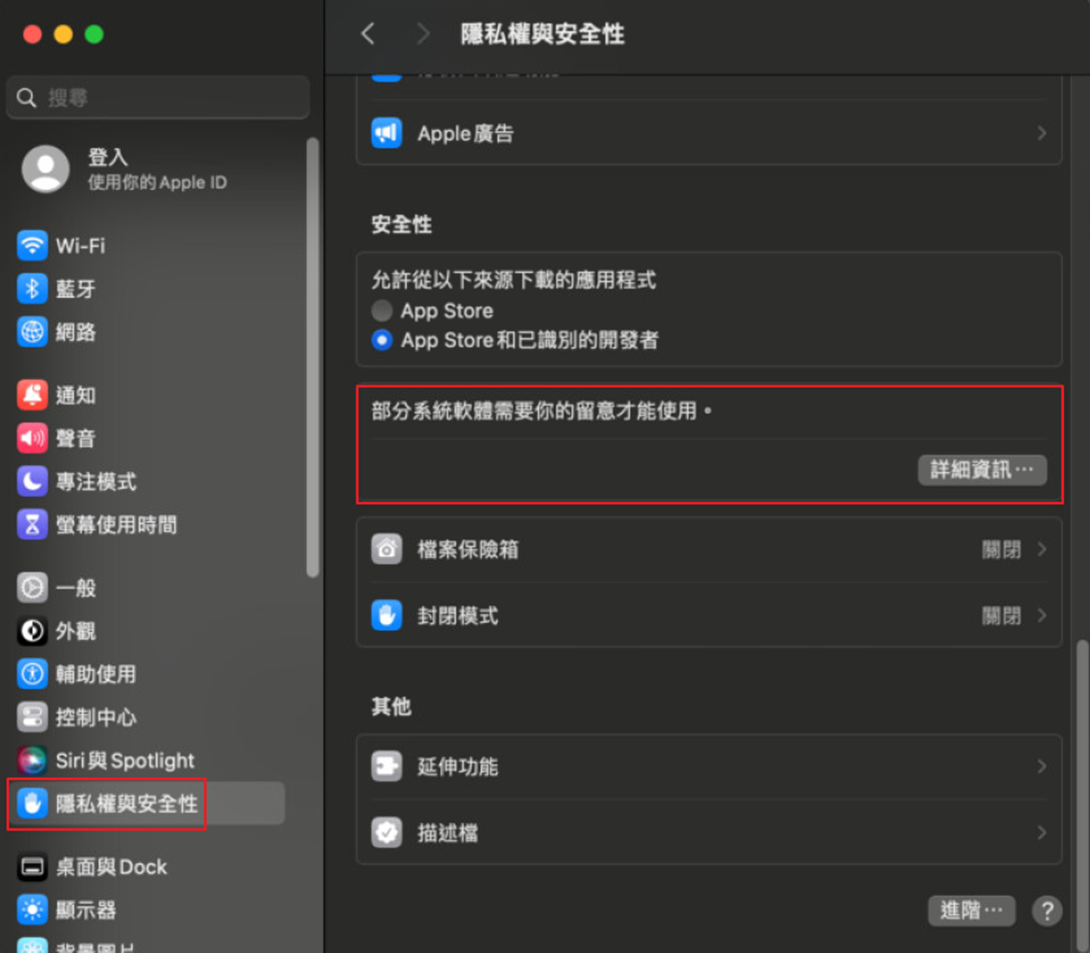
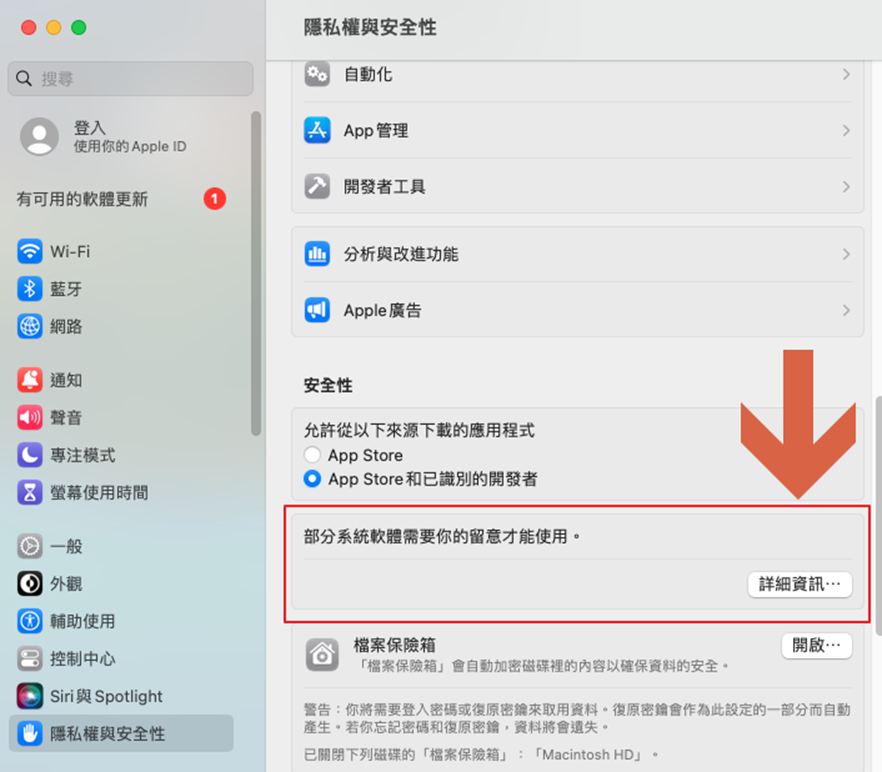
點擊該按鈕後將打開 隱私權與安全性 找到該頁面中的
部分系統需要你得留意才能使用。 點擊旁邊的
詳細資訊
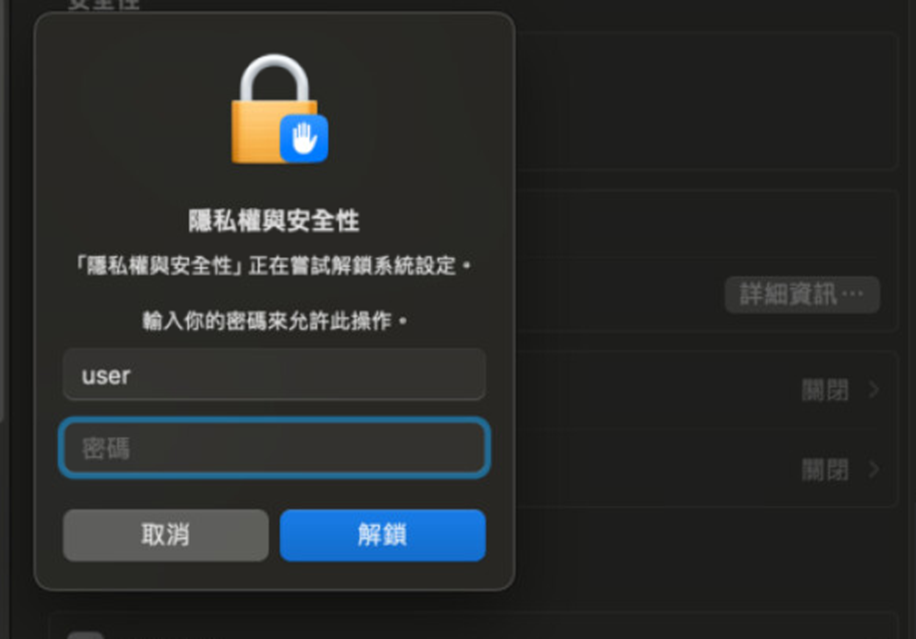
輸入密碼
允許 iCore Security 與 iCore Service
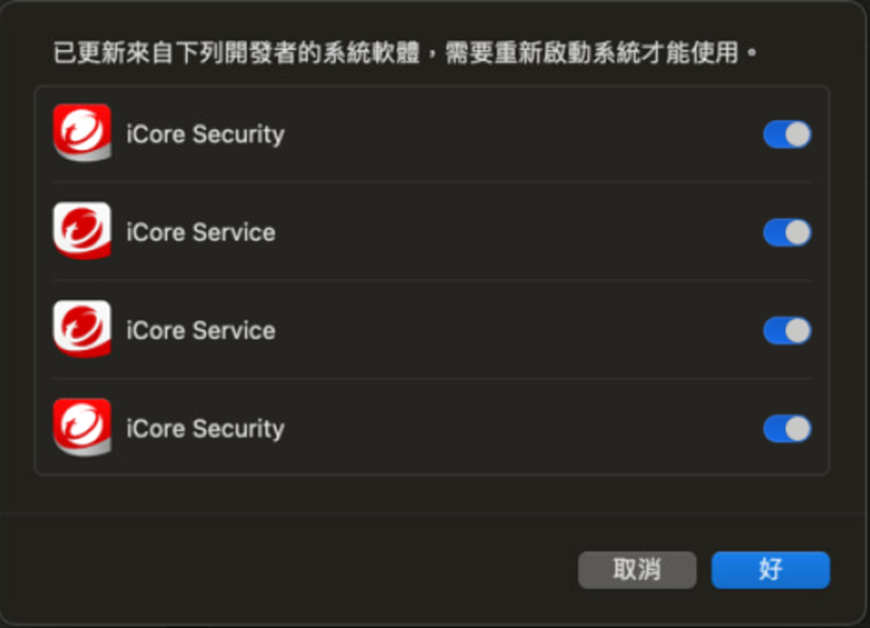
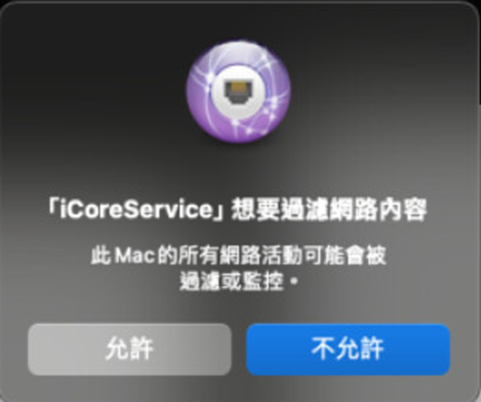
允許 iCoreService 過濾網路流量
完畢後繼續允許 Endpoint Sensor 與
Security Agent 的權限
Note
這些應該會跟已阻擋系統延伸功能的通知一起出現
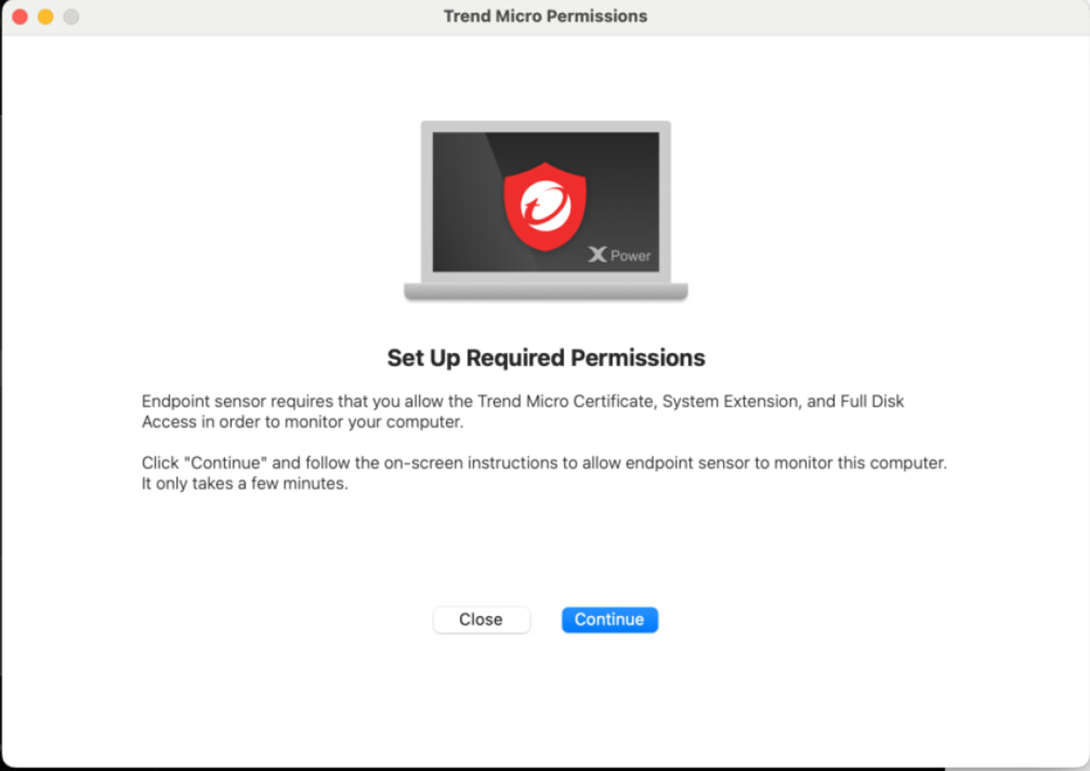
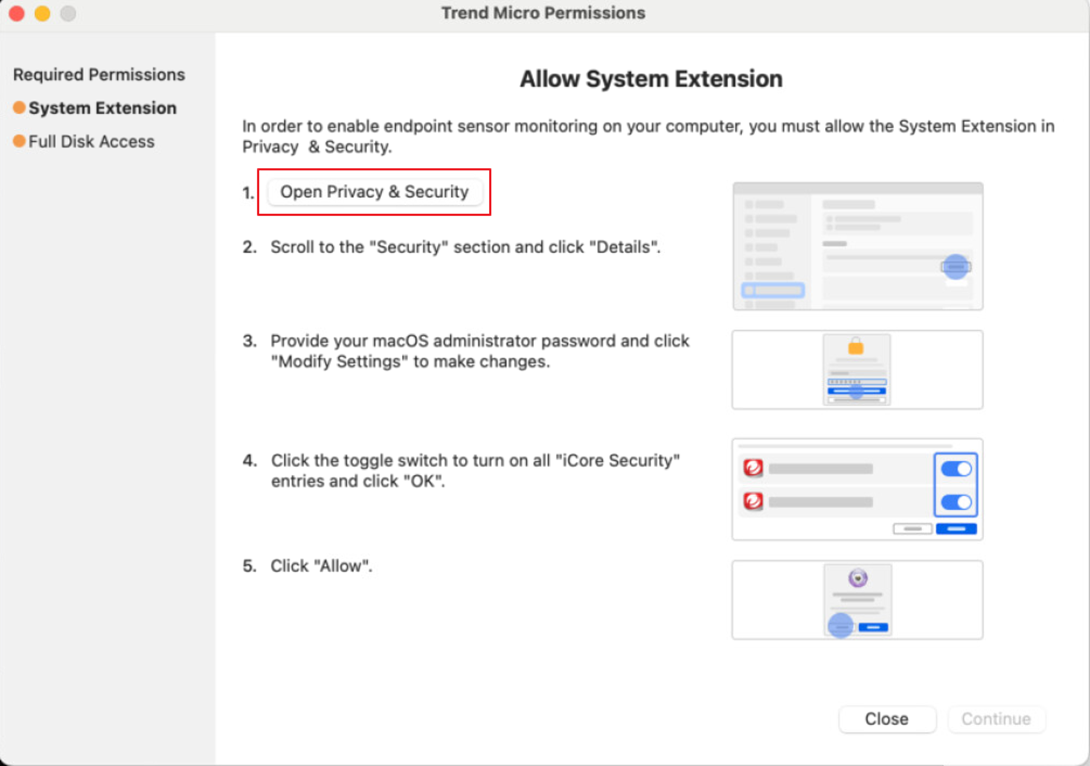
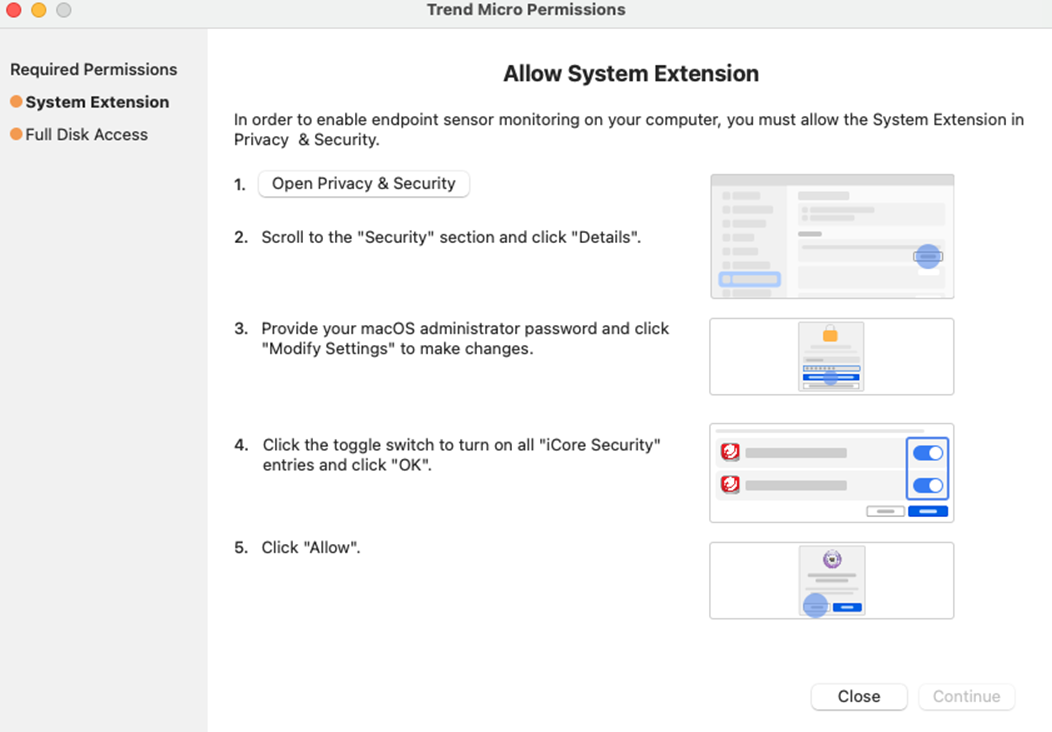
首先點擊 Endpoint Sensor 的
Continue 在接下來的
Allow System Extension
點擊
Open Privacy & Security
這應該會導向到稍早允許系統延伸功能的位置
如果一開始沒有跳被阻擋的系統延伸功能的通知,可以由此導向到該位置。
設定完成後,點擊 Continue 繼續到下一個
Full Disk Access 權限
在 Allow Full Access 點擊
Open Privacy & Security
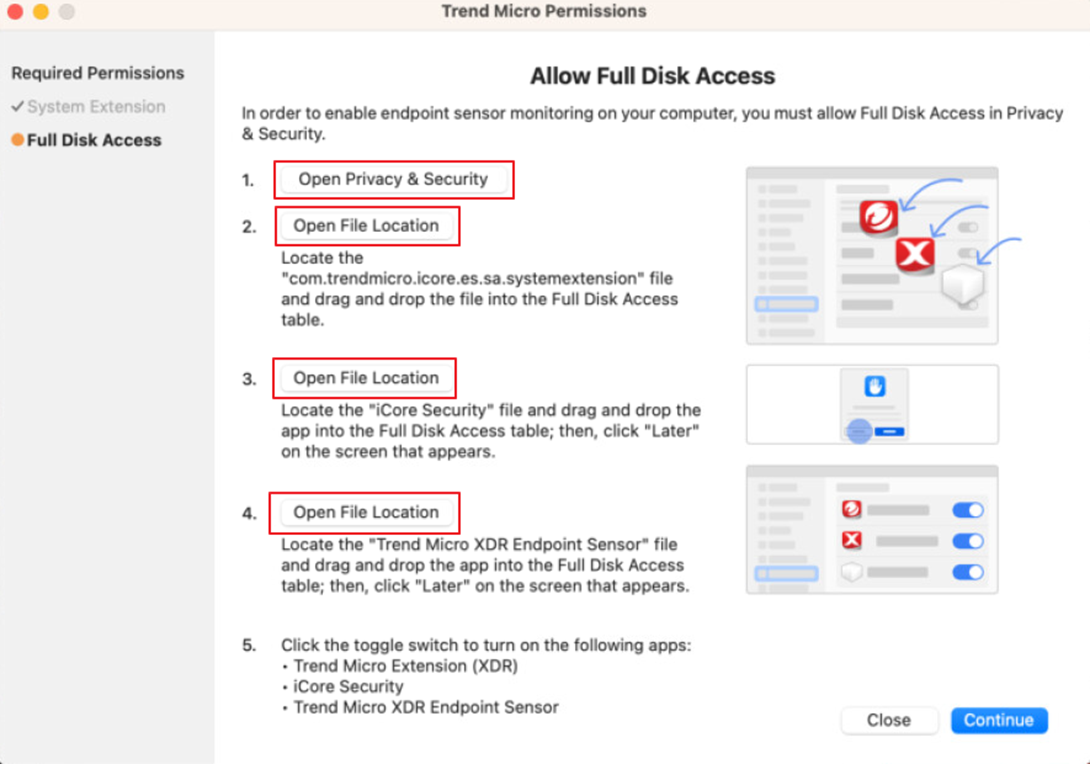
會導向到 完全取用磁碟 的位置,繼續依照順序點擊
Open File Location
並把彈出視窗中的檔案一個一個拉進
完全取用磁碟 的選單中
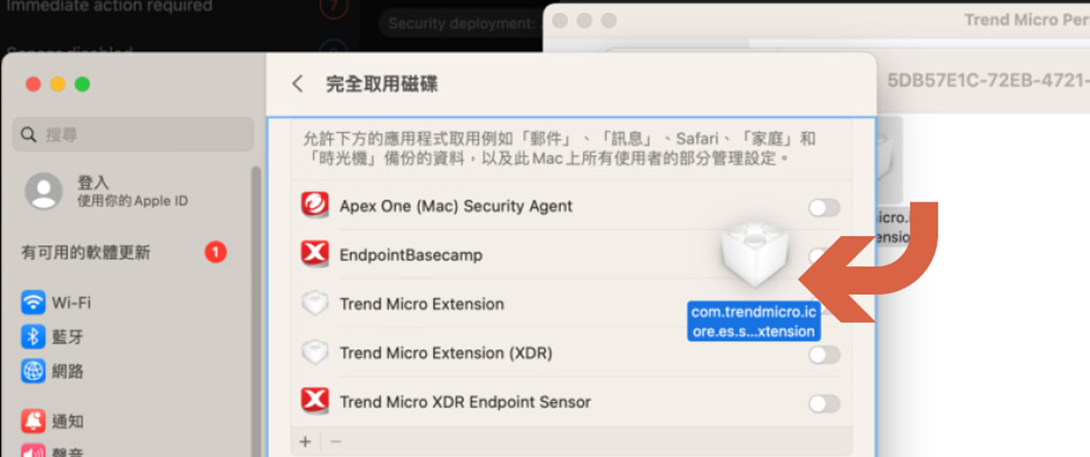
完成後連同 Security Agent 的權限一起允許

完成後,等待程式重新啟動應不再看見需要權限的通知
Deployment Script
此功能允許您生成自動化腳本,透過 CLI 下載並安裝 Agent
適合需要大量部署或整合至第三方派送系統(如 SCCM, Ansible)的環境。
請至 Endpoint Inventory 點擊
Agent Installer,在彈出的右側欄,依序完成以下設定後取得
Deployment Script:
-
Deployment method:選擇
Deployment script
-
Endpoint group:選擇端點歸屬的
Endpoint Group 必須屬於
Standard Endpoint Protection 管理的
Endpoint Group
-
Operating system:依照選擇的
Endpoint Group 自動鎖定對應的作業系統
-
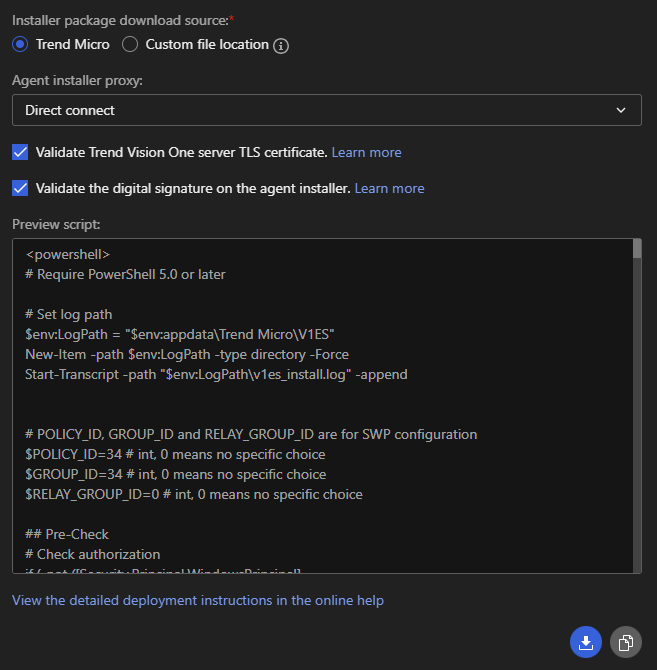
Installer package download source:除非特殊需求,否則一律選擇 TrendAI™
-
Agent installer proxy:依照需求可以選擇用於安裝時的對外連線:
- Direct connect:直接連線
-
Custom proxy:
Agent Installer Proxy Settings 頁面設定的自定義
proxy
-
Service Gateway:已啟用
Forward Proxy Service 的
Service Gateway
-
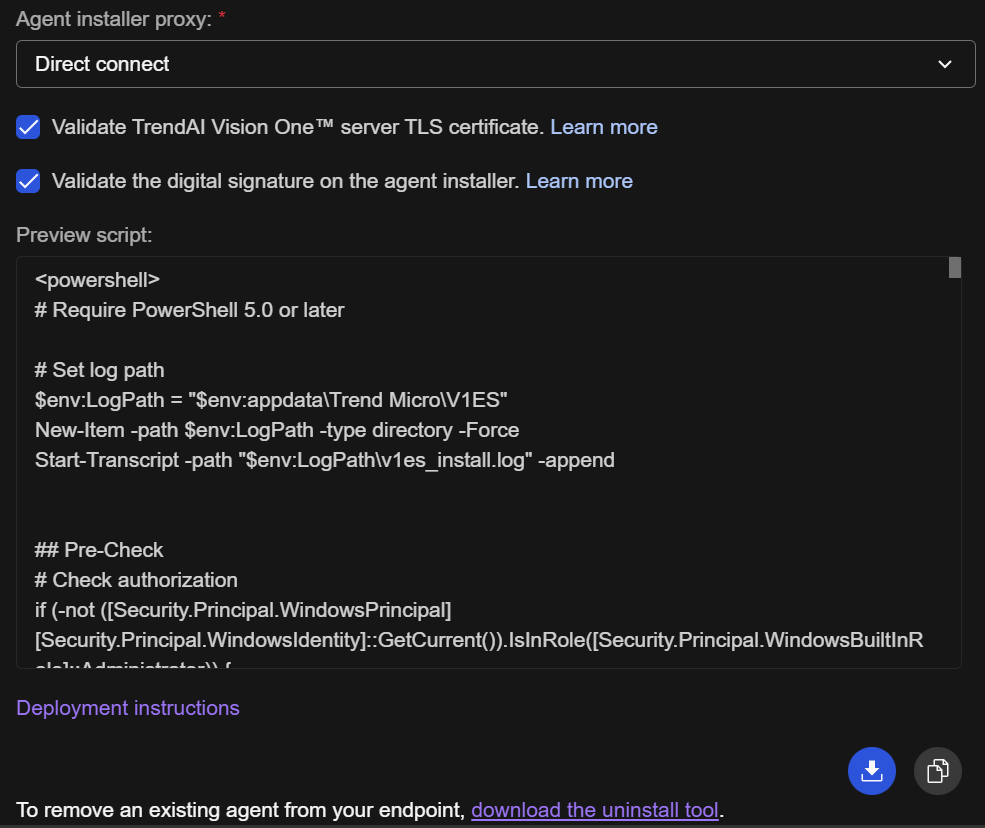
Validate TrendAI Vision One™ server TLS certificate:預設勾選,依照環境的資安政策需求選擇。
-
Validate the digital signature on the agent installer:預設未勾選,依照環境的資安政策需求選擇。
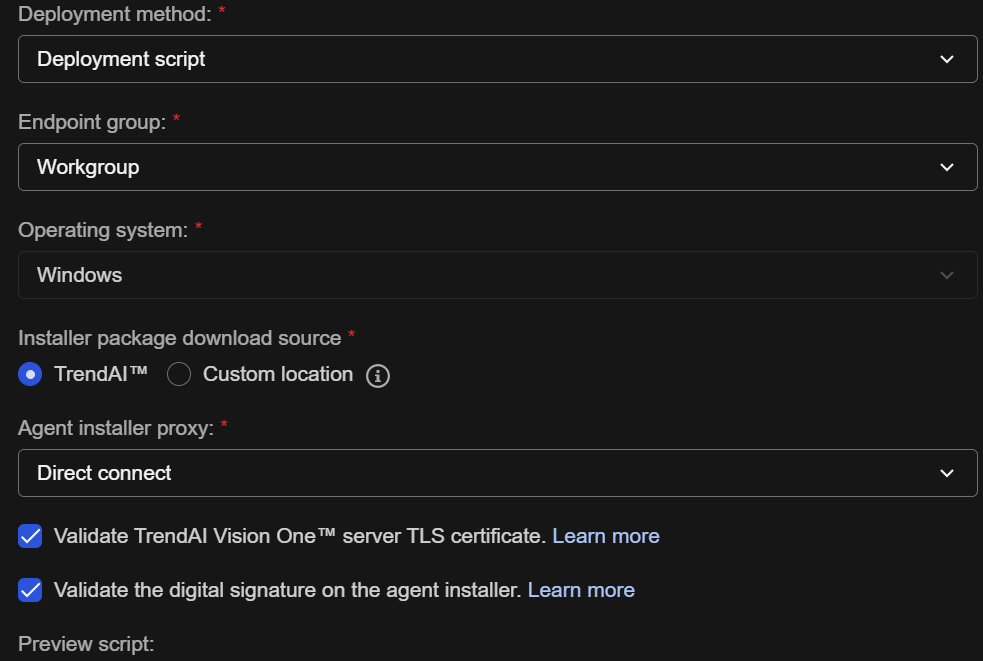
- 檢查 Preview script 是否依照上述修改產生變化
- 點擊右下方的下載或是複製圖示取得腳本
Offline package
與一般的輕量級安裝檔不同,此部署方式會將所有的防護元件預先打包成單一檔案。安裝過程完全不需要連線至網際網路下載元件。
主要使用情境 (Use Case):
特別適合頻寬受限、嚴格防火牆內部的端點環境,或是為了確保在「安裝完成」到「成功連線至雲端註冊」的這段空窗期間,Agent
就能立刻擁有初始 Policy 並開始執行 Policy 所設定的功能。
- 離線安裝檔不需解壓縮,請直接將下載取得的
.exe
檔案傳送至目標端點上,並以系統管理員身分執行即可完成安裝。-
安裝完成後,Agent 最終仍需要取得網路連線,才能回報至 Vision One
並完成註冊。
請至 Endpoint Inventory 點擊
Agent Installer,在彈出的右側欄,依序完成以下設定後下載
Agent Installer:
-
Deployment method:選擇
Offline package
-
Endpoint group:選擇端點歸屬的
Endpoint Group,必須屬於
Standard Endpoint Protection 管理的
Endpoint Group
-
Operating system:目前僅支援 Windows
-
OS architecture:選擇目標端點的系統架構(例如
64-bit (x86-64)、32-bit (x86) 或
ARM64 (AArch64))
-
Initial policy:選擇當用戶端安裝完成後,應套用的初始政策
-
Agent installer proxy:依照需求可以選擇用於安裝完成初次的對外連線:
- Direct connect:直接連線
-
Custom proxy:
Agent Installer Proxy Settings 頁面設定的自定義
proxy
-
Service Gateway:已啟用
Forward Proxy Service 的
Service Gateway
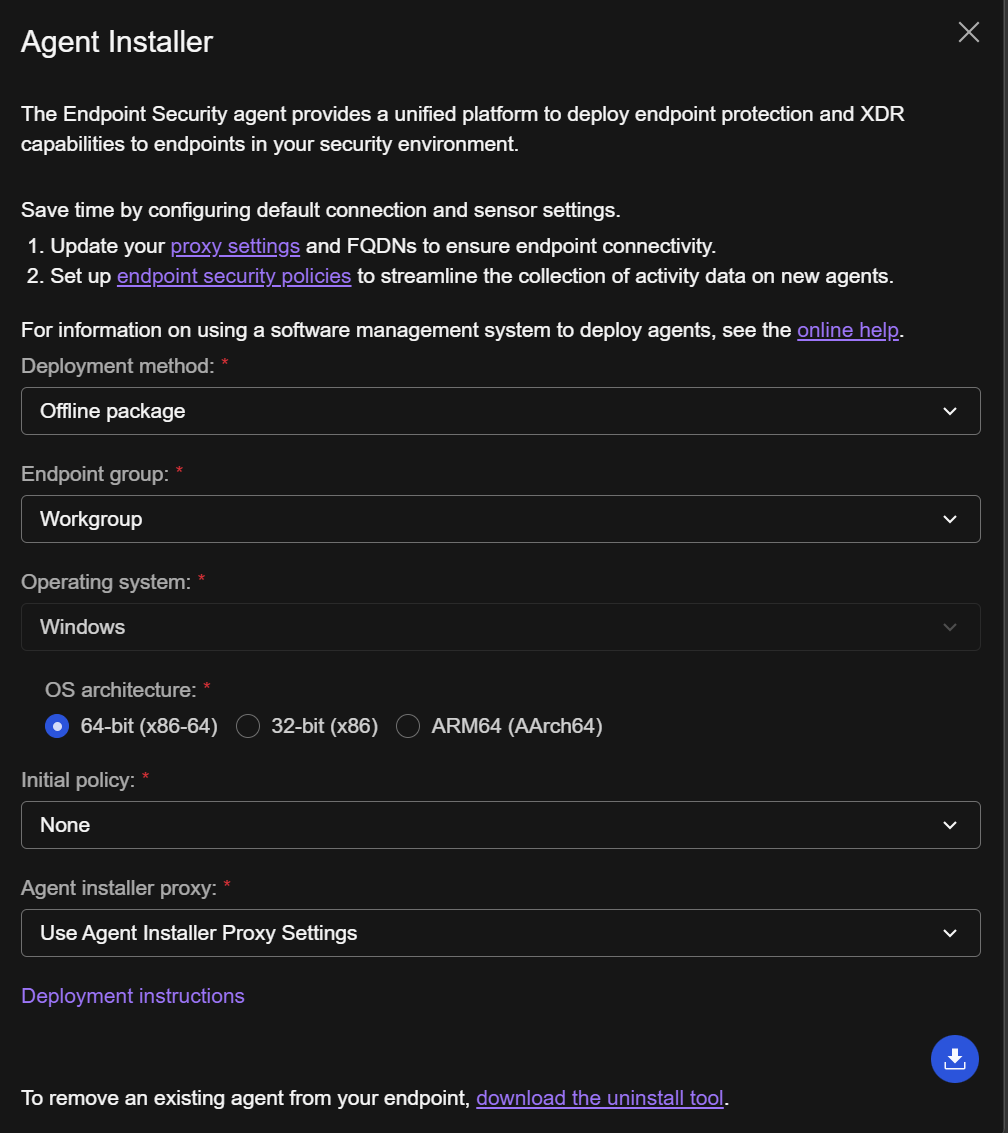
- 點擊右下角的 下載圖示 取得安裝檔。
下載取得的檔案為
TMStandardAgent_Windows_<architecture>.exe。
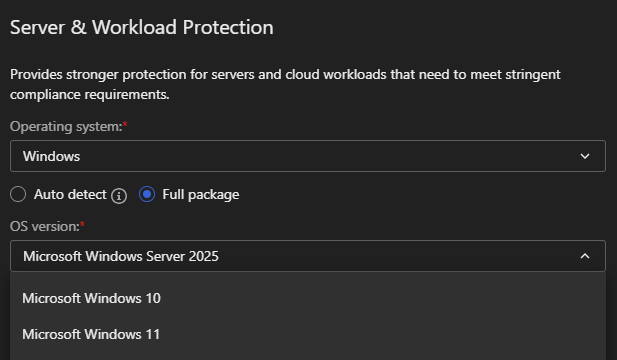
Server & Workload Protection (SWP)
Windows
請至 Endpoint Inventory 點擊
Agent Installer,在彈出的右側欄,依序完成以下設定後下載
Agent Installer:
-
Deployment method:選擇
Installer package
-
Endpoint group:選擇端點歸屬的
Endpoint Group 必須屬於
Server & Workload Protection 管理的
Endpoint Group
-
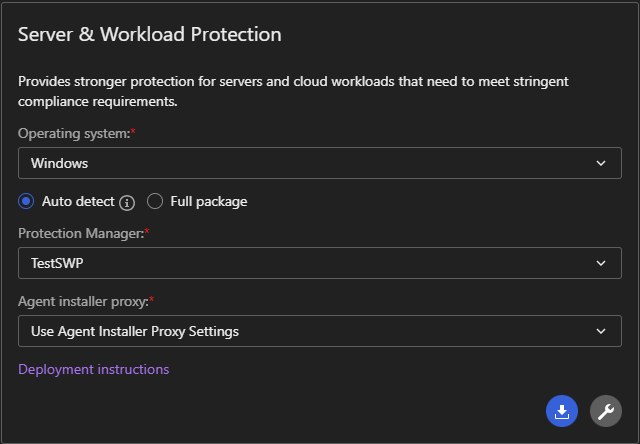
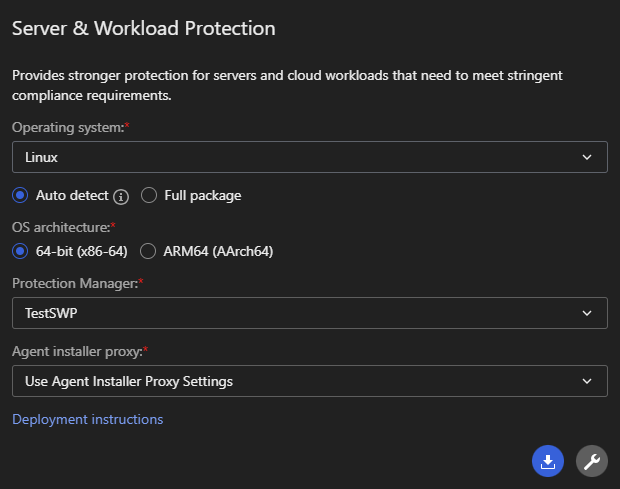
Operating system:選擇對應的作業系統
-
Auto detect:輕量安裝檔。執行時會自動偵測系統架構並下載對應元件,適合頻寬充足的環境。
-
Full package:完整安裝檔。檔案較大,內含所有必要元件,適合頻寬受限的環境使用。
-
Agent installer proxy:
-
此選項僅影響「安裝過程」中的連線,與 Agent
安裝完成後的日常運作設定 (Runtime Proxy Settings) 無關。
-
預設為
Use Agent Installer Proxy Settings
依序測試所有已知 Proxy 並找到可用的,順序參考:Agent Installer Proxy Settings
- 僅在需強制指定安裝期間的連線通道時才需更改。
- 點擊右下角的 下載圖示 取得安裝檔。
Auto detect
在偵測到版本之後會需要額外下載元件,會需要更多的網路資源
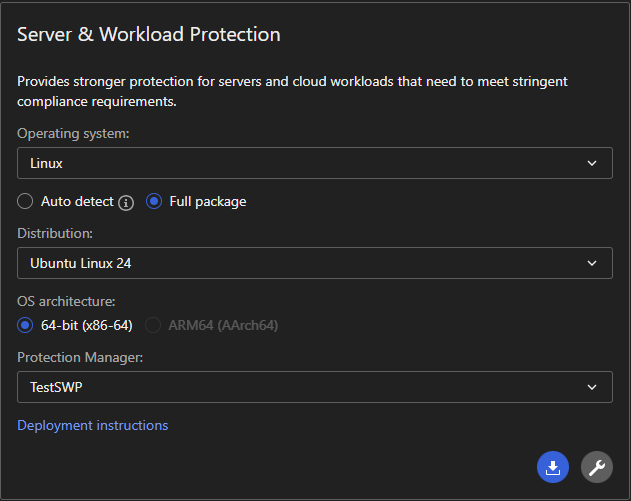
Full package
會需要自行選擇版本並拿到對應的作業系統部署
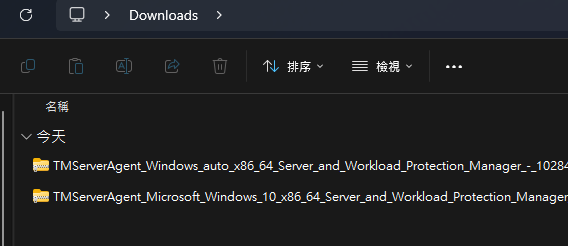
下載取得 agent installer 如果是 Auto detect 的可以看到
auto 在檔名上
反之,則可以看到對應的作業系統版本在檔名上
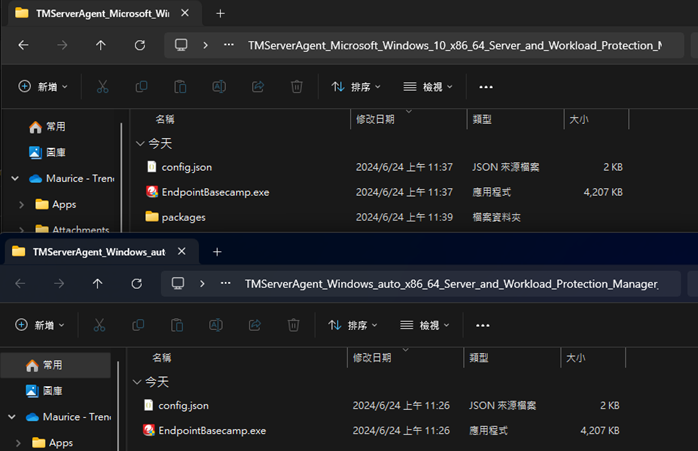
Warning
注意:解壓縮取得的檔案請保持它們的名稱與相對位置
請勿重新命名、變更或移動安裝套件中的任何檔案或資料夾,避免安裝過程中找不到檔案。
Auto detect 會相較於 Full package 少了
packages 的資料夾
以系統管理員身分執行
EndpointBasecamp.exe 並等待安裝完成
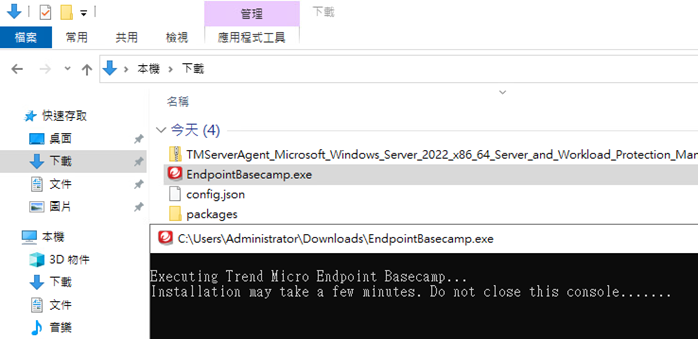
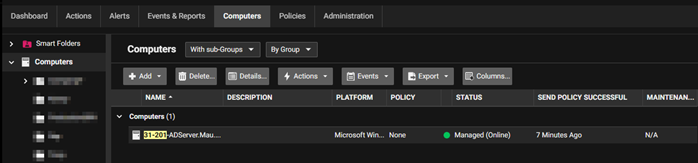
安裝完成後即可在 Endpoint Inventory 看到該端點
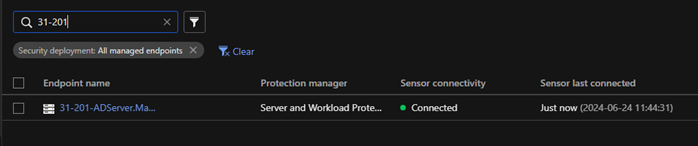
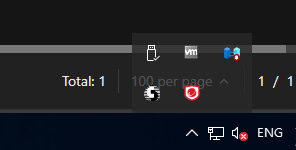
同時該端點右下方也會出現圖示
如果沒有設定 Policy 也沒有預設的 Policy
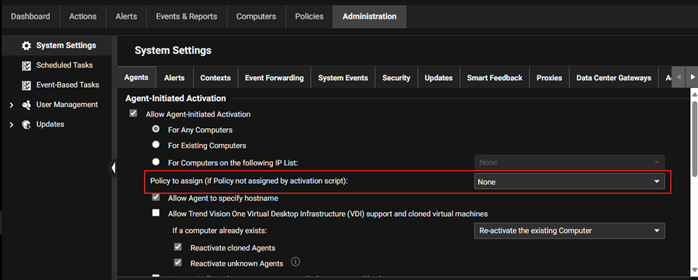
請到 Computers 設定 Policy 來啟用所需要的功能
Linux
請至 Endpoint Inventory 點擊
Agent Installer,在彈出的右側欄
找到
Server & Workload Protection
區塊,依序完成以下設定後下載 Agent Installer:
-
Deployment method:選擇
Installer package
-
Endpoint group:選擇端點歸屬的
Endpoint Group 必須屬於
Server & Workload Protection 管理的
Endpoint Group
-
Operating system:選擇對應的作業系統
-
Auto detect:輕量安裝檔。執行時會自動偵測系統架構並下載對應元件,適合頻寬充足的環境。
-
Full package:完整安裝檔。檔案較大,內含所有必要元件,適合頻寬受限的環境使用。
-
Agent installer proxy:
-
此選項僅影響「安裝過程」中的連線,與 Agent
安裝完成後的日常運作設定 (Runtime Proxy Settings) 無關。
-
預設為
Use Agent Installer Proxy Settings
依序測試所有已知 Proxy 並找到可用的,順序參考:Agent Installer Proxy Settings
- 僅在需強制指定安裝期間的連線通道時才需更改。
- 點擊右下角的 下載圖示 取得安裝檔。
Full package
會需要自行選擇版本並拿到對應的作業系統部署
下載取得 Agent Installer 如果是 Auto detect 的可以看到
auto 的檔名
反之,則可以看到對應的作業系統版本在檔名上

Warning
注意:解壓縮取得的檔案請保持它們的名稱與相對位置
請勿重新命名、變更或移動安裝套件中的任何檔案或資料夾,避免安裝過程中找不到檔案。
Auto detect 會相較於 Full package 少了
packages 的資料夾


cd 移動到解壓縮目的資料夾,輸入
sudo ./tmxbc install

安裝完成後可以用
ps aux | grep tmxbc | grep -v grep 看到服務

Tip
如果服務有啟動但是沒有回報到 Endpoint Inventory 請按照下列順序初步檢查
-
agent 與 Vision One 之間的時間差是否超過了三十分鐘
可以嘗試透過
date; curl
              "http://worldtimeapi.org/api/timezone/<customer_timezone>
檢查網際網路時間與裝置時間的差距
例如:date;curl http://worldtimeapi.org/api/timezone/Asia/Taipei

- 是否已經依照建議打開防火牆
-
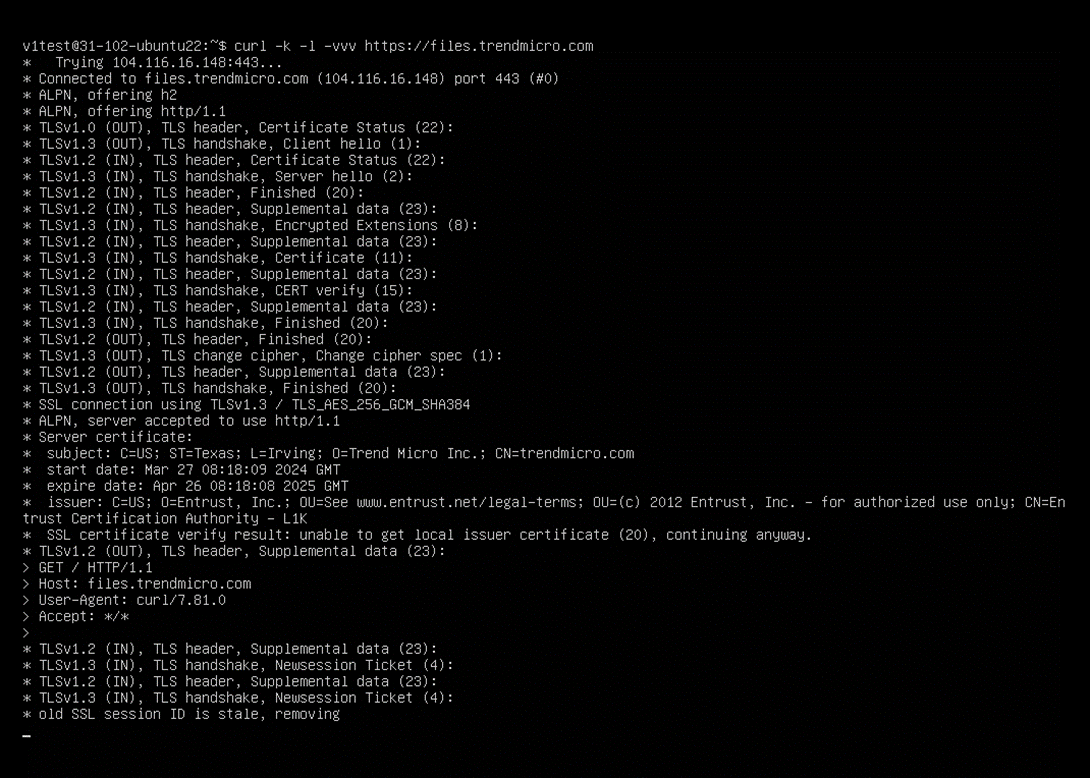
是否能夠存取
https://files.trendmicro.com
-
如果沒有 proxy,使用
curl -k -l -vvv https://files.trendmicro.com
-
如果有 proxy,使用
curl -k -l -vvv -X proxy_url:port
                  https://files.trendmicro.com
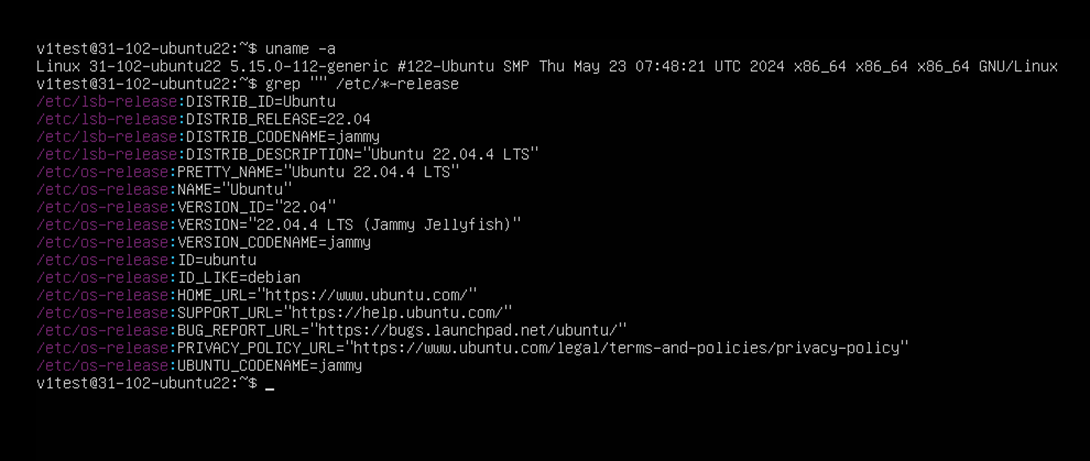
- Kernel 資訊
uname -r
grep "" /etc/*-release
5. 確認是否有 Linux Secure Boot(如果是 Endpoint Sensor 啟用有問題)
如果有 Linux Secure Boot 是否有 Enrolling Trend Micro public key
Note
如果初步檢查仍具問題需要收集下列資料
XBC debug log
-
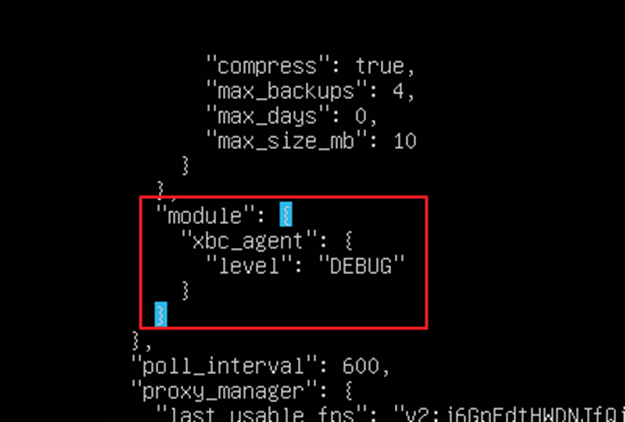
修改設定啟用 debug
sudo vi /opt/TrendMicro/EndpointBasecamp/etc/.conf
- 重新啟動服務
systemctl restart tmxbc
-
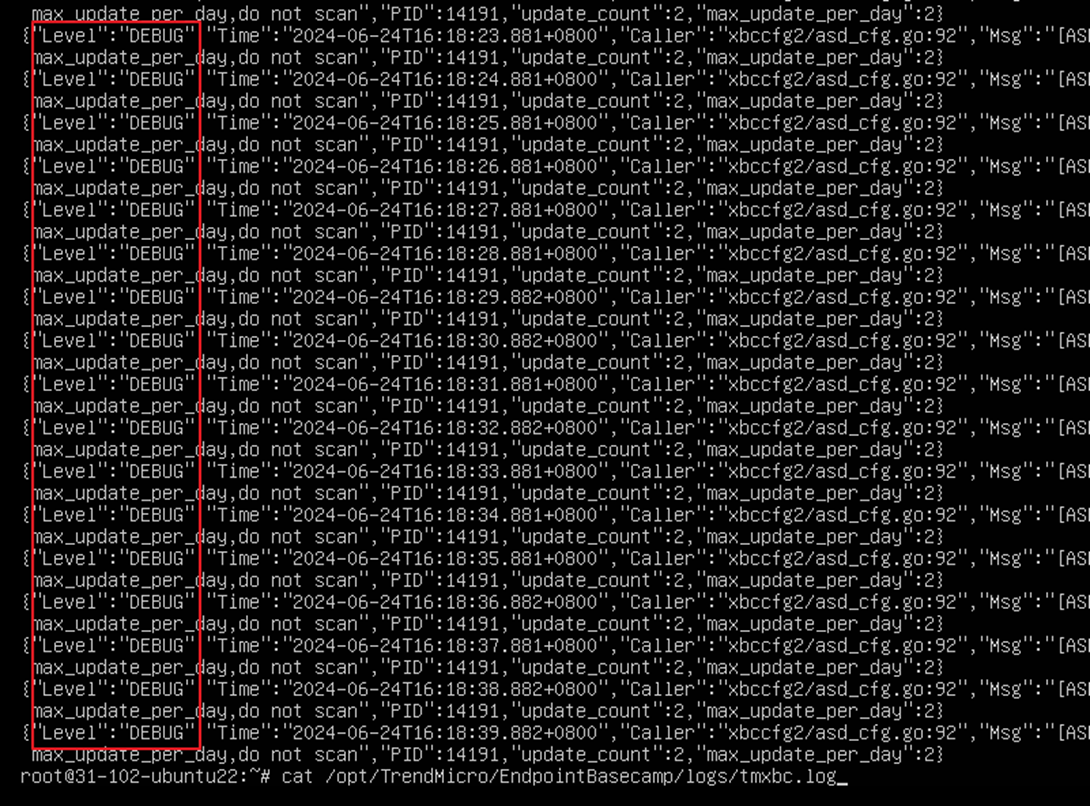
重新啟動服務後確認
/opt/TrendMicro/EndpointBasecamp/logs/tmxbc.log
是否已經看到 Level 為 DEBUG
-
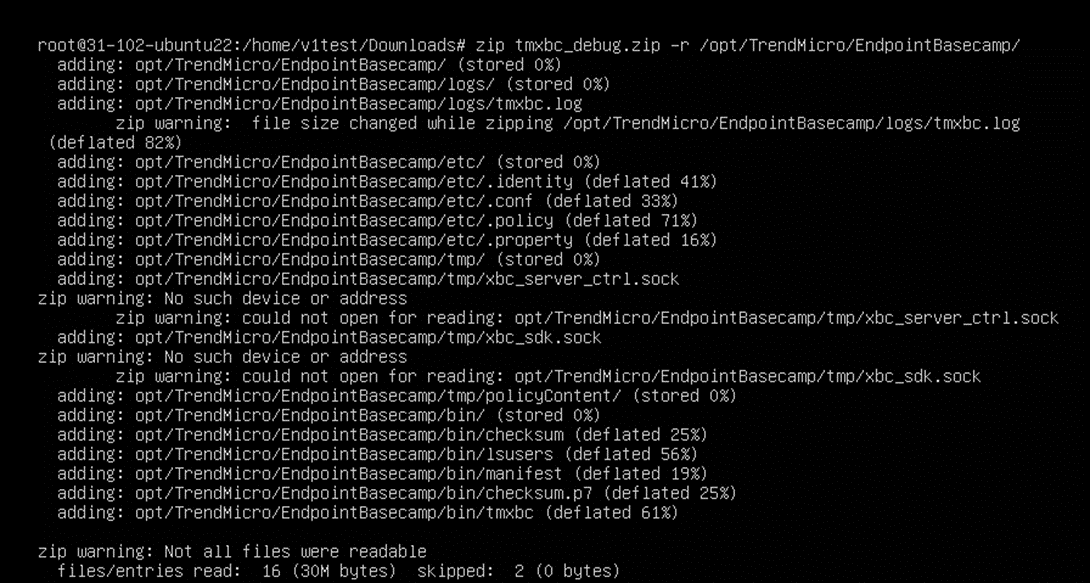
輸入下列指令將
/opt/TrendMicro/EndpointBasecamp/ 壓縮收集
zip tmxbc_debug.zip -r /opt/TrendMicro/EndpointBasecamp/
diagnostic package
如果是 Endpoint Sensor 啟用有問題請額外收集 diagnostic package
-
輸入下列指令產生 diagnostic package
sudo /opt/TrendMicro/vls_agent/vlsa_control -d
- 收集下列資料夾與檔案
/var/opt/TrendMicro/vls_agent/diag
/var/opt/TrendMicro/vls_agent/xbc.ini
/var/opt/TrendMicro/vls_agent/diag/meta.json
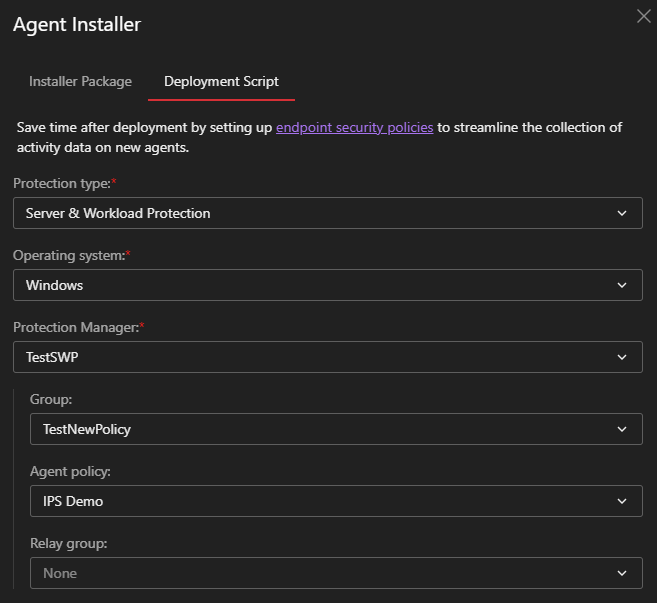
Deployment Script
此功能允許您生成自動化腳本,透過 CLI 下載並安裝 Agent
適合需要大量部署或整合至第三方派送系統(如 SCCM, Ansible)的環境。
請至 Endpoint Inventory 點擊
Agent Installer,在彈出的右側欄,依序完成以下設定後取得
Deployment Script:
-
Deployment method:選擇
Deployment script
-
Endpoint group:選擇端點歸屬的
Endpoint Group 必須屬於
Server & Workload Protection 管理的
Endpoint Group
- Operating system:選擇對應的作業系統
-
Initial policy:選擇當腳本啟用用戶端時,應套用哪一個
policy
-
Relay group:選擇當腳本啟用用戶端時,應使用哪一個
Relay group
-
Installer package download source:除非特殊需求,否則一律選擇 TrendAI™
-
Agent installer proxy:依照需求可以選擇用於安裝時的對外連線:
- Direct connect:直接連線
-
Custom proxy:
Agent Installer Proxy Settings 頁面設定的自定義
proxy
-
Service Gateway:已啟用
Forward Proxy Service 的
Service Gateway
-
Validate TrendAI Vision One™ server TLS certificate:預設勾選,依照環境的資安政策需求選擇。
-
Validate the digital signature on the agent installer:預設未勾選,依照環境的資安政策需求選擇。
- 檢查 Preview script 是否依照上述修改產生變化
- 點擊右下方的下載或是複製圖示取得腳本
Offline package
與一般的輕量級安裝檔不同,此部署方式會將所有的防護元件預先打包成單一檔案。安裝過程完全不需要連線至網際網路下載元件。
主要使用情境 (Use Case):
特別適合頻寬受限、嚴格防火牆內部的端點環境,或是為了確保在「安裝完成」到「成功連線至雲端註冊」的這段空窗期間,Agent
就能立刻擁有初始 Policy 並開始執行 Policy 所設定的功能。
-
離線安裝檔不需解壓縮,請直接將下載取得的安裝檔(Windows 為 .exe,Linux
為無副檔名二進位檔)傳送至目標端點上,並以系統管理員或 root
身分執行即可完成安裝。- 安裝完成後,Agent
最終仍需要取得網路連線,才能回報至 Vision One 並完成註冊。
- 離線安裝套件僅支援部署 Agent version
202603 及更新版本。- 產生的離線安裝套件僅在建立後的
90 天內有效。
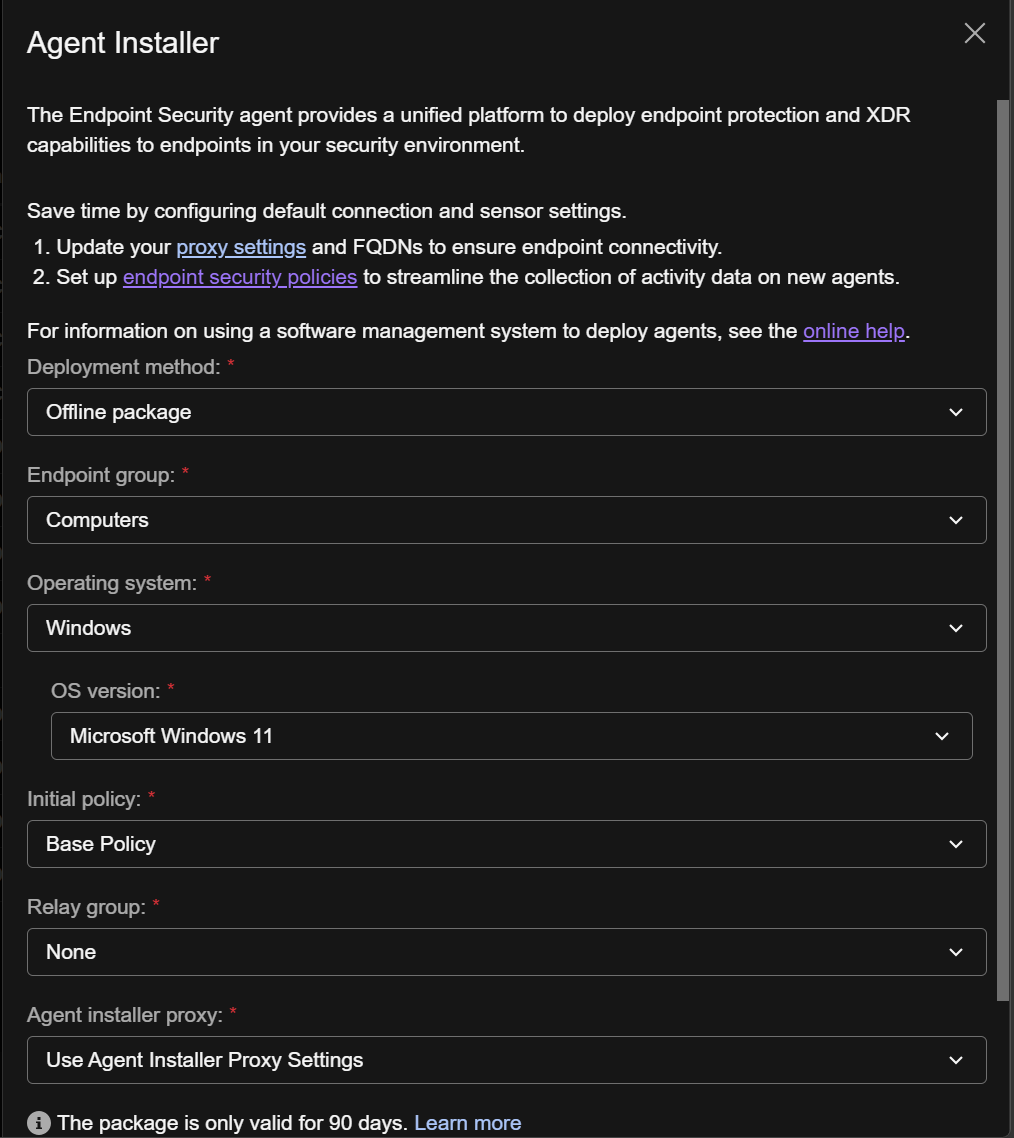
請至 Endpoint Inventory 點擊
Agent Installer,在彈出的右側欄,依序完成以下設定後下載
Agent Installer:
-
Deployment method:選擇
Offline package
-
Endpoint group:選擇端點歸屬的
Endpoint Group,必須屬於
Server & Workload Protection 管理的
Endpoint Group
-
Operating system:選擇對應的作業系統(Windows
或 Linux)
-
OS version:選擇目標端點詳細的作業系統版本(例如
Microsoft Windows 11)
-
Initial policy:選擇當用戶端安裝完成後,應套用哪一個
policy(例如 Base Policy)
-
Relay group:選擇安裝時使用的 Relay group(例如
None)
-
Agent installer proxy:依照需求可以選擇用於安裝完成初次的對外連線:
- Direct connect:直接連線
-
Custom proxy:
Agent Installer Proxy Settings 頁面設定的自定義
proxy
-
Service Gateway:已啟用
Forward Proxy Service 的
Service Gateway
- 點擊右下角的 下載圖示 取得安裝檔。
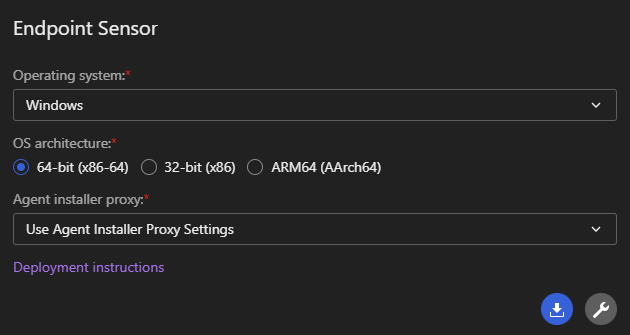
Sensor Only
Windows
請至 Endpoint Inventory 點擊
Agent Installer,在彈出的右側欄
依序完成以下設定後下載 Agent Installer:
-
Deployment method:選擇
Installer package
-
Endpoint group:選擇 Sensor Only
- Operating system:選擇對應的作業系統
-
Agent installer proxy:
-
此選項僅影響「安裝過程」中的連線,與 Agent
安裝完成後的日常運作設定 (Runtime Proxy Settings) 無關。
-
預設為
Use Agent Installer Proxy Settings
依序測試所有已知 Proxy 並找到可用的,順序參考:Agent Installer Proxy Settings
- 僅在需強制指定安裝期間的連線通道時才需更改。
- 點擊右下角的 下載圖示 取得安裝檔。
下載取得 TMSensorAgent_Windows_x86_64.zip
Warning
注意:解壓縮取得的檔案請保持它們的名稱與相對位置
請勿重新命名、變更或移動安裝套件中的任何檔案或資料夾,避免安裝過程中找不到檔案。
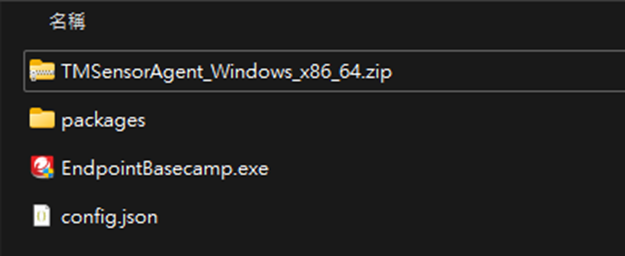
以系統管理員身分執行
EndpointBasecamp.exe 並等待安裝完成
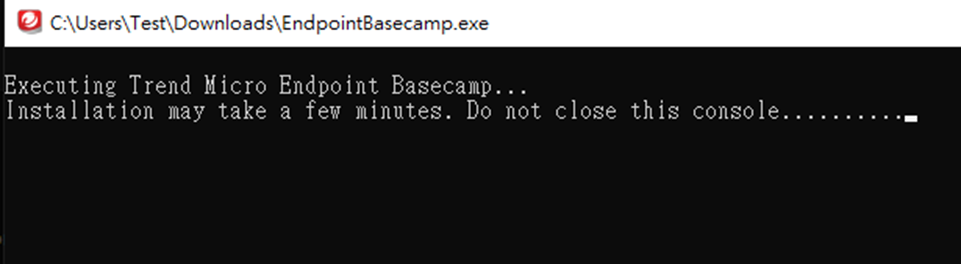
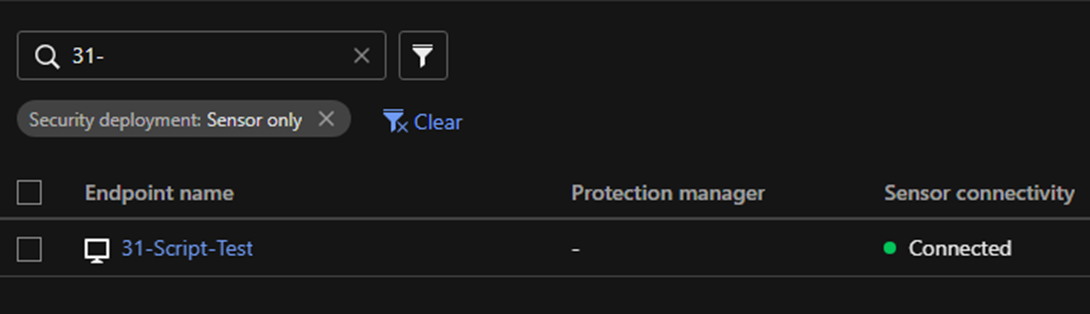
安裝完成後即可在 Endpoint Inventory 看到該端點
macOS
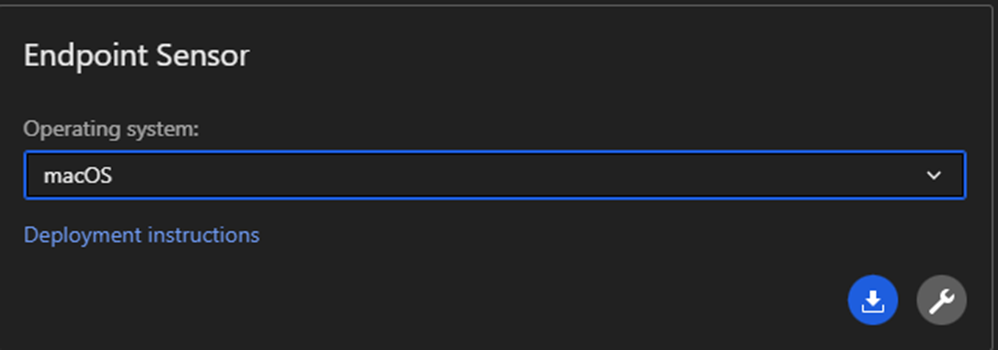
請至 Endpoint Inventory 點擊
Agent Installer,在彈出的右側欄
依序完成以下設定後下載 Agent Installer:
-
Deployment method:選擇
Installer package
-
Endpoint group:選擇 Sensor Only
- Operating system:選擇對應的作業系統
-
Agent installer proxy:
-
此選項僅影響「安裝過程」中的連線,與 Agent
安裝完成後的日常運作設定 (Runtime Proxy Settings) 無關。
-
預設為
Use Agent Installer Proxy Settings
依序測試所有已知 Proxy 並找到可用的,順序參考:Agent Installer Proxy Settings
- 僅在需強制指定安裝期間的連線通道時才需更改。
- 點擊右下角的 下載圖示 取得安裝檔。
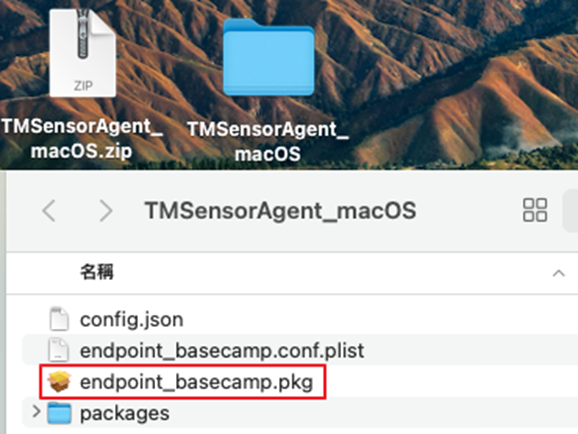
點擊 endpoint_basecamp.pkg 安裝
點擊 繼續
點擊 安裝
輸入密碼後按下 安裝軟體
安裝完成
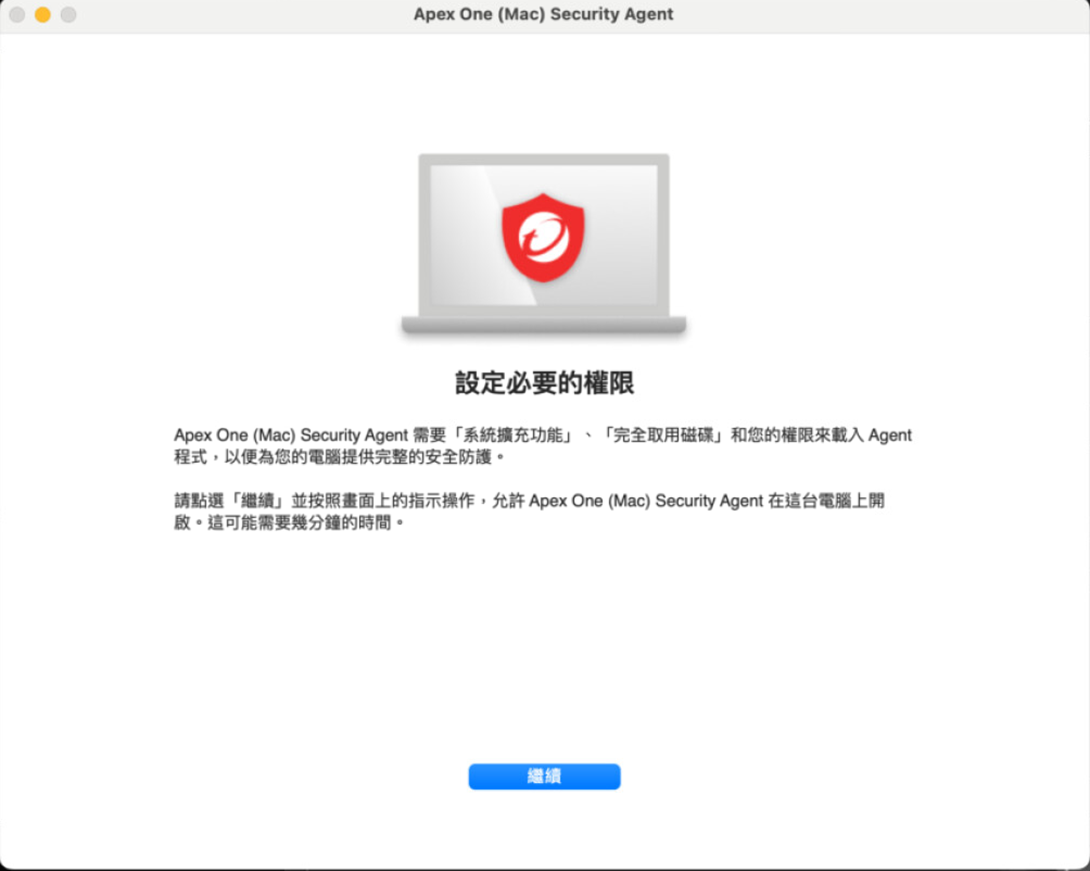
完成安裝後彈出需要權限的視窗
依照程式上面的說明給予權限,首先點擊
Open privacy & Security 的按鈕
點擊該按鈕後將打開 隱私權與安全性 找到該頁面中的
部分系統需要你得留意才能使用。 點擊旁邊的
詳細資訊
將彈出的視窗所需要的權限打開,按下 好
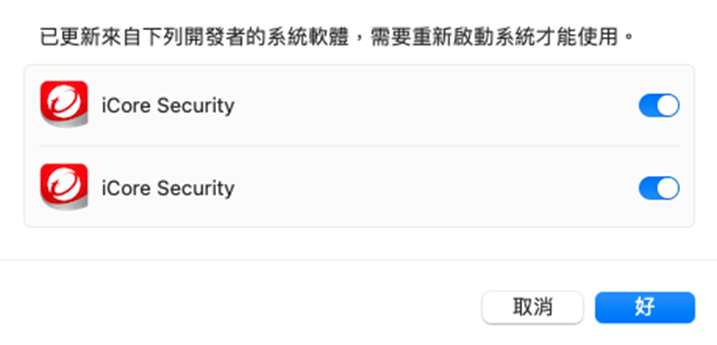
允許 iCoreSecurity 過濾網路內容
完成第一個步驟 System Extension 繼續開啟
Full Disk Access
點擊這個頁面的 Open privacy & Security 的按鈕
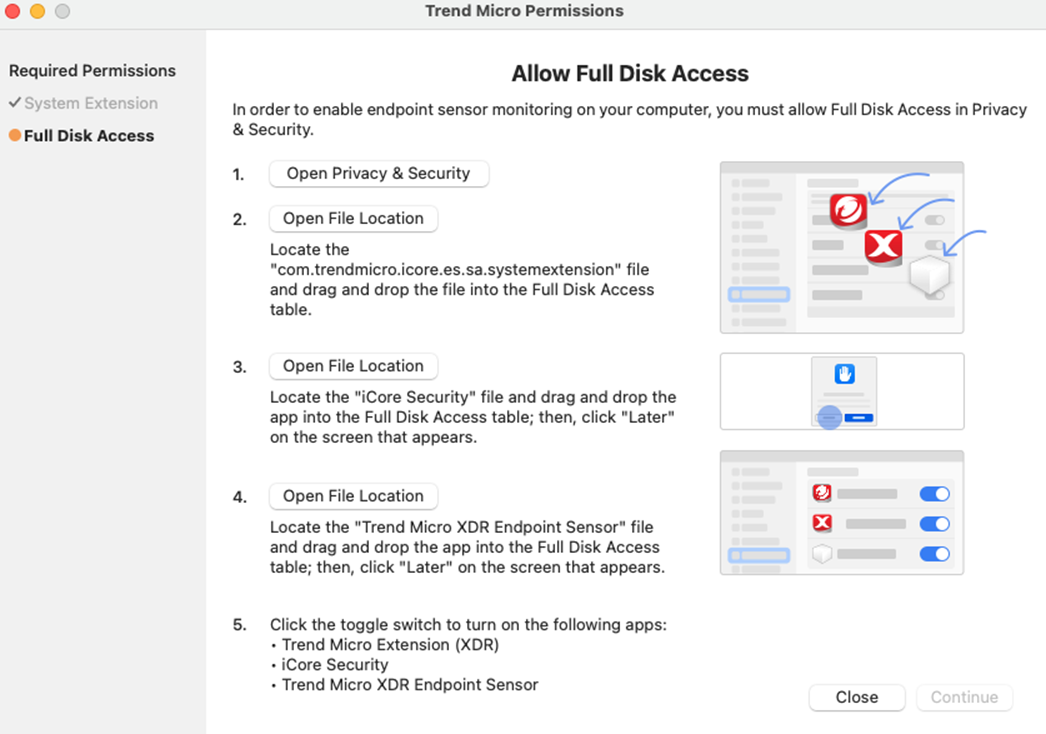
彈出 完全取用磁碟 的視窗,繼續按照順序點
Open File Location
在每一個彈出的資料夾都使用滑鼠拖曳檔案到
完全取用磁碟 的視窗
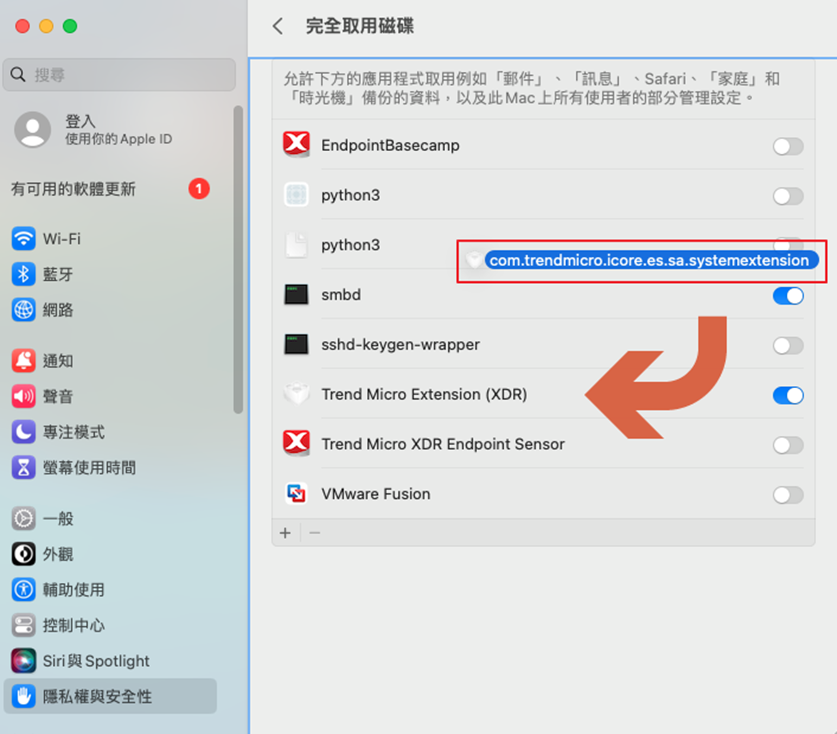
依照順序授予完全取用磁碟的權限:
EndpointBasecamp
Trend Micro Extension (XDR)
Trend Micro XDR Endpoint Sensor
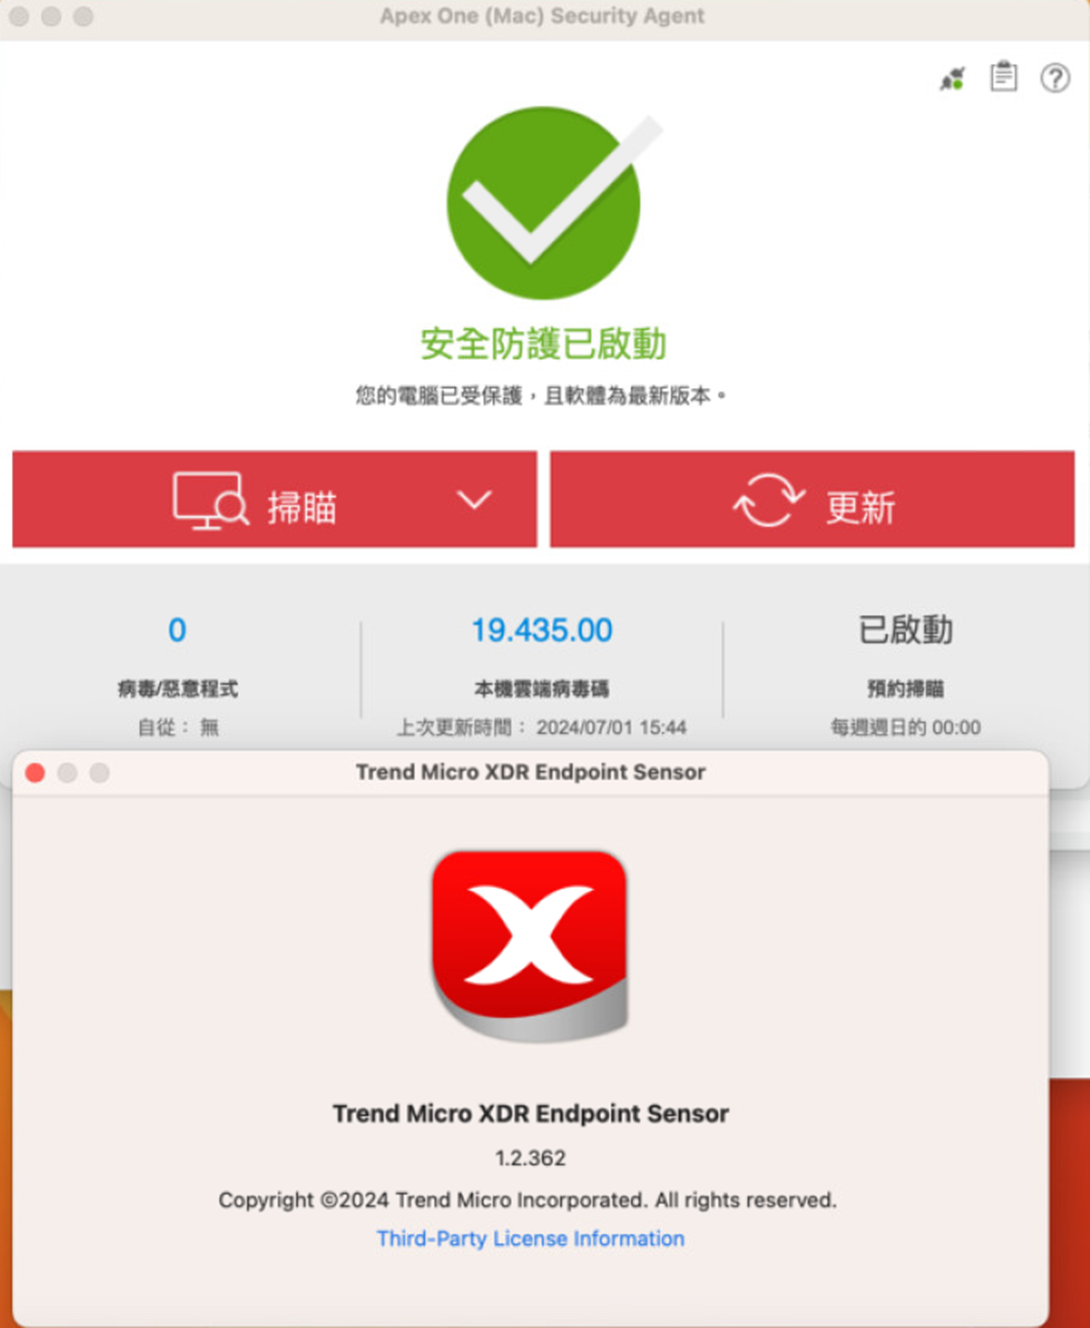
程式會在最後會要求重新打開
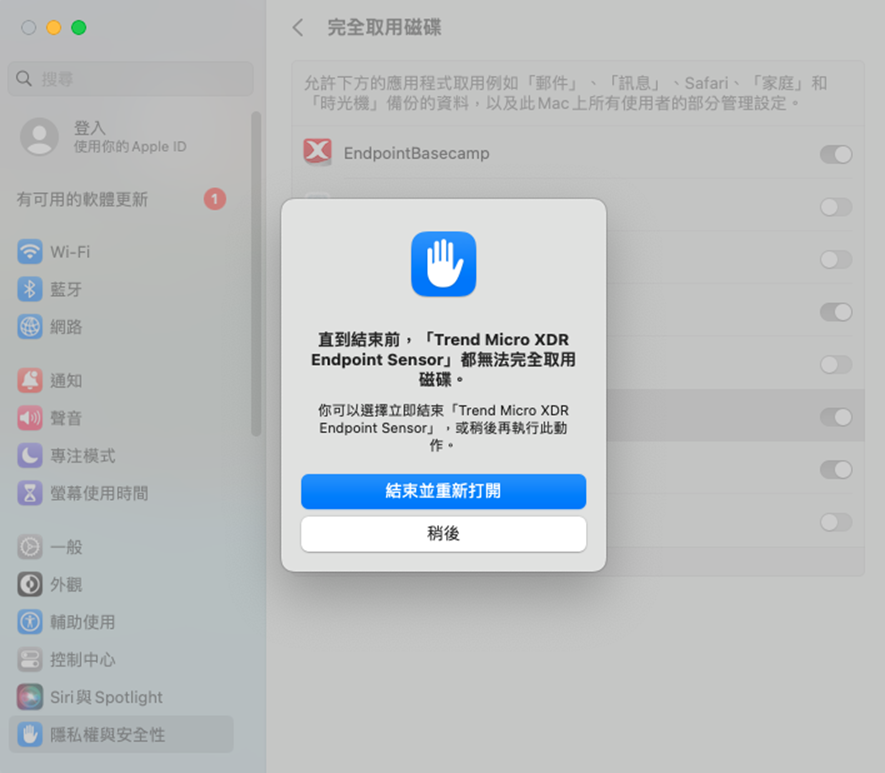
重新開啟後應不再會看到需要權限的視窗而是看到下列視窗(確認完就可以關閉)
Linux
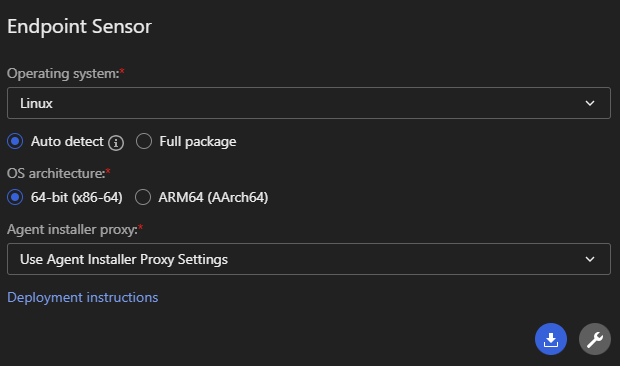
請至 Endpoint Inventory 點擊
Agent Installer,在彈出的右側欄
依序完成以下設定後下載 Agent Installer:
-
Deployment method:選擇
Installer package
-
Endpoint group:選擇 Sensor Only
-
Operating system:選擇對應的作業系統
-
Auto detect:輕量安裝檔。執行時會自動偵測系統架構並下載對應元件,適合頻寬充足的環境。
-
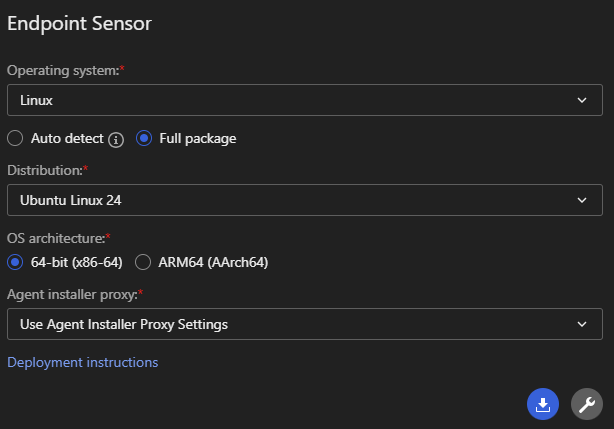
Full package:完整安裝檔。檔案較大,內含所有必要元件,適合頻寬受限的環境使用。
-
Agent installer proxy:
-
此選項僅影響「安裝過程」中的連線,與 Agent
安裝完成後的日常運作設定 (Runtime Proxy Settings) 無關。
-
預設為
Use Agent Installer Proxy Settings
依序測試所有已知 Proxy 並找到可用的,順序參考:Agent Installer Proxy Settings
- 僅在需強制指定安裝期間的連線通道時才需更改。
- 點擊右下角的 下載圖示 取得安裝檔。
Auto detect
在偵測到版本之後會需要額外下載元件,會需要更多的網路資源
Full package
會需要自行選擇版本並拿到對應的作業系統部署
下載取得 Agent Installer 如果是 Auto detect 的可以看到
auto 的檔名
反之,則可以看到對應的作業系統版本在檔名上

Warning
注意:解壓縮取得的檔案請保持它們的名稱與相對位置
請勿重新命名、變更或移動安裝套件中的任何檔案或資料夾,避免安裝過程中找不到檔案。
Auto detect 會相較於 Full package 少了
packages 的資料夾
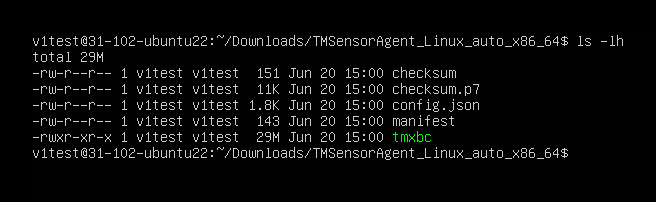
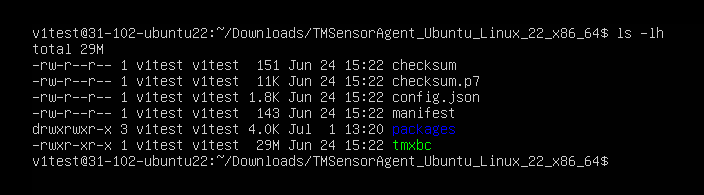
cd 移動到解壓縮目的資料夾,輸入
sudo ./tmxbc install

安裝完成後可以用
ps aux | grep tmxbc | grep -v grep 看到服務
Tip
如果服務有啟動但是沒有回報到 Endpoint Inventory 請按照下列順序初步檢查
-
agent 與 Vision One 之間的時間差是否超過了三十分鐘
可以嘗試透過
date; curl
              "http://worldtimeapi.org/api/timezone/<customer_timezone>
檢查網際網路時間與裝置時間的差距
例如:date;curl http://worldtimeapi.org/api/timezone/Asia/Taipei
- 是否已經依照建議打開防火牆
-
是否能夠存取
https://files.trendmicro.com
-
如果沒有 proxy,使用
curl -k -l -vvv https://files.trendmicro.com
-
如果有 proxy,使用
curl -k -l -vvv -X proxy_url:port
                  https://files.trendmicro.com
- Kernel 資訊
uname -r
grep "" /etc/*-release
5. 確認是否有 Linux Secure Boot(如果是 Endpoint Sensor 啟用有問題)
如果有 Linux Secure Boot 是否有 Enrolling Trend Micro public key
Note
如果初步檢查仍具問題需要收集下列資料
XBC debug log
-
修改設定啟用 debug
sudo vi /opt/TrendMicro/EndpointBasecamp/etc/.conf
- 重新啟動服務
systemctl restart tmxbc
-
重新啟動服務後確認
/opt/TrendMicro/EndpointBasecamp/logs/tmxbc.log
是否已經看到 Level 為 DEBUG
-
輸入下列指令將
/opt/TrendMicro/EndpointBasecamp/ 壓縮收集
zip tmxbc_debug.zip -r /opt/TrendMicro/EndpointBasecamp/
diagnostic package
如果是 Endpoint Sensor 啟用有問題請額外收集
diagnostic package
-
輸入下列指令產生 diagnostic package
sudo /opt/TrendMicro/vls_agent/vlsa_control -d
- 收集下列資料夾與檔案
/var/opt/TrendMicro/vls_agent/diag
/var/opt/TrendMicro/vls_agent/xbc.ini
/var/opt/TrendMicro/vls_agent/diag/meta.json
Deployment Script
此功能允許您生成自動化腳本,透過 CLI 下載並安裝 Agent
適合需要大量部署或整合至第三方派送系統(如 SCCM, Ansible)的環境。
請至 Endpoint Inventory 點擊
Agent Installer,在彈出的右側欄,依序完成以下設定後取得
Deployment Script:
-
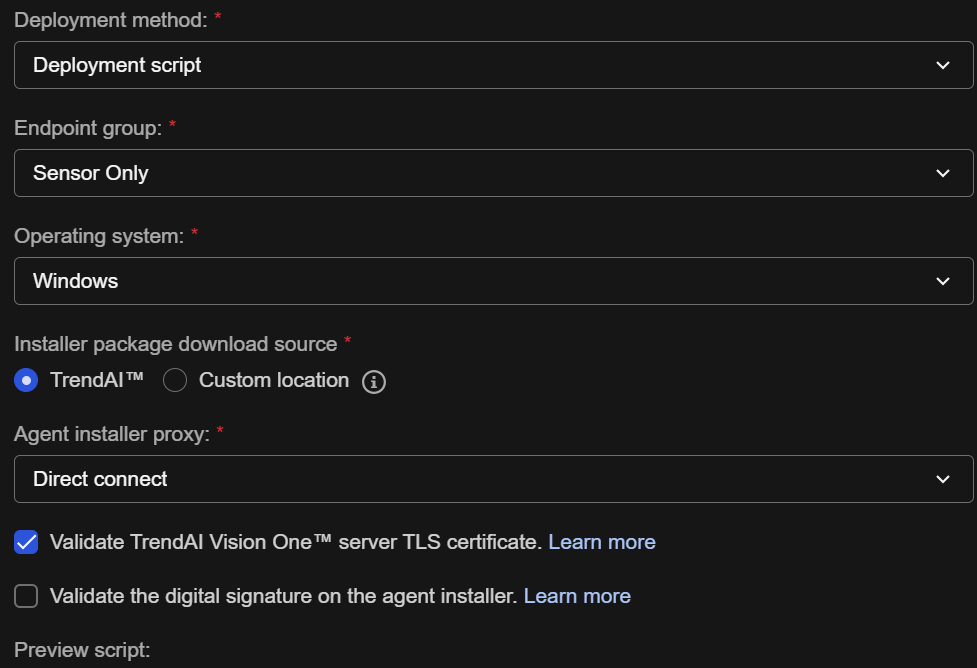
Deployment method:選擇
Deployment script
-
Endpoint group:選擇 Sensor Only
-
Operating system:選擇對應的作業系統
-
Installer package download source:除非特殊需求,否則一律選擇 TrendAI™
-
Agent installer proxy:依照需求可以選擇用於安裝時的對外連線:
- Direct connect:直接連線
-
Custom proxy:
Agent Installer Proxy Settings 頁面設定的自定義
proxy
-
Service Gateway:已啟用
Forward Proxy Service 的
Service Gateway
-
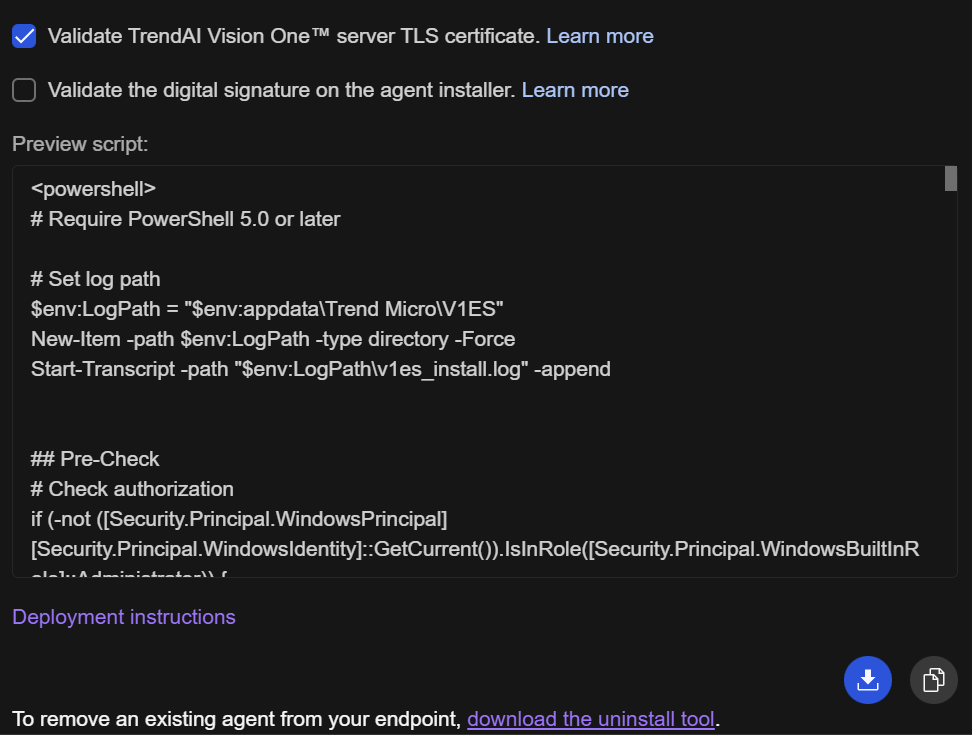
Validate TrendAI Vision One™ server TLS certificate:預設勾選,依照環境的資安政策需求選擇。
-
Validate the digital signature on the agent installer:預設未勾選,依照環境的資安政策需求選擇。
- 檢查 Preview script 是否依照上述修改產生變化
-
點擊右下方的下載或是複製圖示取得腳本
Offline package
與一般的輕量級安裝檔不同,此部署方式會將所有的防護元件預先打包成單一檔案。安裝過程完全不需要連線至網際網路下載元件。
主要使用情境 (Use Case):
特別適合頻寬受限、嚴格防火牆內部的端點環境,或是為了確保在「安裝完成」到「成功連線至雲端註冊」的這段空窗期間,Agent
就能立刻擁有初始 Policy 並開始執行 Policy 所設定的功能。
-
離線安裝檔不需解壓縮,請直接將下載取得的安裝檔(Windows 為 .exe,Linux
為無副檔名二進位檔)傳送至目標端點上,並以系統管理員或 root
身分執行即可完成安裝。- 安裝完成後,Agent
最終仍需要取得網路連線,才能回報至 Vision One 並完成註冊。
請至 Endpoint Inventory 點擊
Agent Installer,在彈出的右側欄,依序完成以下設定後下載
Agent Installer:
-
Deployment method:選擇
Offline package
-
Endpoint group:選擇 Sensor Only
-
Operating system:選擇對應的作業系統(Windows
或 Linux)
-
OS architecture:選擇目標端點的系統架構(例如
64-bit (x86-64)、32-bit (x86) 或
ARM64 (AArch64))
-
Agent installer proxy:依照需求可以選擇用於安裝完成初次的對外連線:
- Direct connect:直接連線
-
Custom proxy:
Agent Installer Proxy Settings 頁面設定的自定義
proxy
-
Service Gateway:已啟用
Forward Proxy Service 的
Service Gateway
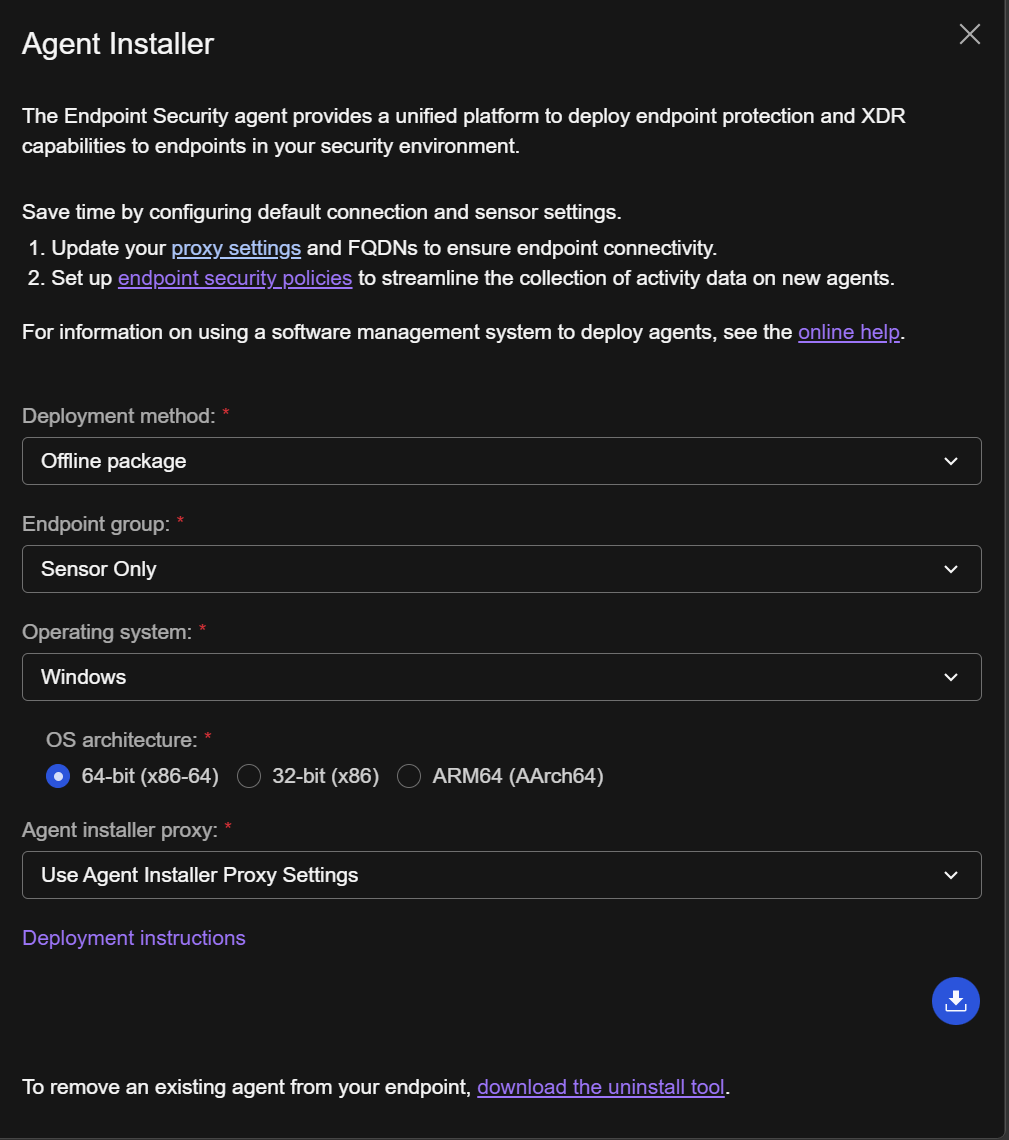
- 點擊右下角的 下載圖示 取得安裝檔。
重要主機設定
在 Cyber Risk Exposure Management >
Continuous Risk Management >
Attack Surface Discovery 點擊 Devices
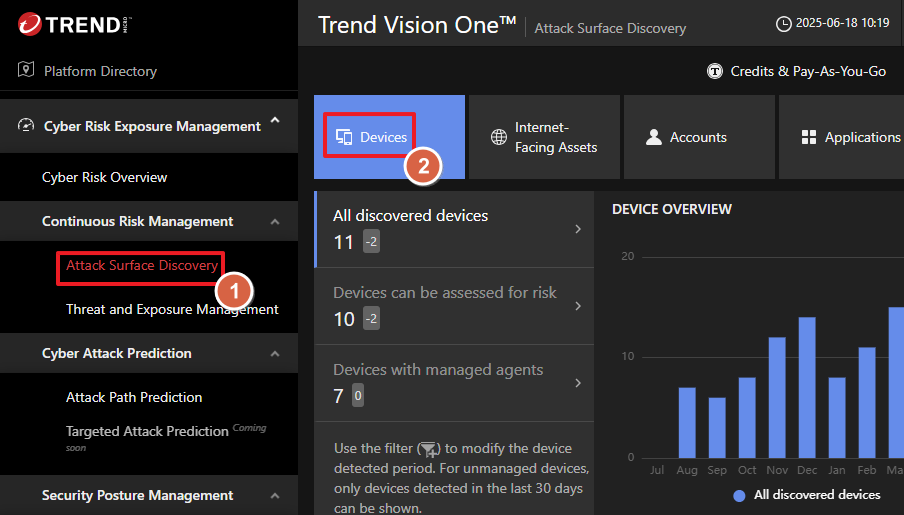
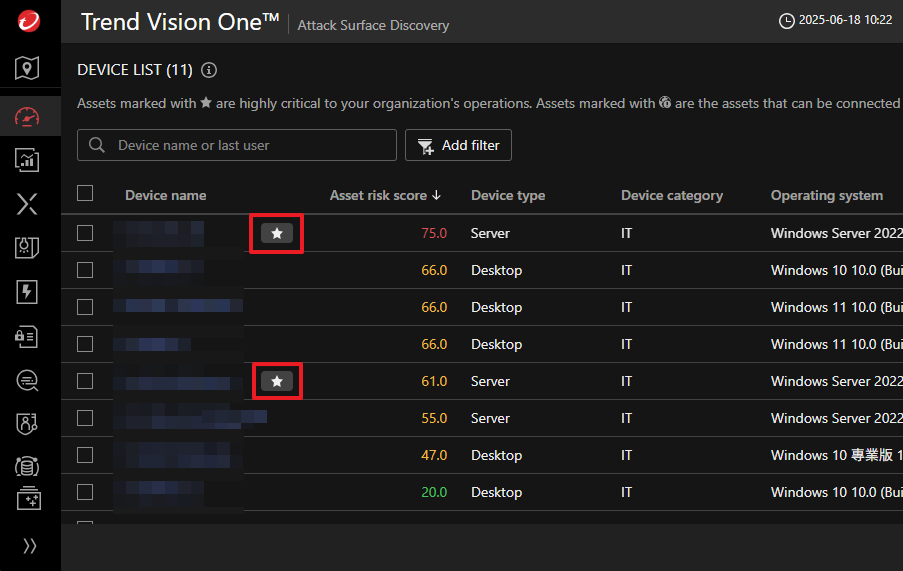
向下滑動找到 Device List 重要主機會標示
 圖示
圖示
亦可手動調整 Asset Criticality 至 8
或更高來標示為重要主機
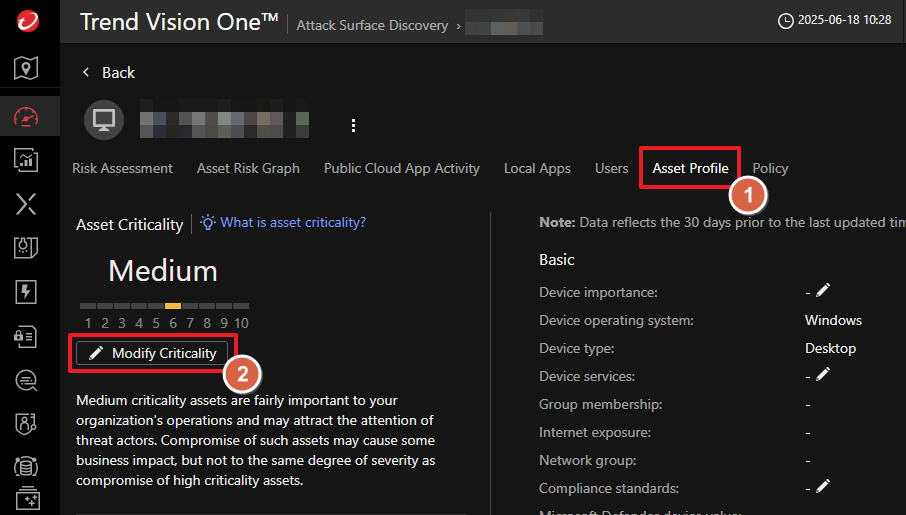
點擊裝置名稱後的頁面中選擇 Asset Profile 可以看到現在的
Asset Criticality 點擊
Modify Criticality 可進行修改
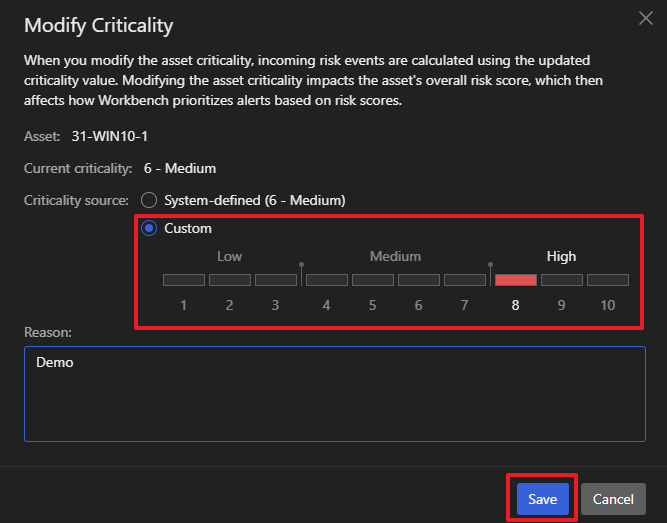
在 Modify Criticality 依照該裝置的重要程度調整
Criticality source
CREM 例外清單
在企業環境中,Cyber Risk Exposure Management (CREM)
的核心任務是協助組織找出潛在的受攻擊面
它能全面統計已偵測到的裝置,並區分出可評估風險與受管理的資產,讓您清晰掌握內部尚未受到監控的未受管理裝置
為了提供全方位的環境可視性,CREM 會主動整合已連接至 Vision One
的多元資料來源,包括但不限於:
- Endpoint Sensor (已開啟 EDR 的 Agent)
- Virtual Network Sensor
- Deep Discovery Inspector
然而,我們理解您可能會因特定的營運需求,需要調整評估範圍
透過 CREM
例外清單功能,您可以自由將部分資產排除在風險評估與風險事件分析之外
值得注意的是,這些被排除的資產將不會計入您的點數使用量,協助您在安全監控與成本效益之間取得最佳平衡
計入點數計算的非雲端資產包括:
-
所有未執行行動作業系統(Android、iOS)、且不在例外清單中的受管理的裝置
-
所有已發現且未受管理的裝置,若其不在例外清單中、執行桌面或伺服器作業系統(Windows、macOS、Linux、Unix),且符合下列任一條件:
手動少量加入
在 Cyber Risk Exposure Management >
Continuous Risk Management >
Attack Surface Discovery 找到
Device List
將列出目前 Vision One 的所有裝置,包含受管理的裝置與過去 30
天內發現的未受管理的裝置
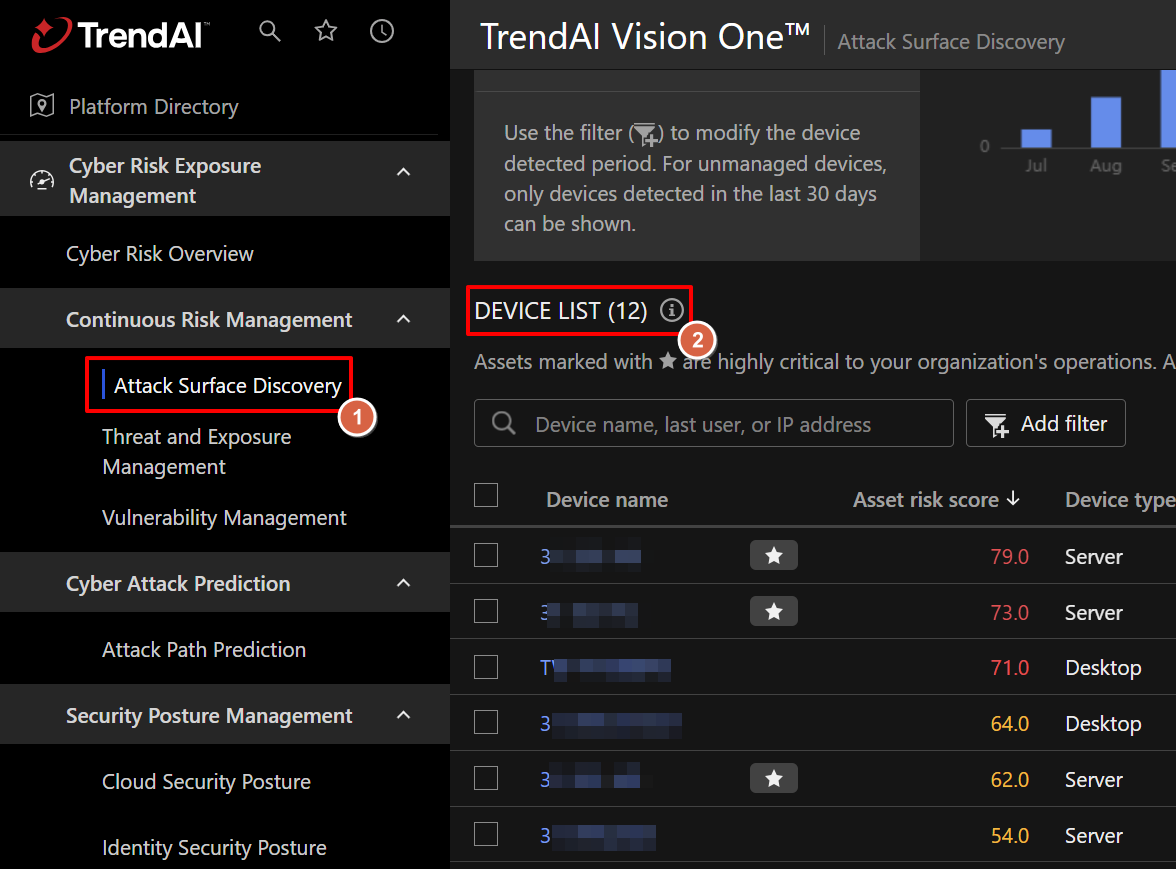
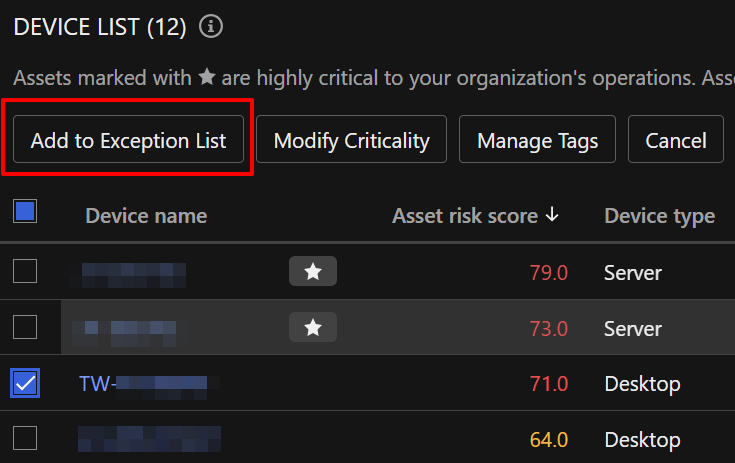
找到並勾選想要加入至例外清單的裝置,點擊上方的
Add to Exception List
在彈出的
Add to Exception List
對話框中,確認受影響的資產與說明後,點擊
Add 即可完成將裝置加入例外清單
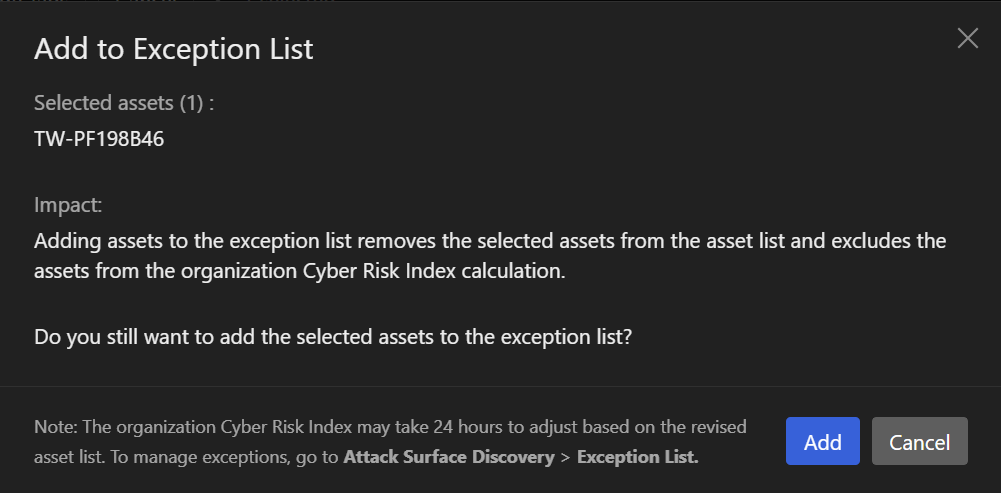
Note
將資產加入例外清單會將其從資產列表中移除,且不再納入組織的 Cyber Risk
Index 計算
組織的 Cyber Risk Index 可能需要 24
小時才能根據更新後的資產列表進行調整
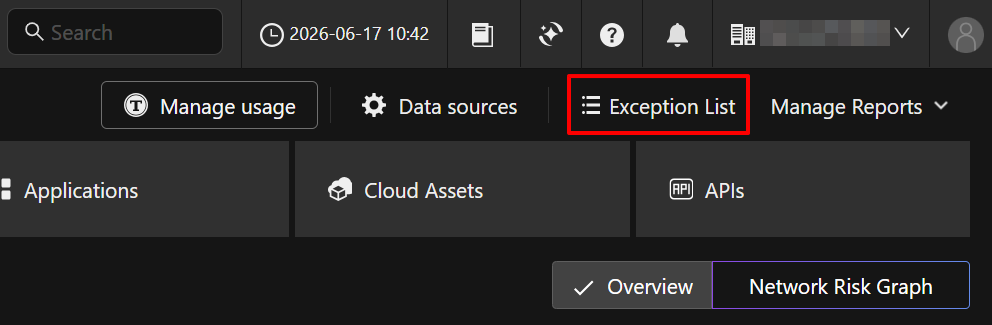
您可以在 Attack Surface Discovery 頁面右上方點擊
Exception List 來管理已加入的例外清單
進入 Exception List 頁面後,可在
Devices
頁籤下確認已成功加入例外清單的裝置清單,其不再納入風險評估

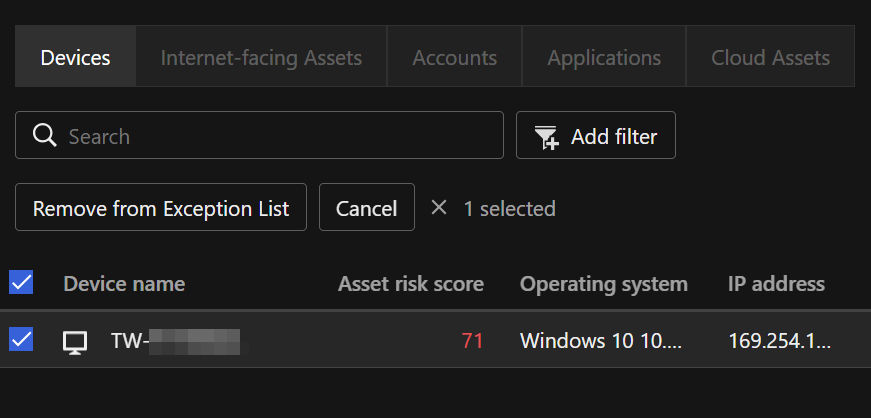
若要將裝置從例外清單中移除,請在
Exception List 中勾選該裝置,並點擊上方的
Remove from Exception List
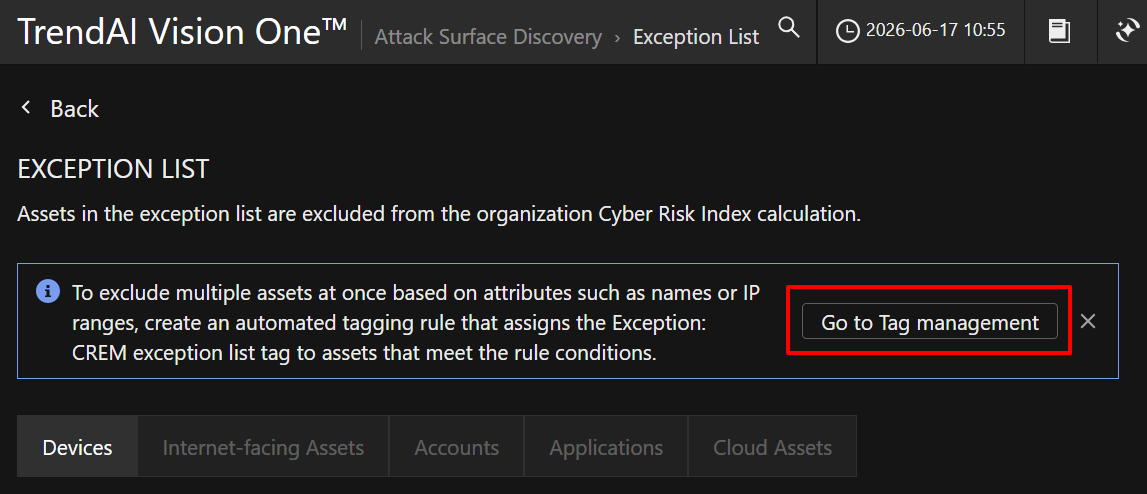
依規則大量加入
若要依據特定的屬性(如名稱或 IP
範圍)一次排除多個資產,可透過自動標記規則來進行設定
請在 Exception List 頁面上方的藍色提示框中,點擊
Go to Tag management 前往標籤管理頁面
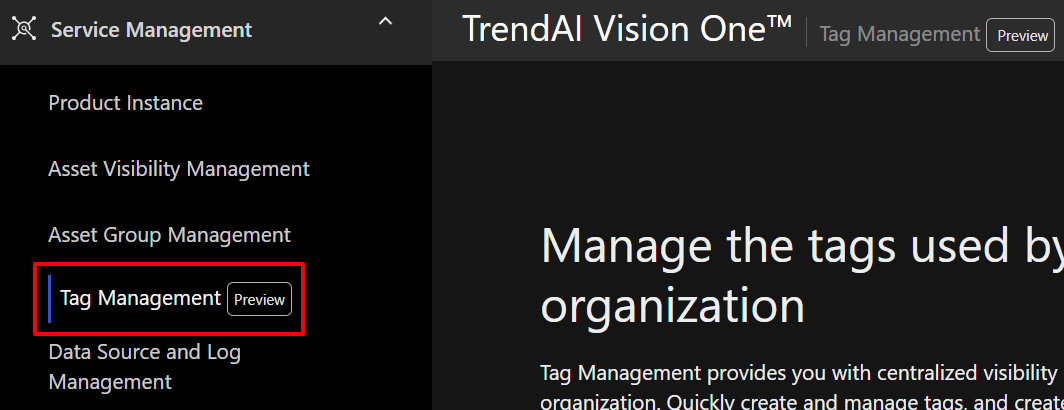
點擊後,系統會自動導覽至 Service Management 中的
Tag Management 頁面
由於
Tag Management
目前為預發布(Pre-release)功能,首次使用時會彈出
Pre-release notice 視窗,確認相關聲明後,點擊
Opt in 即可啟用此功能
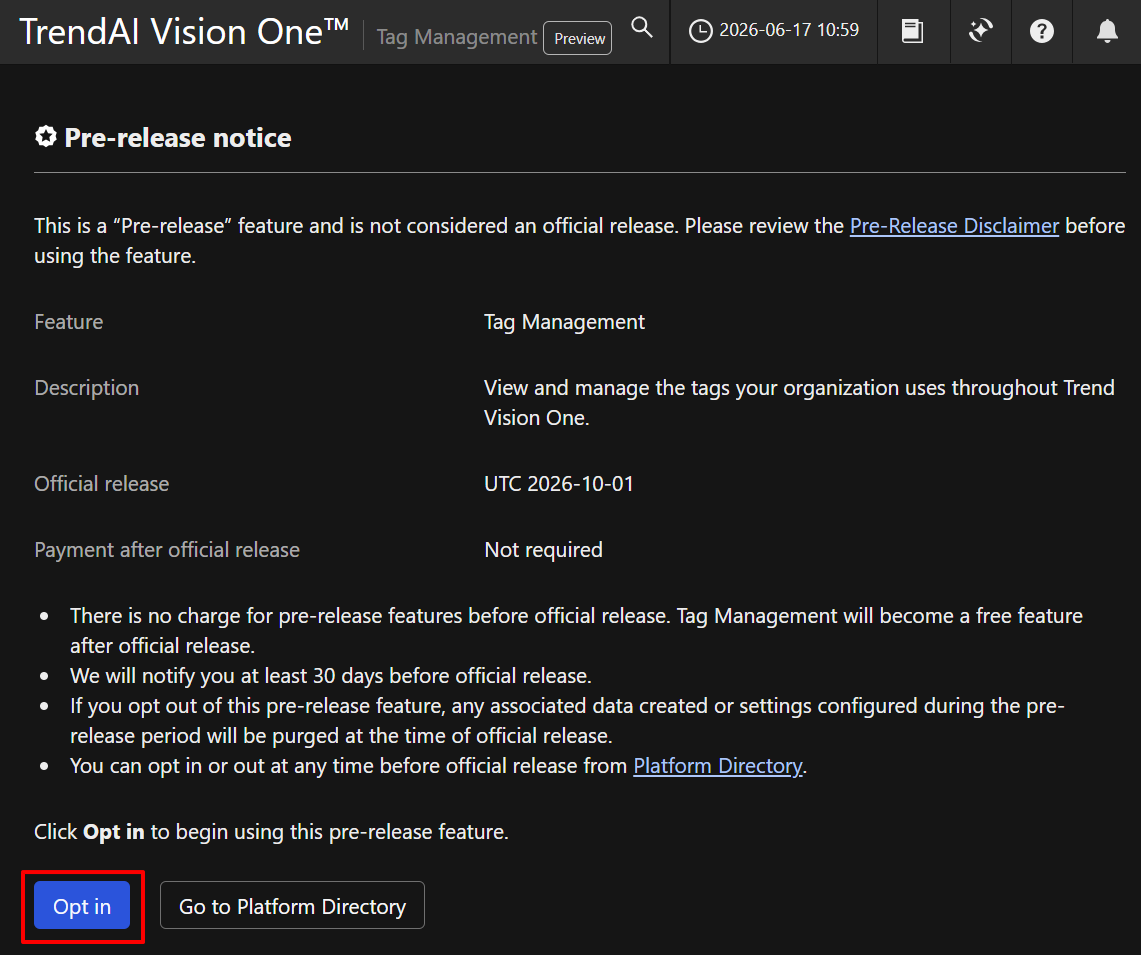
Note
Tag Management 預計於 UTC 2026-10-01
正式發布,且正式發布後為免費功能,不需額外付費
您可隨時從 Platform Directory 啟用或停用此功能
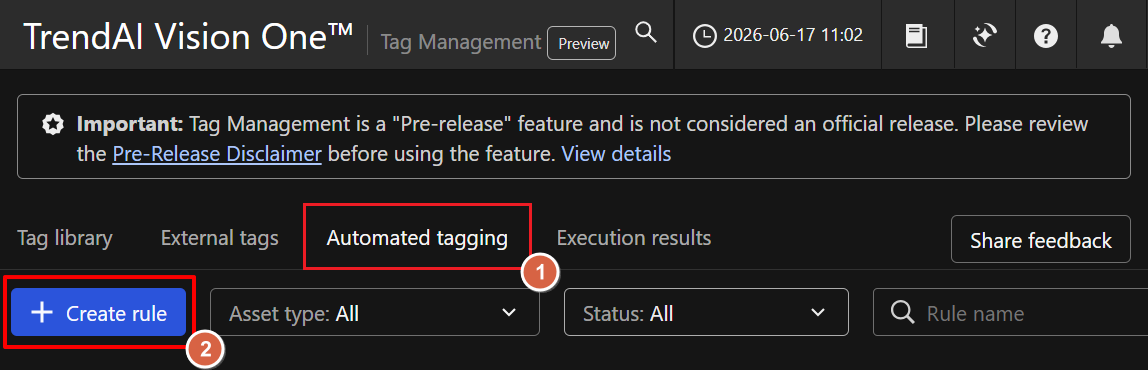
進入
Tag Management 頁面後,依序完成以下步驟來建立規則:
- 點擊 Automated tagging 頁籤
- 點擊 Create rule 建立規則
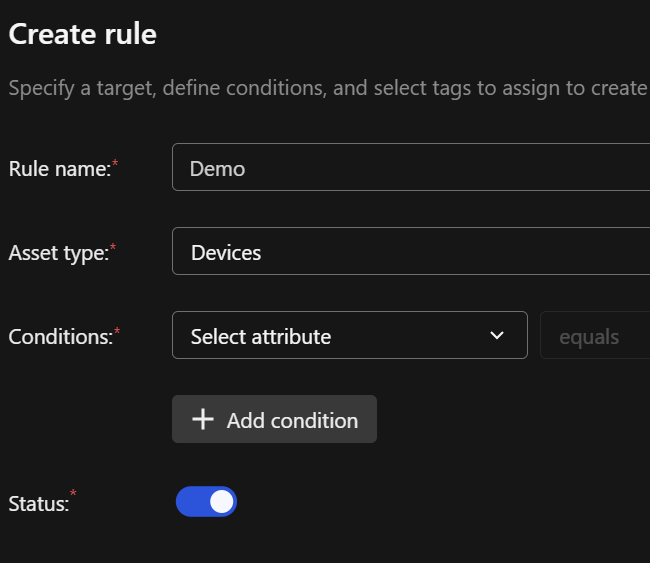
在 Create rule 頁面中完成以下基本設定:
- Rule name:輸入自定義的規則名稱
- Asset type:必須選擇 Devices
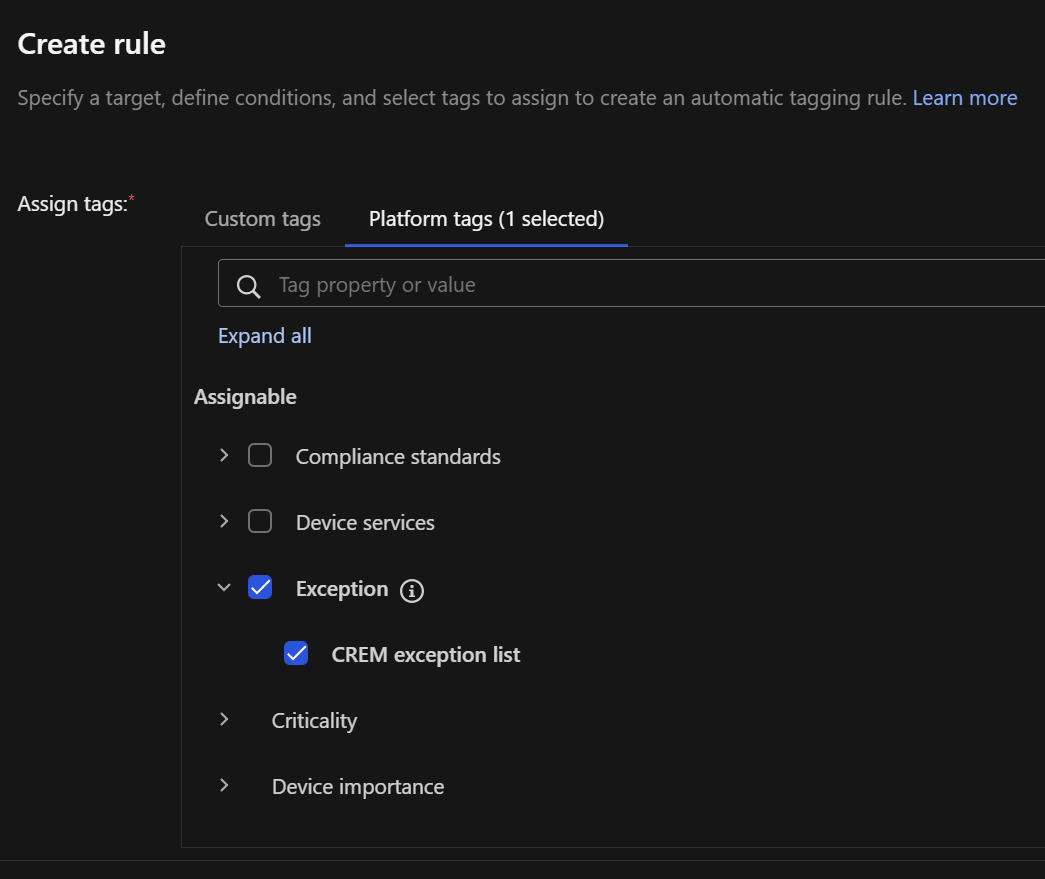
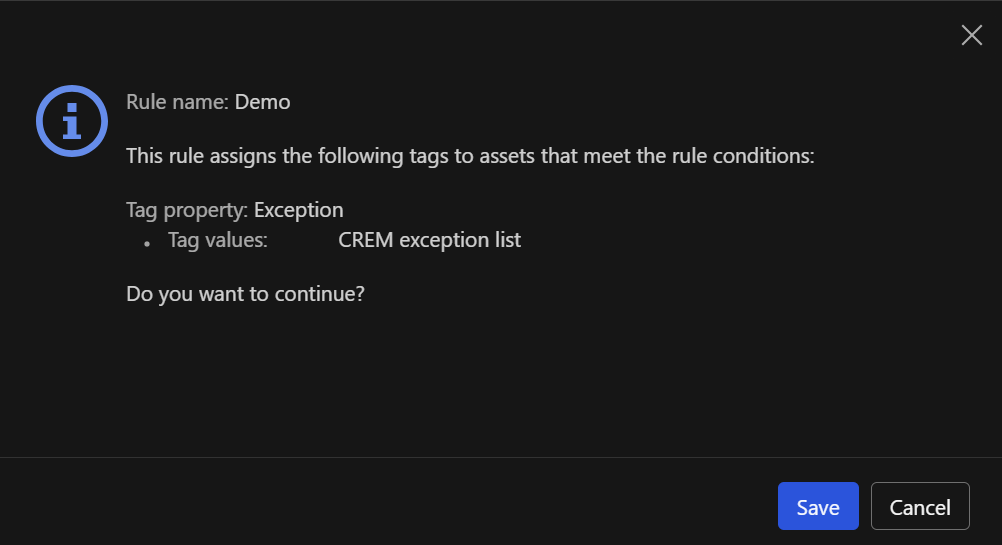
在最下方的 Assign tags 區塊中,切換至
Platform tags 頁籤,展開
Exception 並勾選
CREM exception list 作為要指派的標籤
在中間的
Conditions 區塊中,您可以依據需求設定自動篩選的條件
以下為常見的條件設定範例:
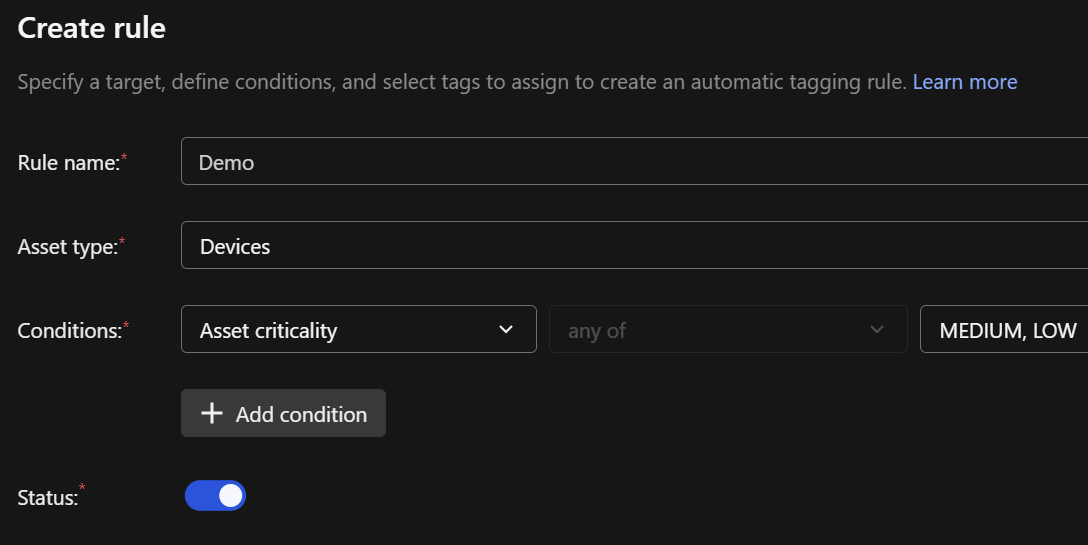
排除非重要主機
將資產重要性低於高重要性(如 Medium 或 Low)的裝置排除:
-
Attribute:選擇 Asset criticality
- Operator:選擇 any of
- Value:選擇 MEDIUM, LOW
Warning
將非重要主機排除會大幅度限縮 CREM
的可視性,使您無法完整掌握組織內潛在的受攻擊面與風險狀況
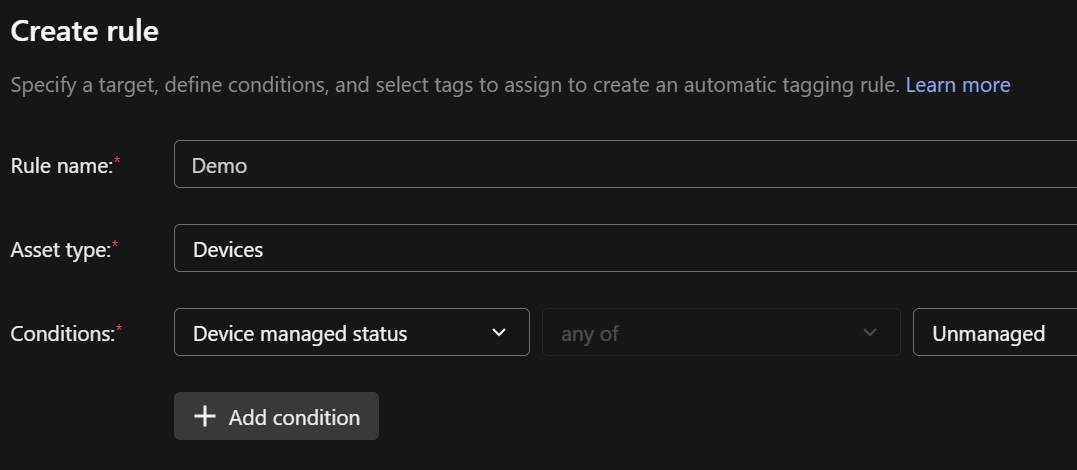
排除未受管理裝置
將未受管理裝置排除:
-
Attribute:選擇
Device managed status
- Operator:選擇 any of
- Value:選擇 Unmanaged
Note
如果您的環境已完成部署,且某些未受管理裝置不需要進行風險評估,您可以套用此排除規則,快速且大量地將它們排除在評估範圍之外
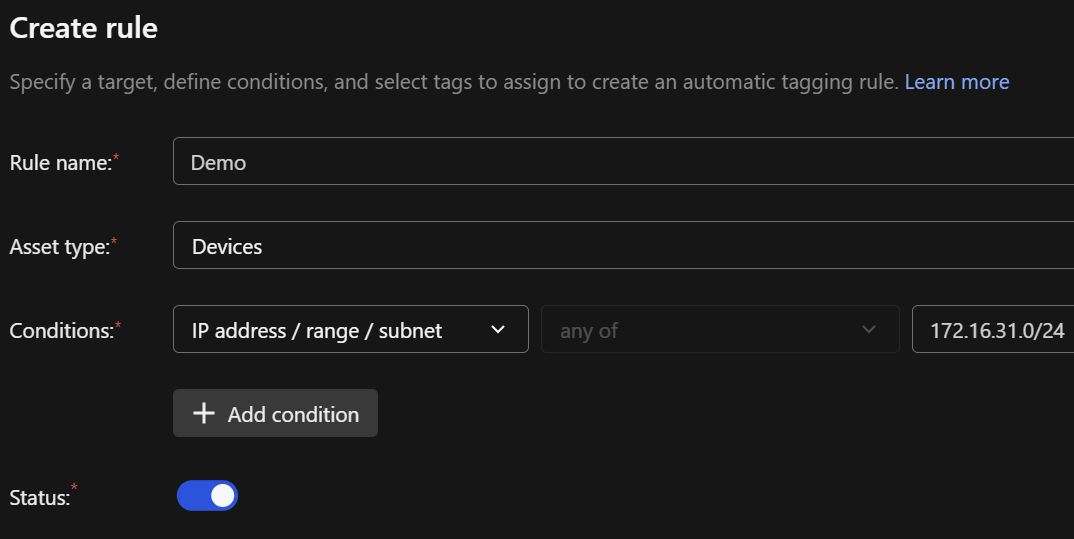
依據 IP 篩選排除
將特定 IP、IP 範圍或子網段的裝置排除:
-
Attribute:選擇
IP address / range / subnet
- Operator:選擇 any of
-
Value:輸入要排除的 IP 範圍(例如
172.16.31.0/24)
設定完成後,點擊右下角的 Save,在彈出的確認視窗中點擊
Save 以完成規則的建立與儲存
規則建立後會立刻執行,您可以透過以下方式確認執行結果
Note
截至本文撰寫時(2026/06/17),已啟用的規則僅在以下情況會執行:
- 規則儲存後
- 手動點擊規則右方的 Play 按鈕
因此,自動標記僅會對規則「執行當下」已存在於
Device List
的裝置生效。若後續有符合條件的新裝置加入,需再次手動執行規則以套用例外標籤
-
在 Automated tagging 頁籤中,點擊該規則
Execution 欄位中的數字(如圖中標示 1)

-
系統會導覽至 Execution results 頁面,點擊
Modified assets 欄位中的數字(如圖中標示 2)
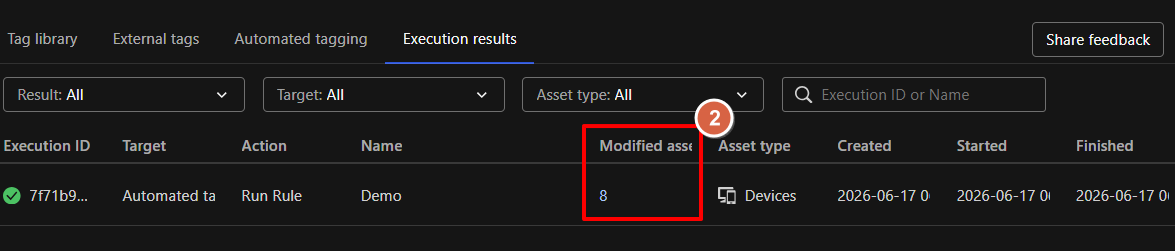
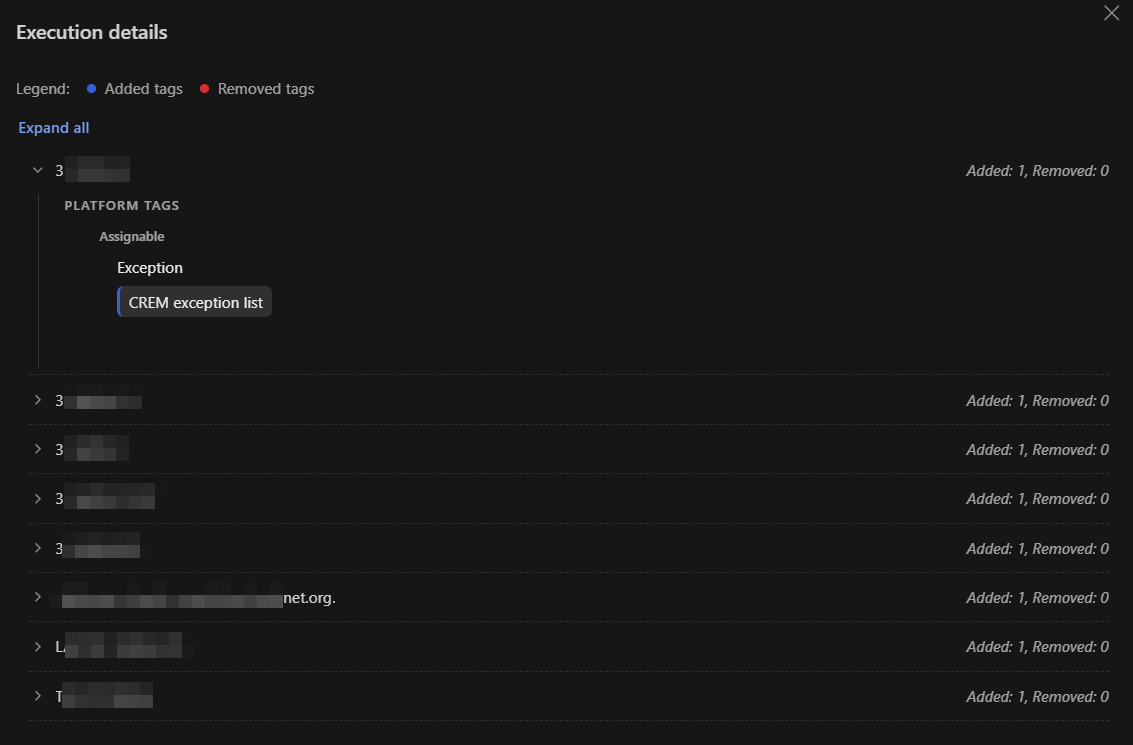
-
在彈出的
Execution details
視窗中,確認被套用例外標籤的裝置清單與詳細資訊
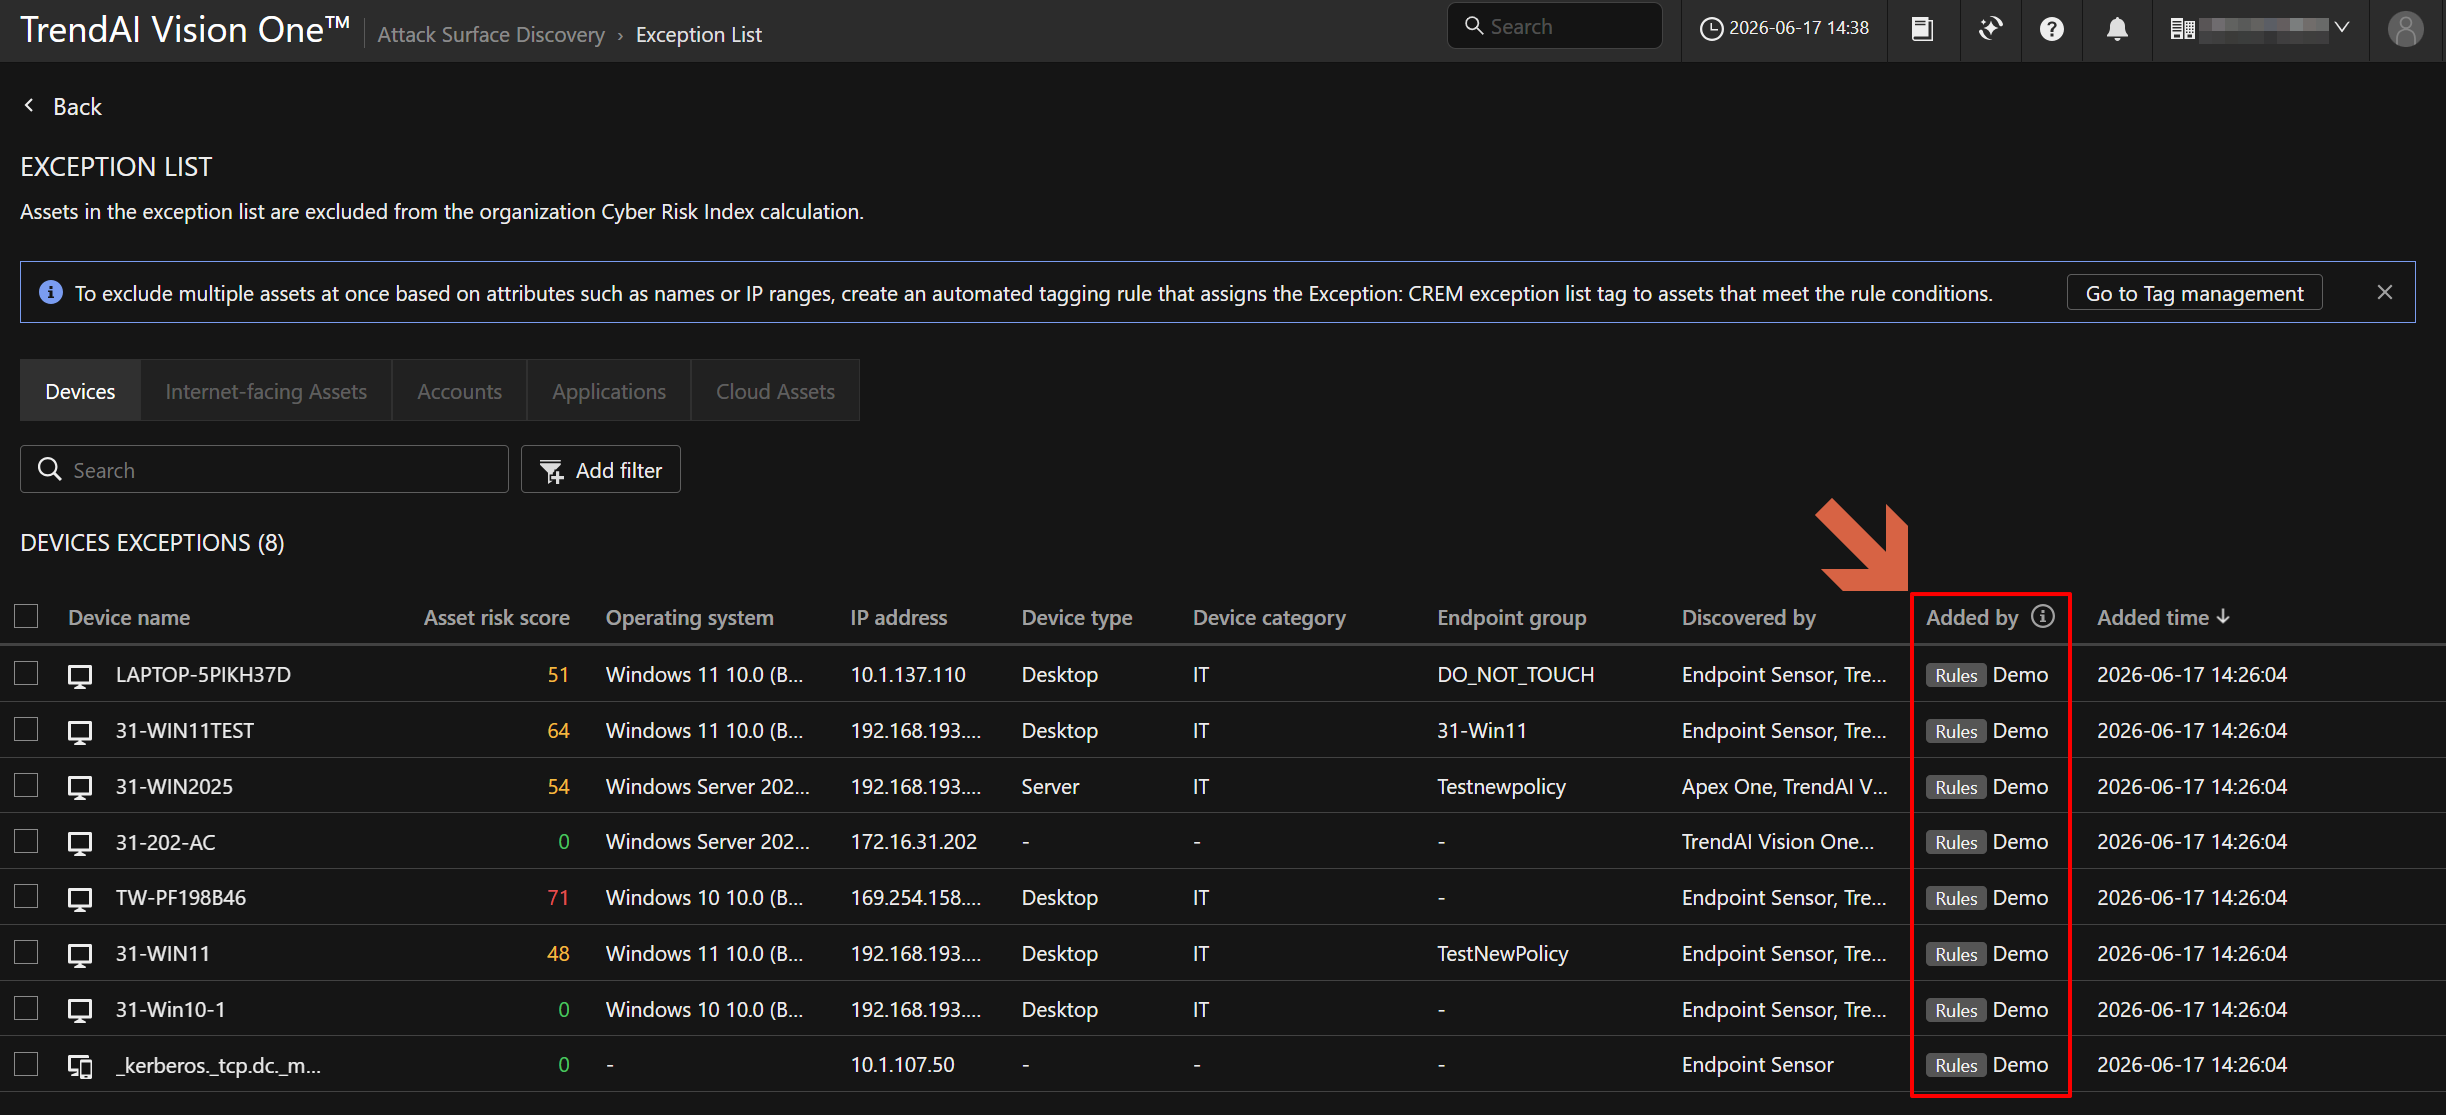
返回至 Exception List 頁面,您可以在
Devices 列表中透過
Added by 欄位確認該例外是由哪一個規則加入例外清單
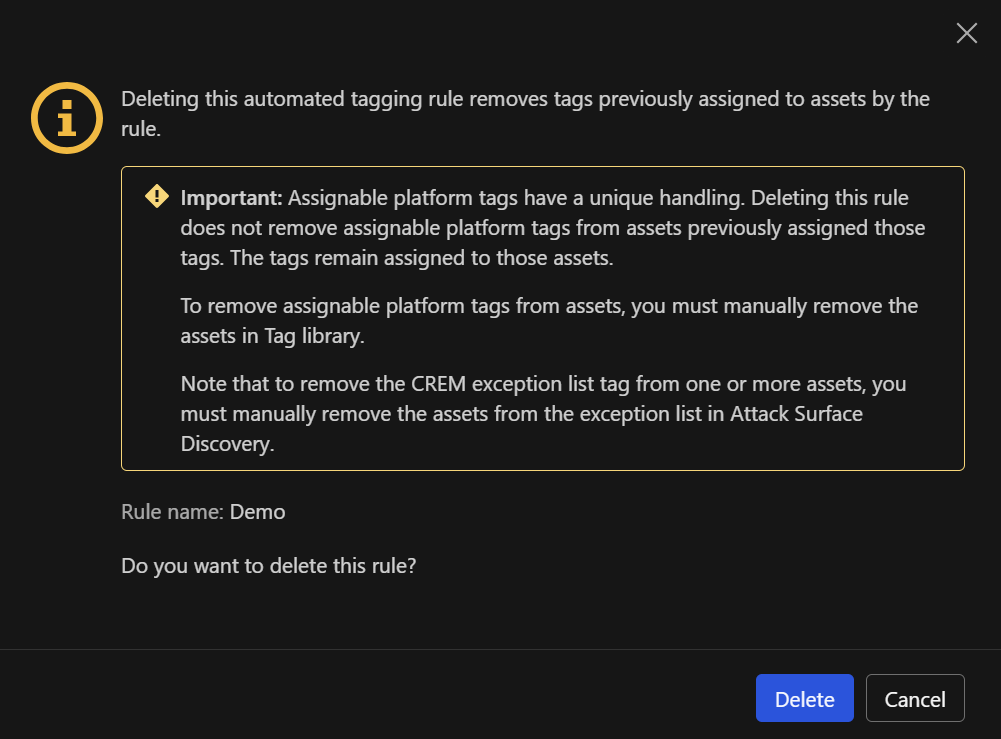
Warning
刪除自動標記規則將會移除該規則先前為資產指派的標籤。然而,可指派平台標籤(Assignable
platform
tags)具有特殊處理機制,刪除規則並不會從先前已套用標籤的資產中自動移除該標籤。因此,CREM exception list
標籤仍會保留在這些資產上。若要將這些裝置移出例外清單,必須手動在
Attack Surface Discovery 的
Exception List 中進行移除
Connection Policies
端點回報至主控台後,即可套用
Connection Policies 進行連線管控
您可以透過此原則限制端點僅存取特定的
Service Gateway 或是 Custom proxy
同時也能設定端點下載更新的來源(包含支援將端點設為
Relay group)
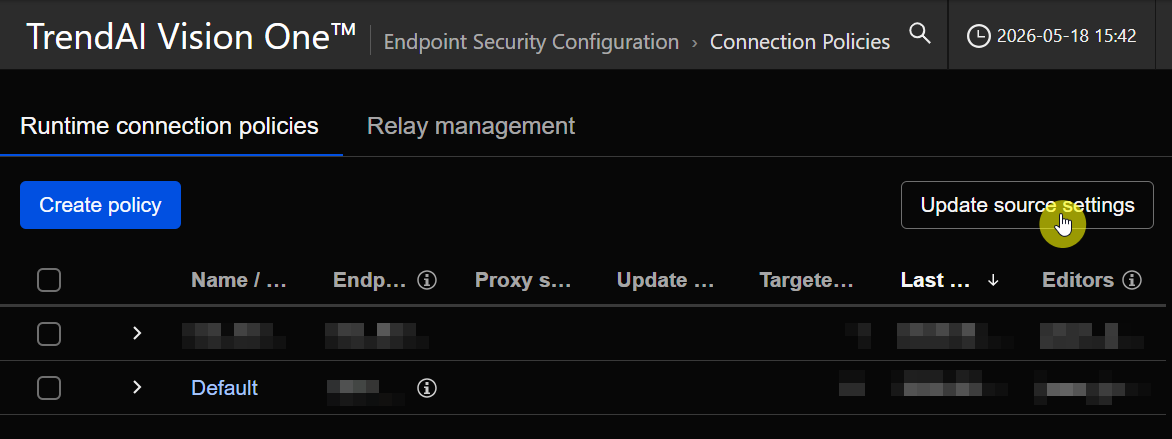
請至 Endpoint Security >
Endpoint Security Configuration 中點擊
Connection Policies
此功能分為 Runtime connection policies 與
Relay management 兩大頁籤
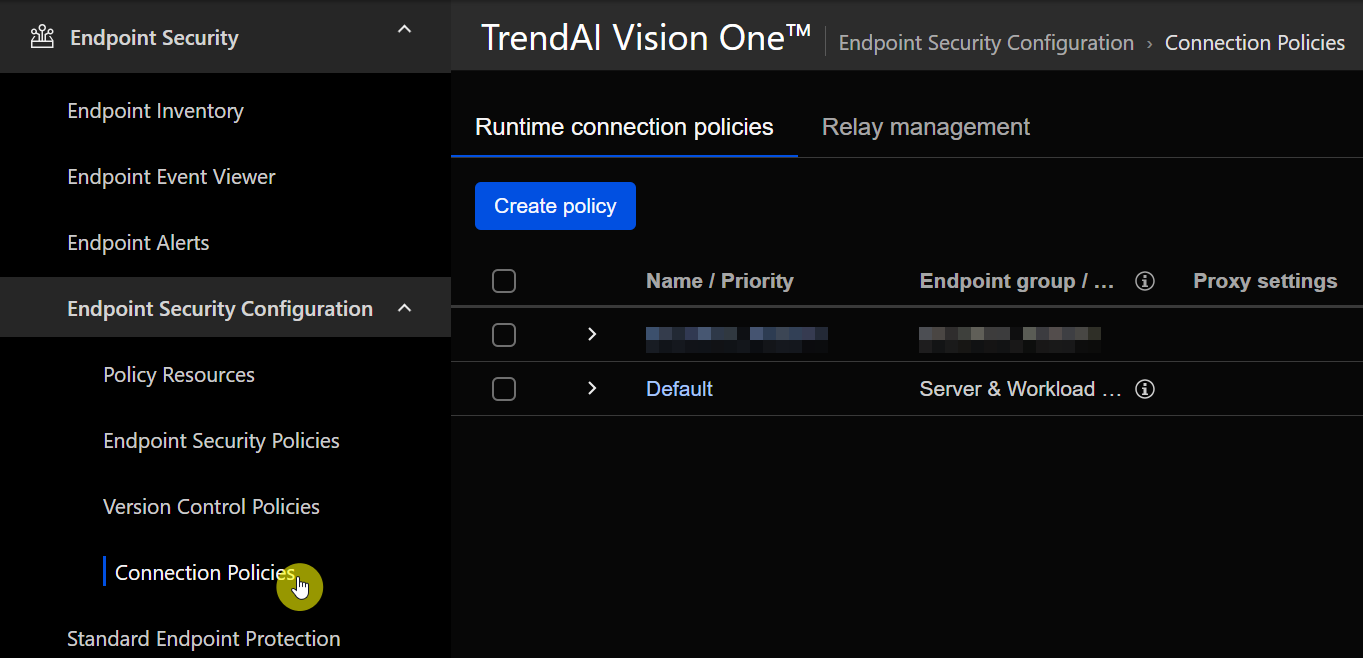
Runtime connection policies
在此頁籤下,您可以看見預設的 Default policy
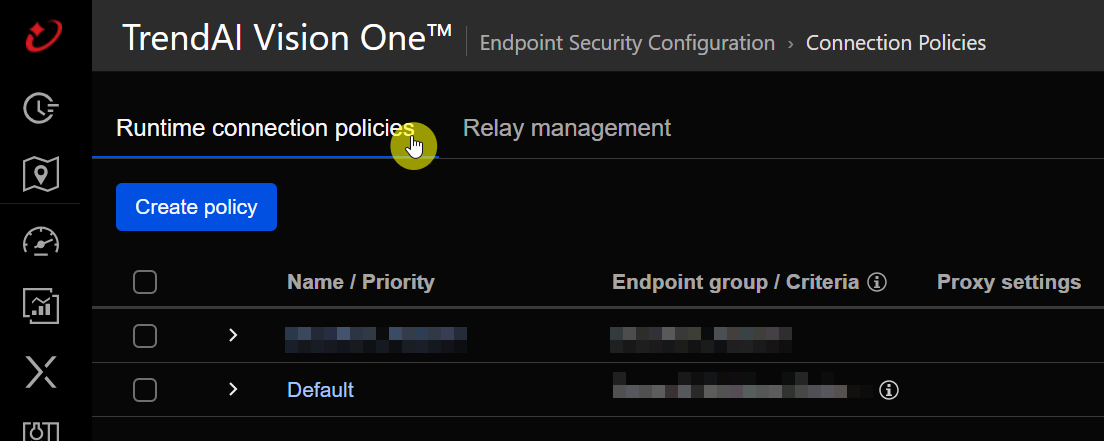
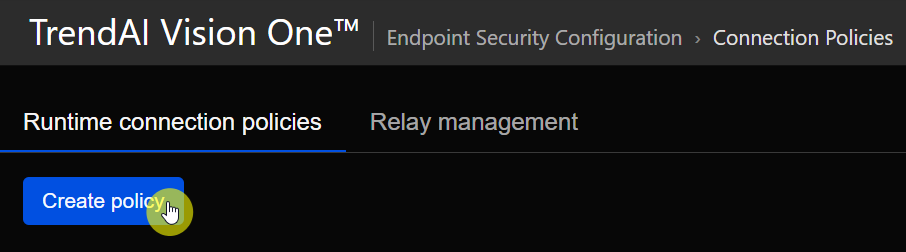
點擊
Create policy
建立新原則(或點擊現有原則名稱進行修改)
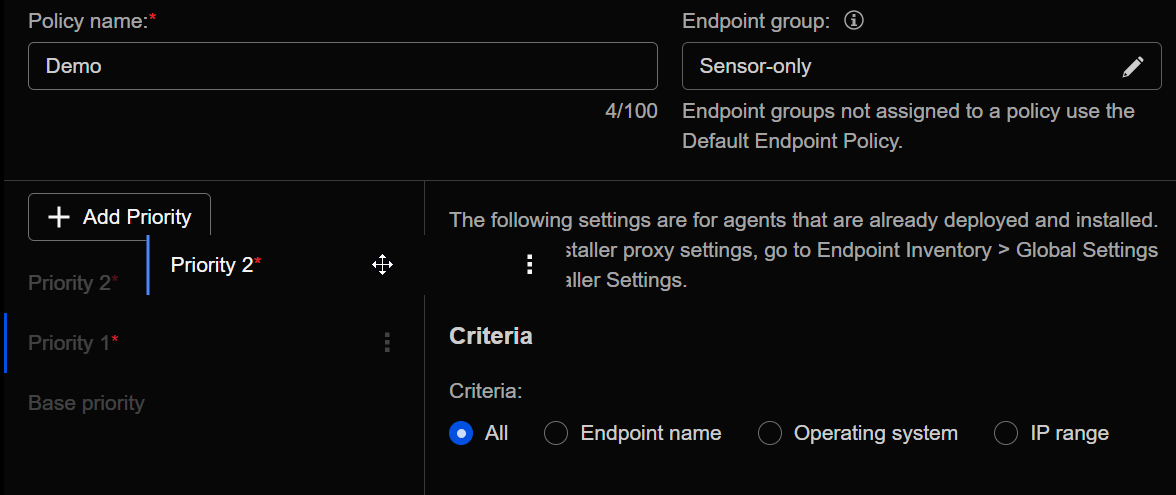
在 General information 區塊中輸入
Policy name 後,點擊編輯圖示選擇要套用的
Endpoint group
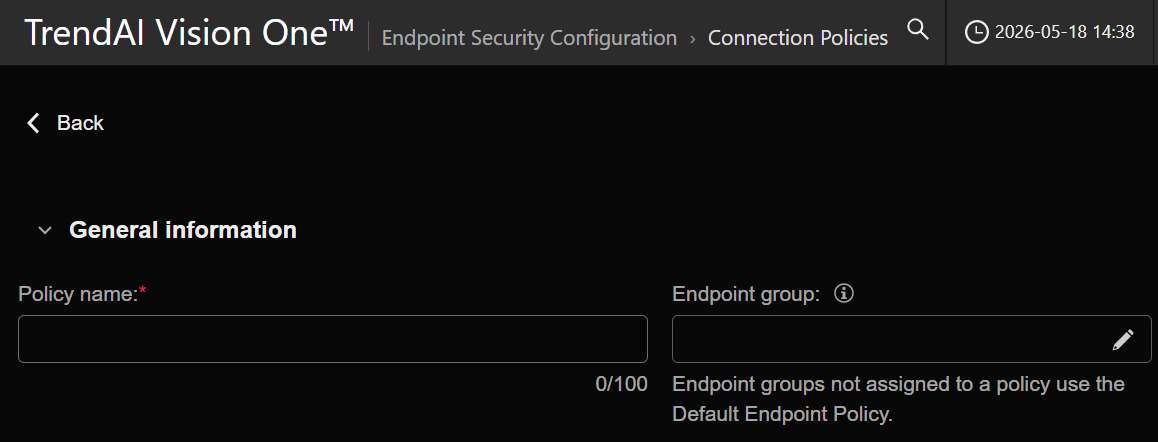
一個 Endpoint group 只能被指派給一個 Policy
若重新指派,該群組將會被轉移至新的 Policy
未被指派的群組將會自動套用預設的原則
接著在左側選單點擊 Add Priority 新增規則
在右側的
Criteria 區塊中,您可以設定該規則的適用條件
支援的依據包含:All、Endpoint name、Operating system、IP
range
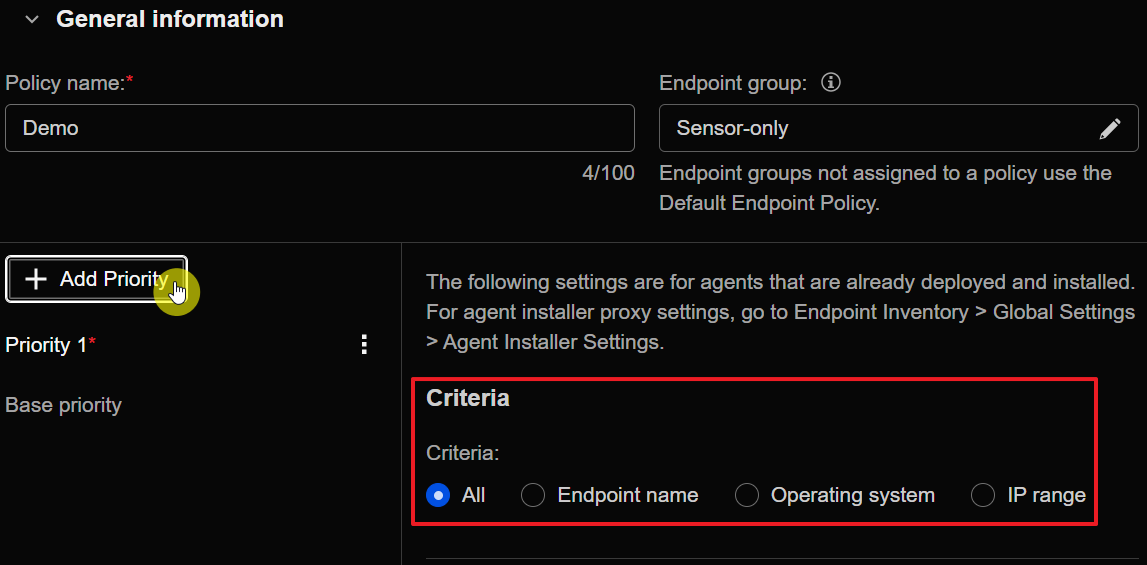
若端點符合多個條件,將會套用優先級最高的規則(數字越小代表優先權越高,例如
Priority 1 會優先於 Priority 2)
若皆不符合,則會套用最底層的 Base priority(其 Criteria
預設為 All 且不可更改)
您可以透過拖曳左側的規則來調整優先順序,清單中越上方的規則優先級越高
在每個設定好的 Priority 規則中,必須分別設定以下兩大連線行為:
Update source
決定該條件下的端點在下載更新時,應連線至何處。可選擇:
若要使用 Service Gateways 作為更新來源,該設備必須已啟用
Generic Caching Service
-
Use selected Service Gateways:連線至指定的 Service
Gateways
-
Use all available Service Gateways:嘗試連線至所有可用的 Service Gateways
- Use relay group:連線至指定的 Relay group
-
No configuration:沿用下一個較低優先級規則的更新來源,若無可用連線則直接連線至 Vision
One 下載更新

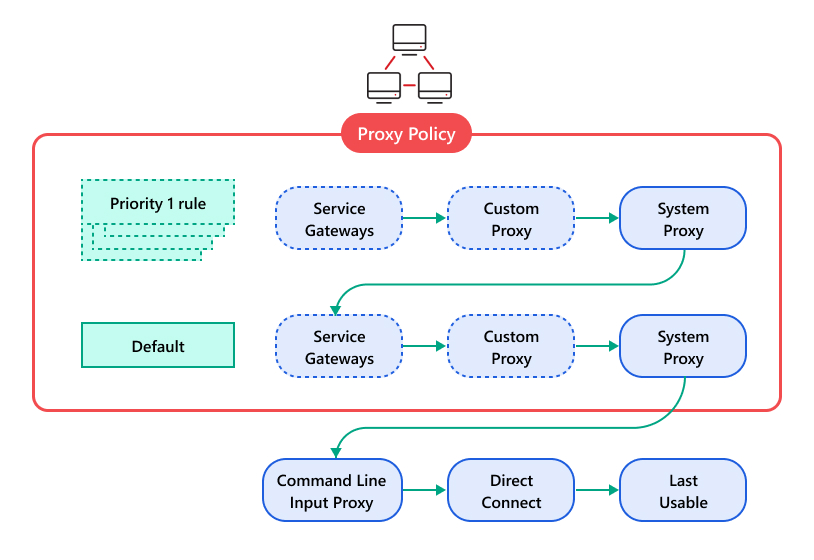
Agent connection proxy settings
指定端點進行日常通訊時的連線設定 Agent 將依照以下順序嘗試連線:
-
符合的最高優先級 Policy 內部嘗試順序為:
- Service Gateway
- Custom proxy
- System proxy
-
符合的次高優先級 Policy
若端點符合多個條件,將會套用優先級最高的規則
- 透過 Command Line 於安裝時指定的 Proxy
- 直接連線
- 最後一次成功連線的設定
Service Gateway - Forward proxy service
指定端點透過 Service Gateway 連線至 Vision One 的連線方式
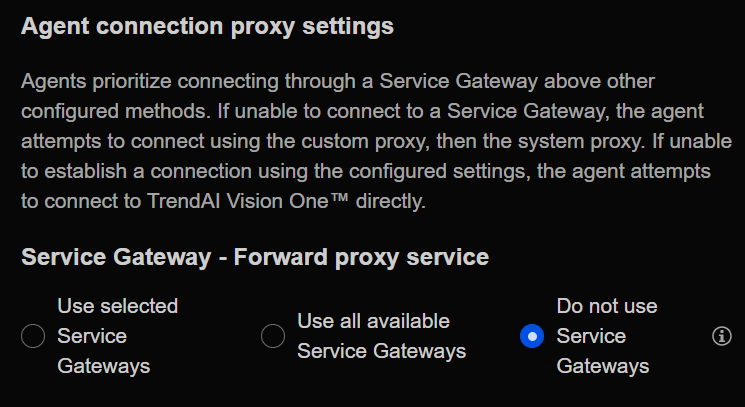
若要使用 Service Gateways 作為 Proxy,該設備必須已啟用
Forward Proxy Service
-
Use selected Service Gateways:連線至指定的 Service
Gateways
-
Use all available Service Gateways:嘗試連線至所有可用的 Service Gateways
-
Do not use Service Gateways:不使用 Service Gateways
進行連線
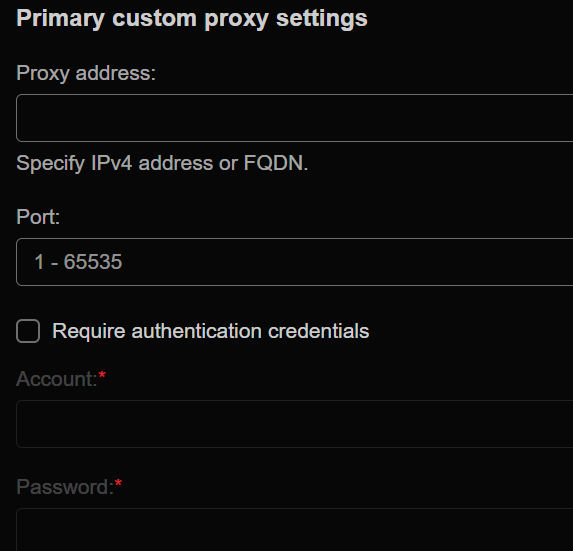
Primary custom proxy settings
輸入自定義的 Proxy 伺服器 IP 與 Port 可勾選是否需要驗證帳號密碼
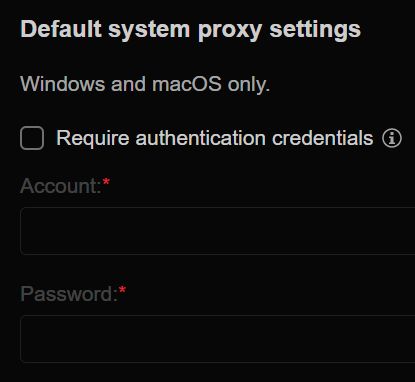
Default system proxy settings
此功能僅限 Windows 與 macOS
勾選 Require authentication credentials 以設定系統預設
Proxy 的驗證帳號密碼
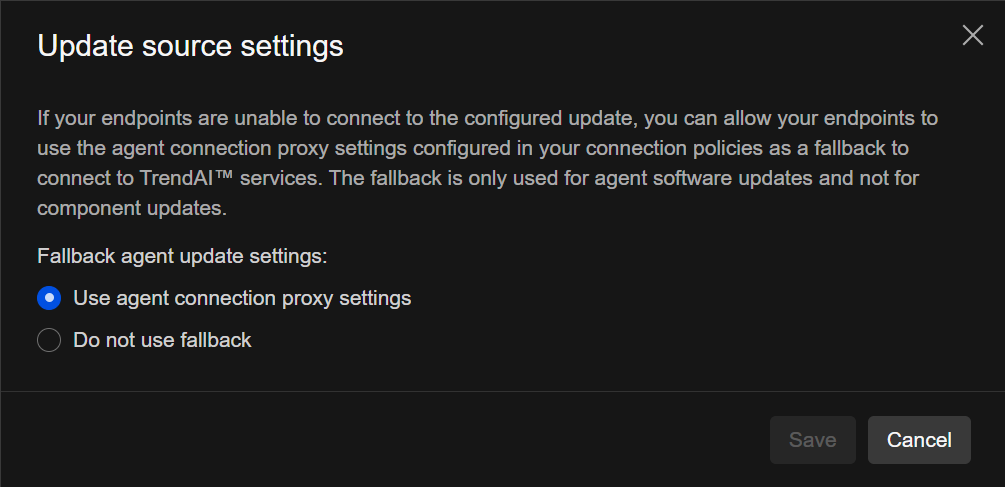
Update source settings
在 Runtime connection policies 頁籤清單上方,點擊
Update source settings 可以設定全域的備援機制
如果端點無法連線至設定的更新來源,您可以設定是否允許端點使用
Agent connection proxy settings
作為下載軟體更新的備援連線通道
Relay management
透過此功能,您可以將特定的端點設為內部網路的更新
Relay,藉此節省對外頻寬與連線資源
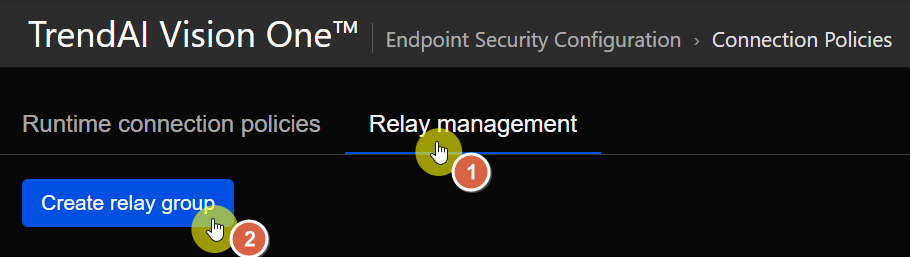
點擊 Create relay group 或點擊現有的群組名稱進行編輯:
- 輸入唯一的 Relay group name
- 填寫選填的 Description
-
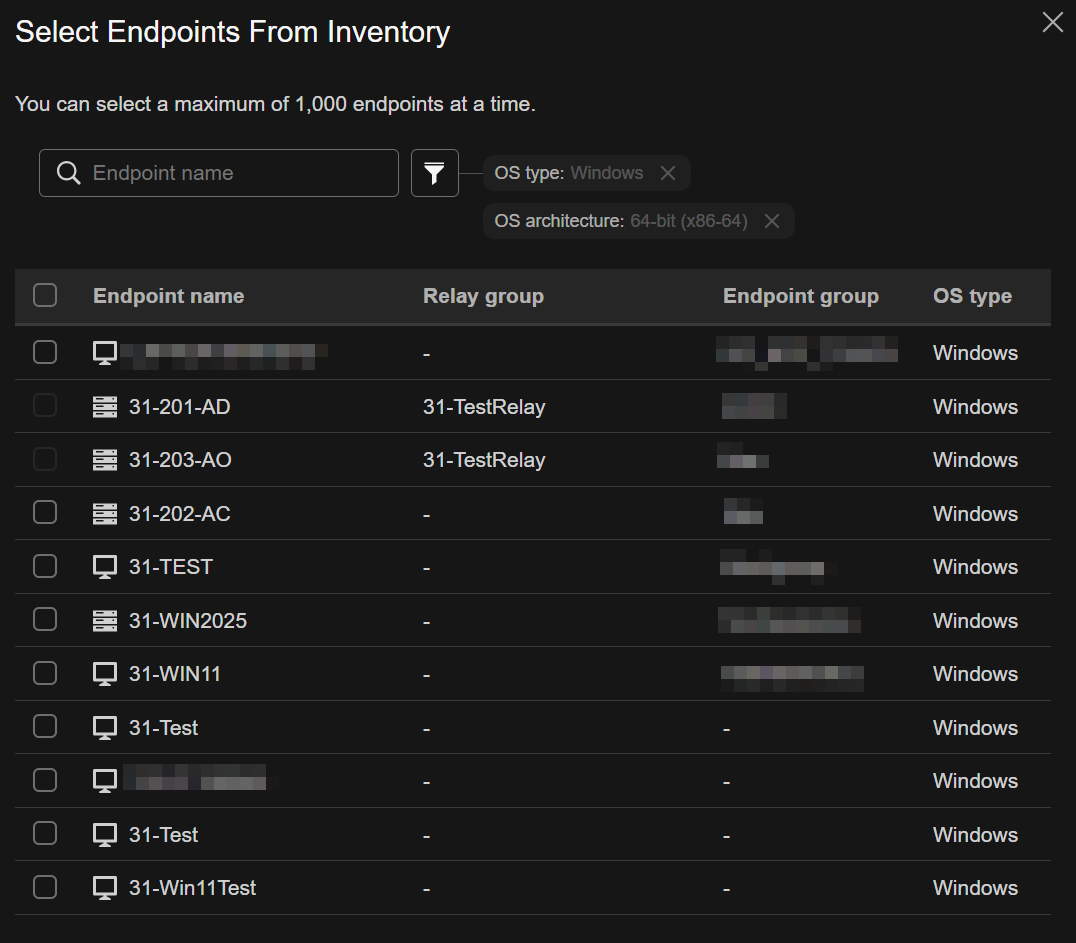
點擊 Endpoint name 下方的編輯圖示,選擇要作為 Relay
的端點
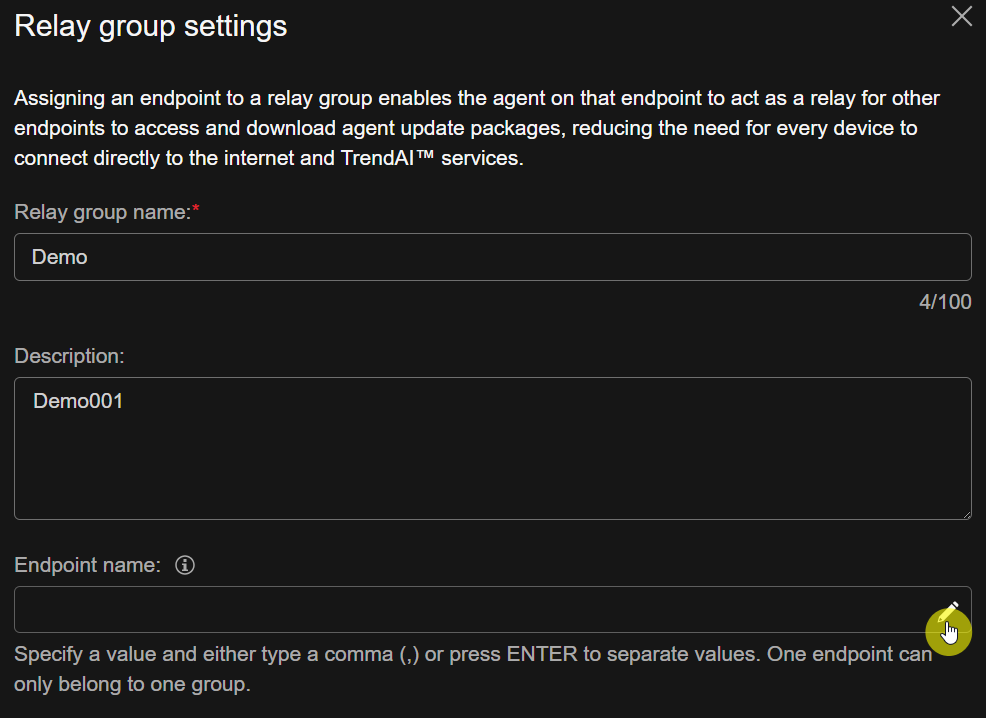
Note
Relay Group 限制
- 一個群組最多可選 1000 個端點
- 單一端點只能屬於一個群組
Relay Agent 系統需求
- 作業系統:Windows 64-bit (x86-64)
- Agent 版本:202604 或更新版本
-
網路:需允許 Port 4126 的
Inbound 連線
-
硬體資源:需預留 50 GB
磁碟空間,記憶體則依部署類型而定(Sensor only 為 1
GB,其餘為 3 GB)
- 點擊 Save 儲存設定
Tip
若該 Relay group 已經被任一 Runtime connection policy
所使用,則無法將其刪除