3rd Party Integration 設定
Active Directory (on-premises)
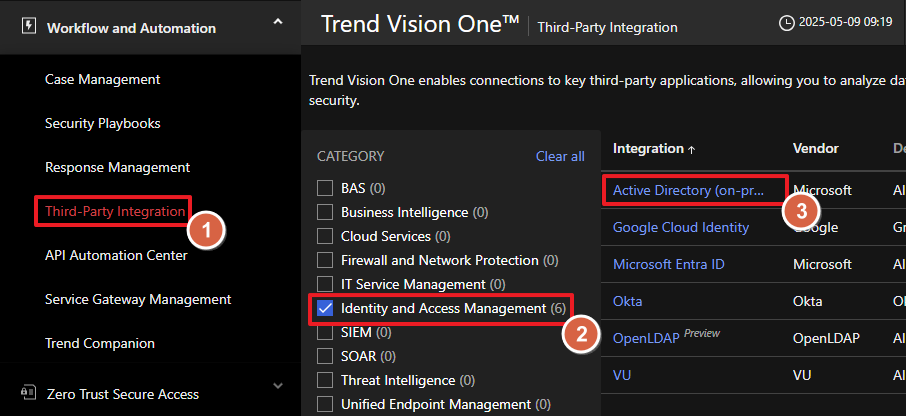
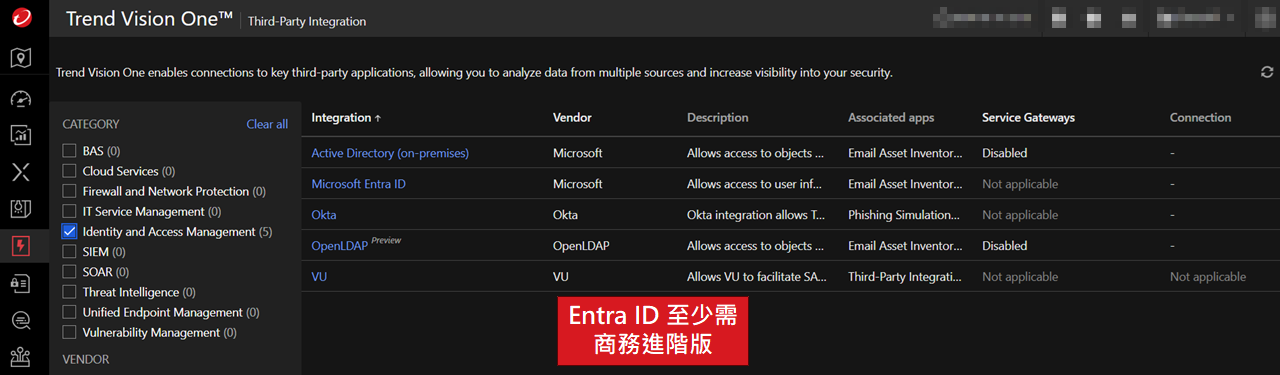
在 Workflow and Automation > Third-Party Integration 勾選 Identity
and Access Management 找到 Active Directory (on-premises)
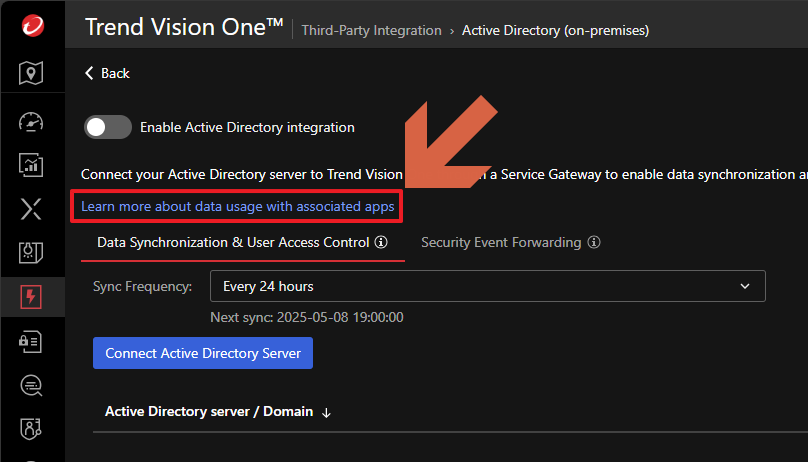
點擊 Learn more about data usage with associated apps 進一步了解整合後的資料將如何被使用
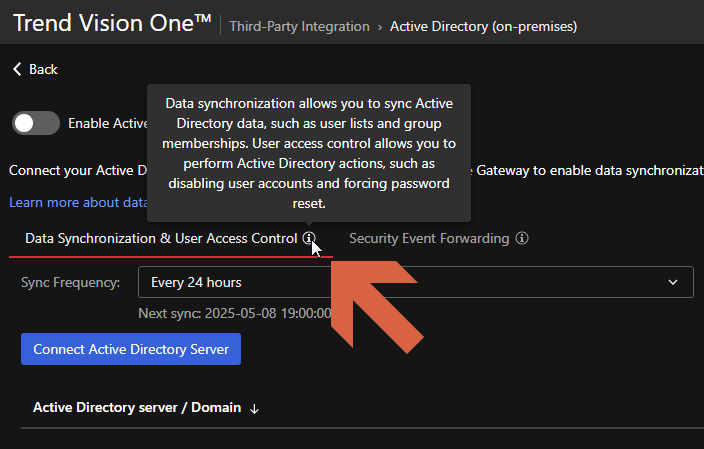
將滑鼠移動至功能旁也有簡單的介紹
了解完資料用途後,先點擊 Enable Active Directory integration 啟用整合
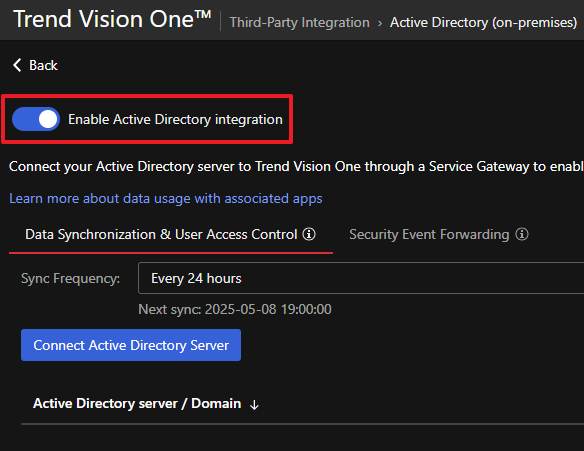
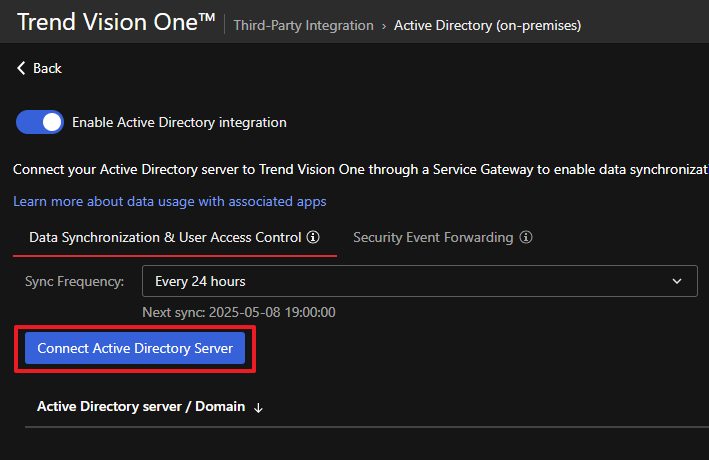
點擊 Connect Active Directory Server
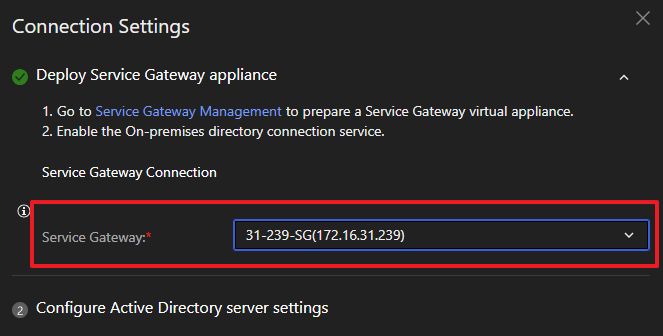
Trend Vision One 連線至 Active Directory (on-premises) 需要透過 Service
Gateway 的 On-premises directory connection 服務
如果 Service Gateway 尚未安裝此服務,點擊畫面中的 Service Gateway Management 設定
如果環境中尚未部署 Service Gateway 請參考:Service Gateway 部署

指定一個擁有 On-premises directory connection 服務的 Service Gateway
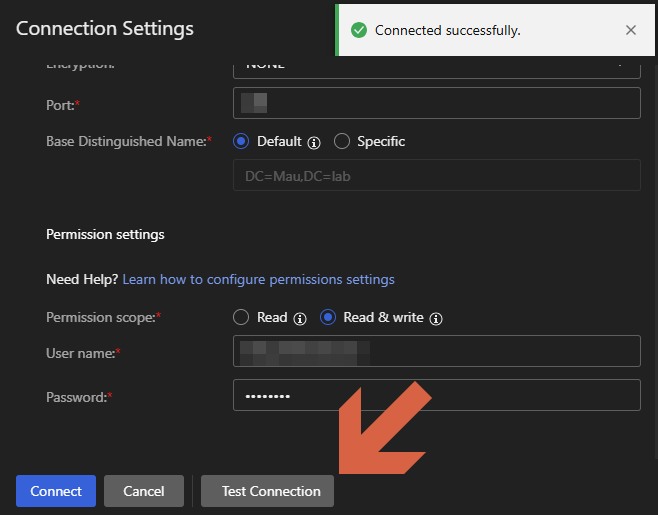
依照環境內連線 Active Directory (on-premises) 所需要的資訊填寫底下內容
關於 Distinguished Name
您可以直接在 Active Directory server 以 PowerShell 執行
(Get-ADDomain).DistinguishedName 獲得其所在網域的 DN
或是執行 Get-ADDomain -Identity 網域 | Select-Object DistinguishedName 查詢

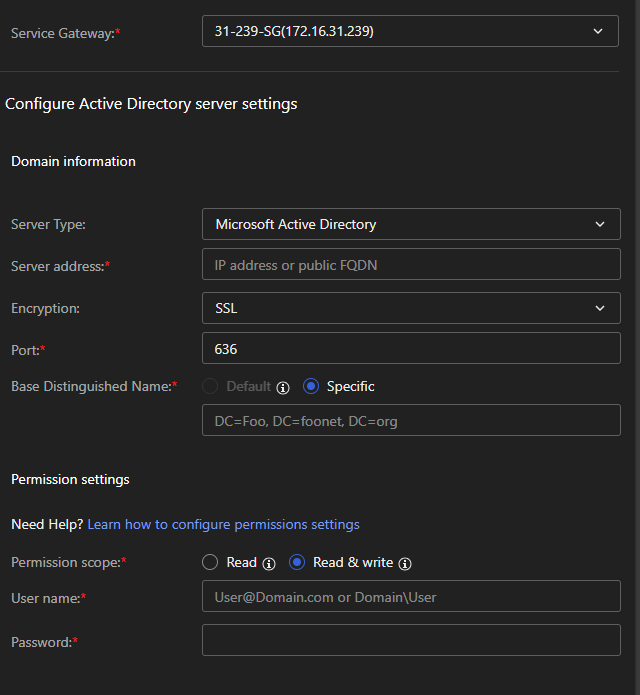
設定完成後,點擊 Test Connection 確認設定正確後點擊 Connect
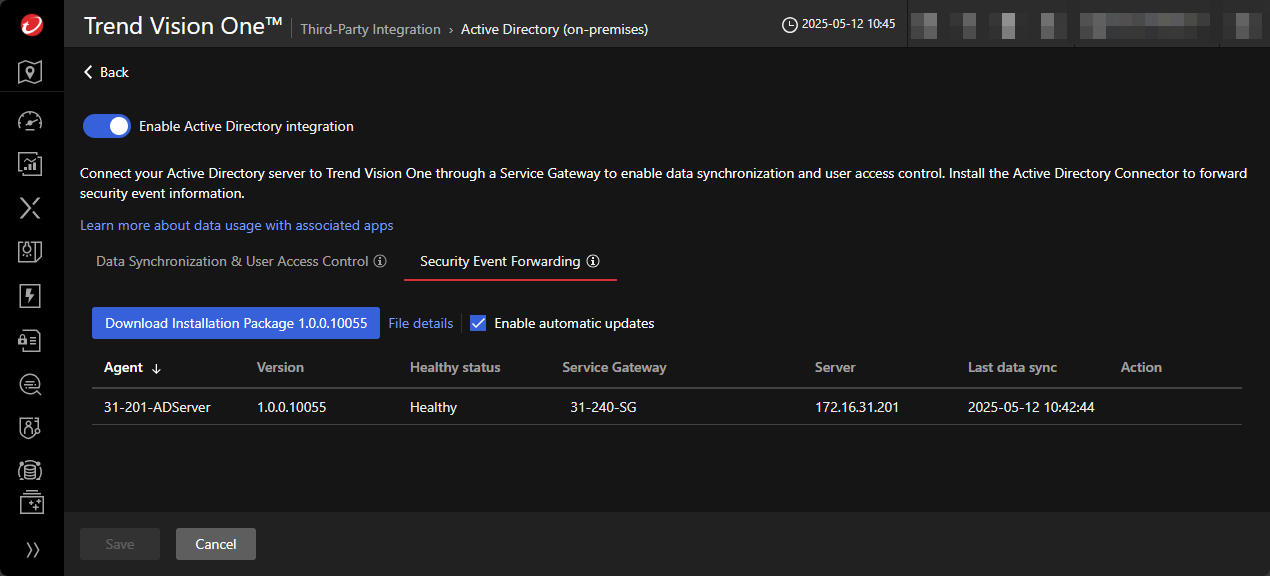
依需求調整同步時間的間隔後,點擊 Save
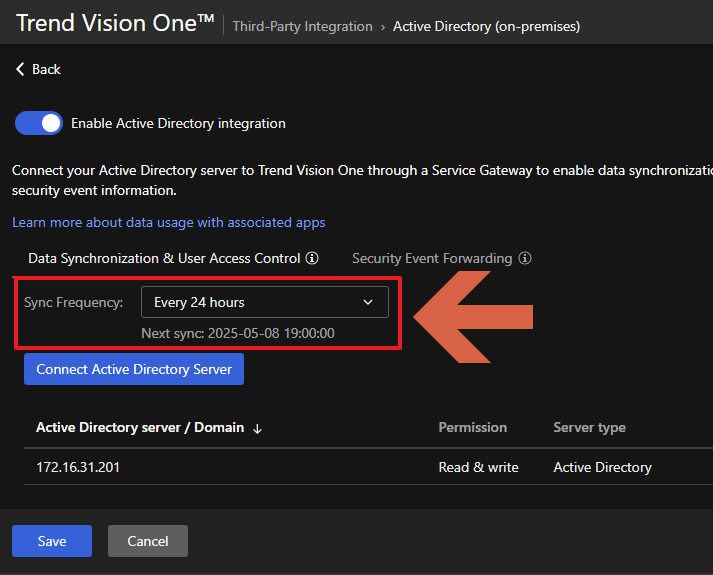
完成後,可於下方清單看到新增的 Active Directory server 以及使用的 Service Gateway 與上次同步時間
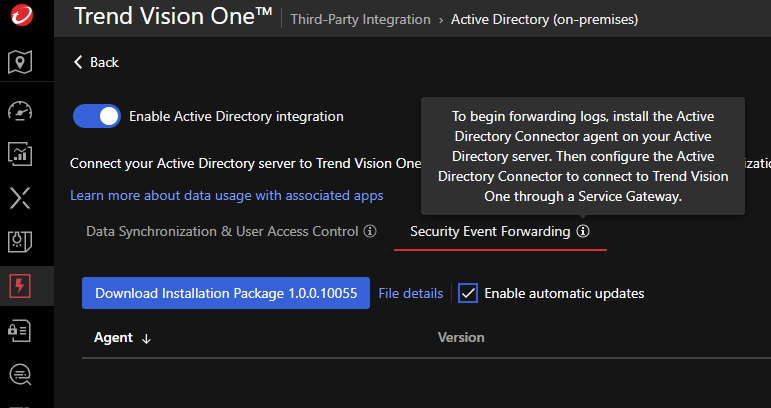
如果需要進一步將 Active Directory server 的 Security Event 上傳至 Trend Vision One
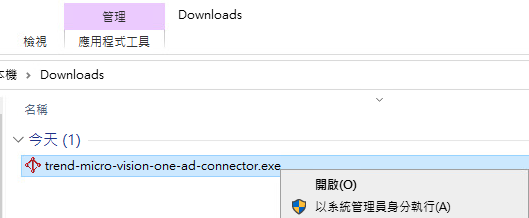
可於 Security Event Forwarding 下載 Active Directory Connector 安裝在
Active Directory server
以系統管理員身分執行下載的 Active Directory Connector
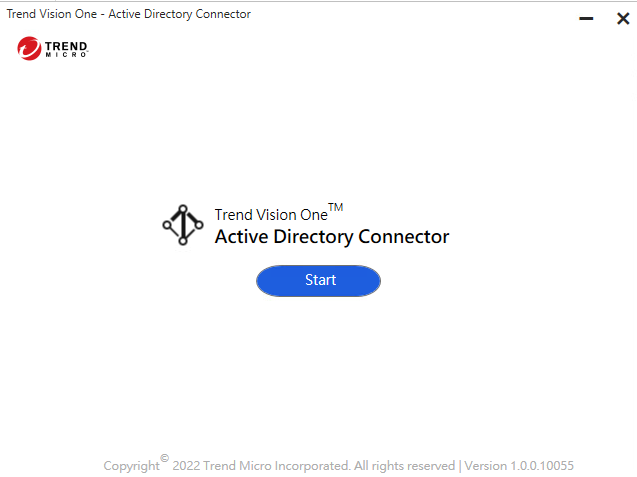
出現 Active Directory Connector 視窗後點擊 Start
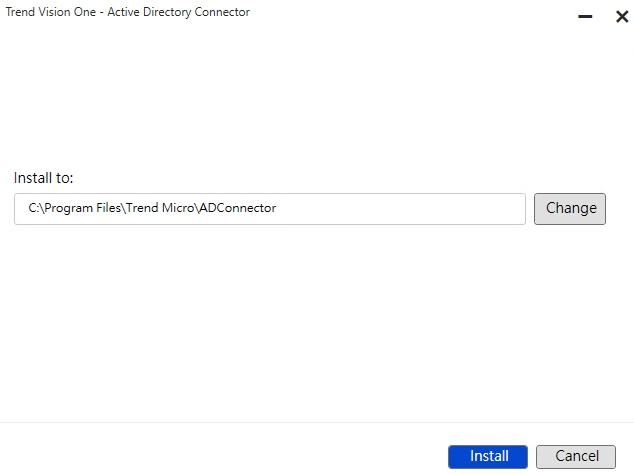
選擇安裝位置後點擊 Install
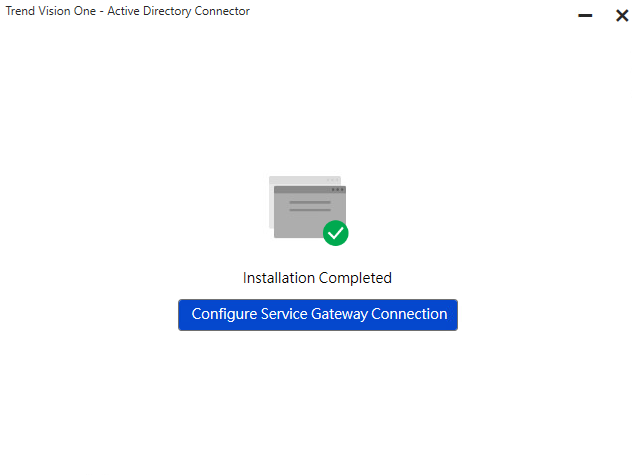
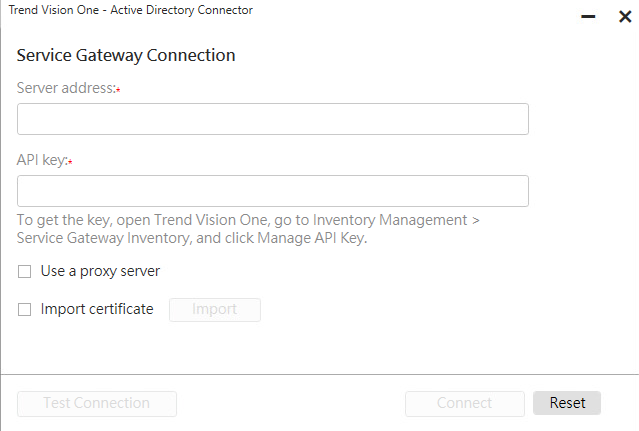
等待安裝完成後點擊 Configure Service Gateway Connection
需要填寫用以連線的 Service Gateway 的位置以及 API Key
在 Workflow and Automation > Service Gateway Management 點擊 Manage
API Key
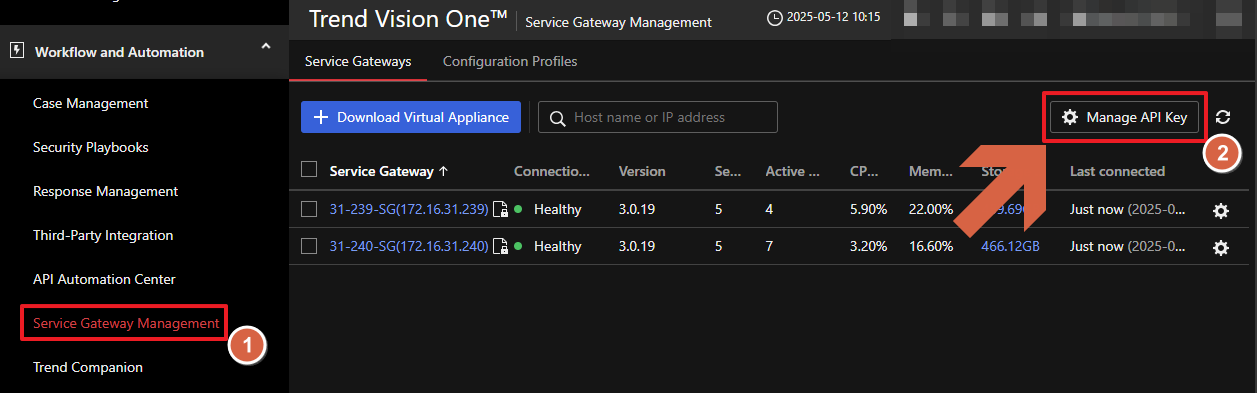
複製現有的 API Key 到 Active Directory Connector 貼上

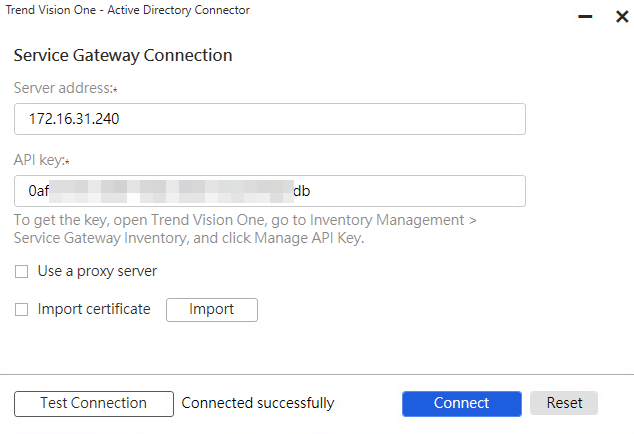
資料輸入完成後點擊 Test Connection 確認出現 Connected successfully 後點擊
Connect
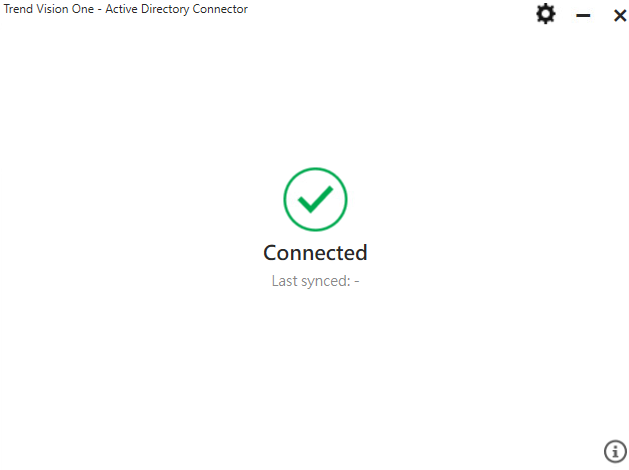
完成後將出現 Connected 的畫面
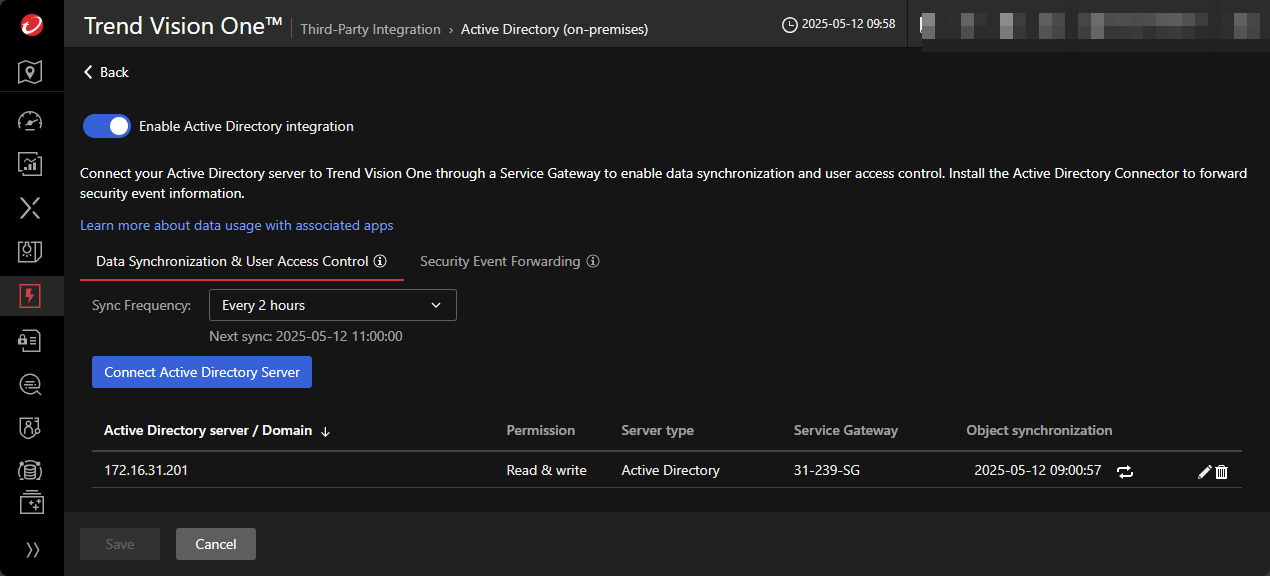
同步完成後可於下方清單看到新增的 Active Directory server 以及使用的 Service Gateway 與上次同步時間
Microsoft Entra ID
在 Workflow and Automation > Third-Party Integration 勾選 Identity
and Access Management 找到 Microsoft Entra ID
依照 Associated apps 所選擇,圖中選擇為第三項
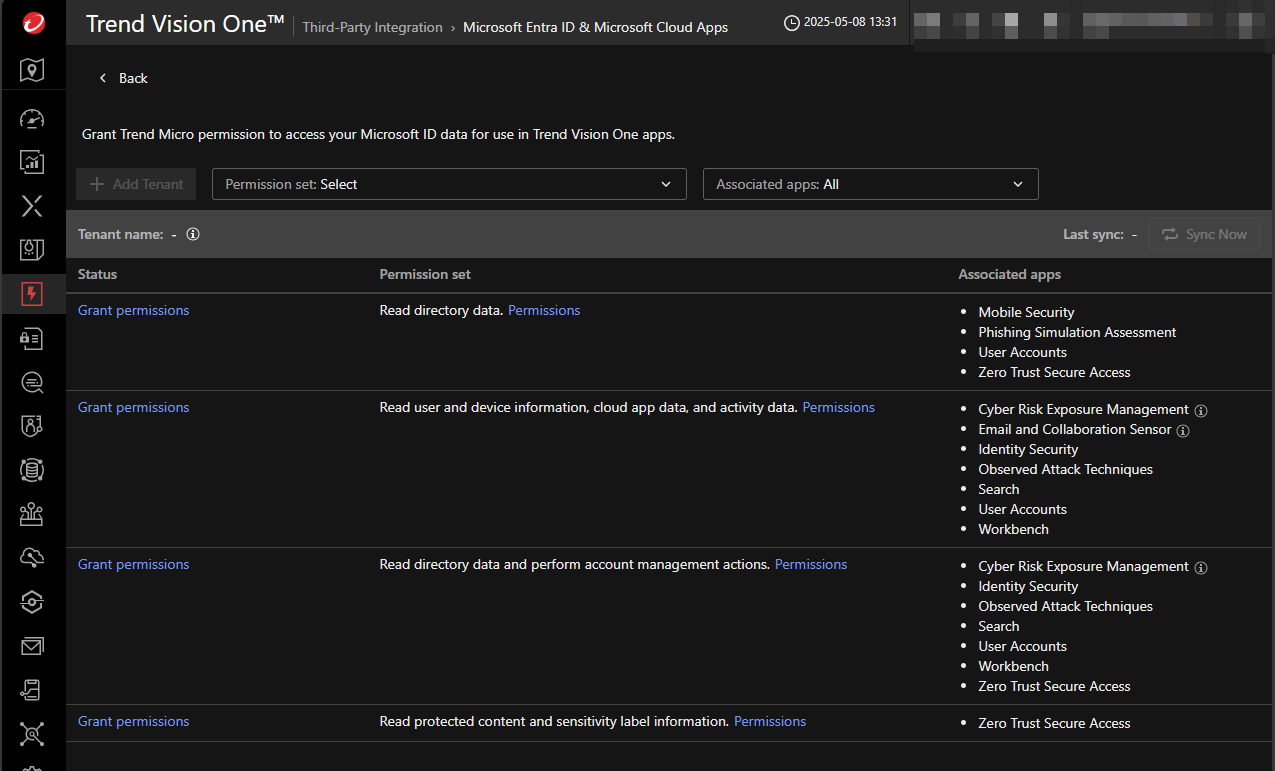
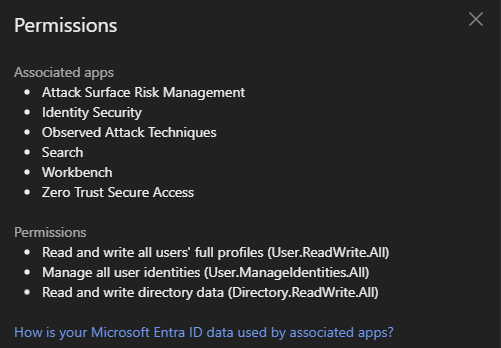
點擊 Permissions 可以看到需要的權限
點擊 Grant permissions 將會引導到登入頁面
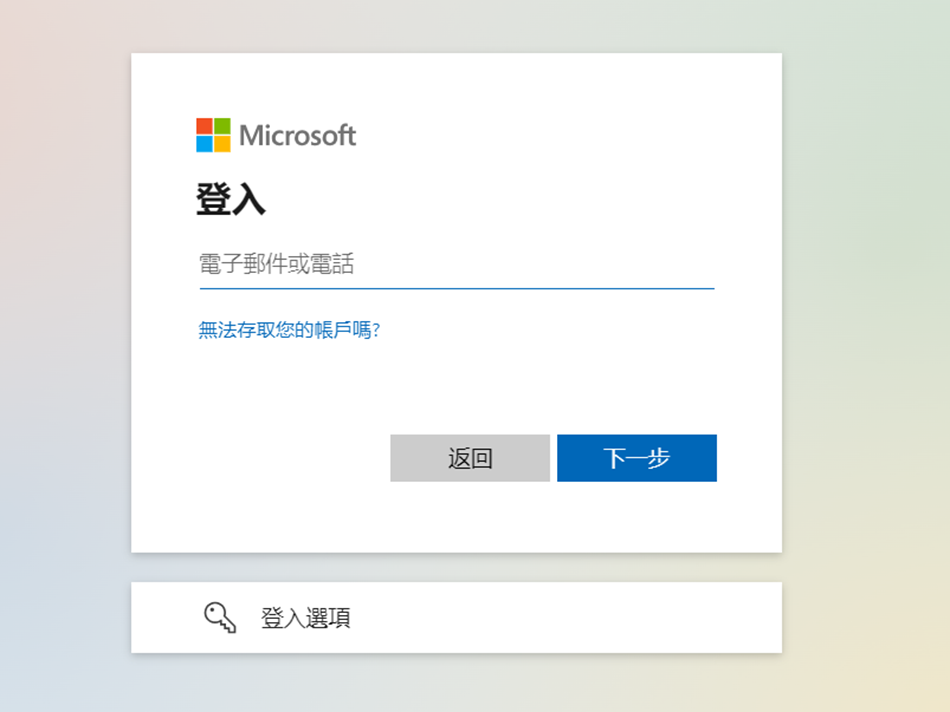
引導到公司/組織的頁面後點擊 下一步
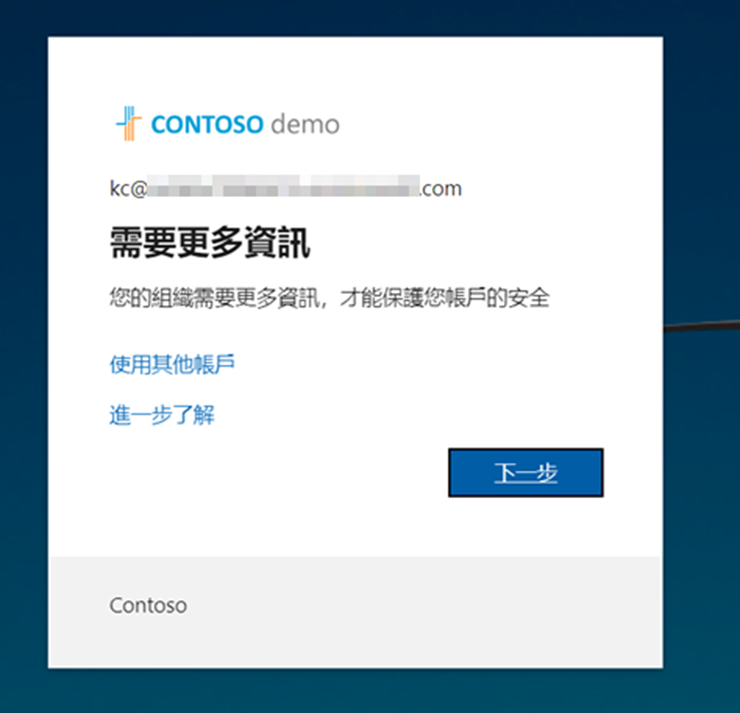
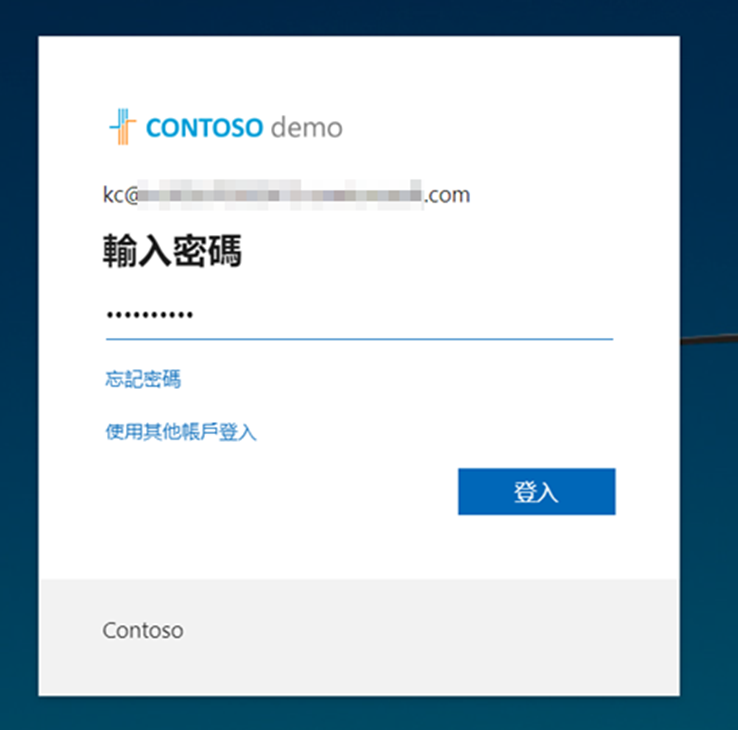
輸入密碼點擊 登入
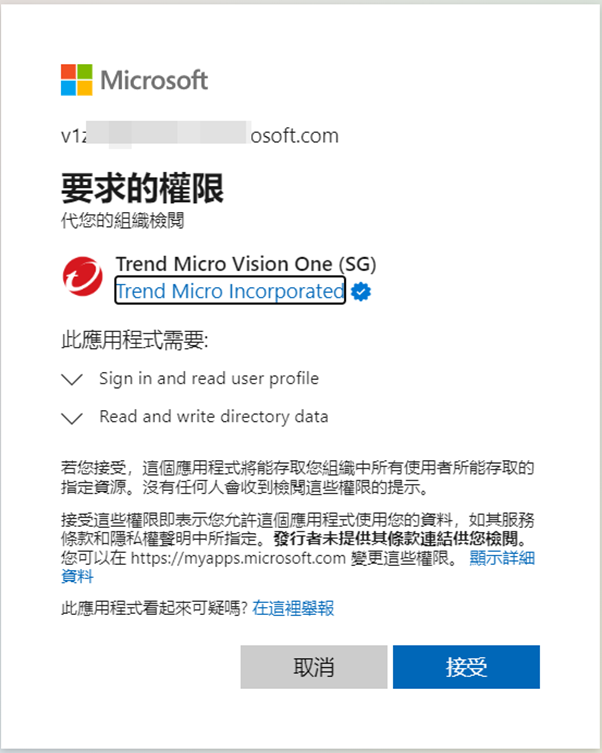
跳出 Trend Micro Vision One 需要權限,點擊接受
完成後畫面

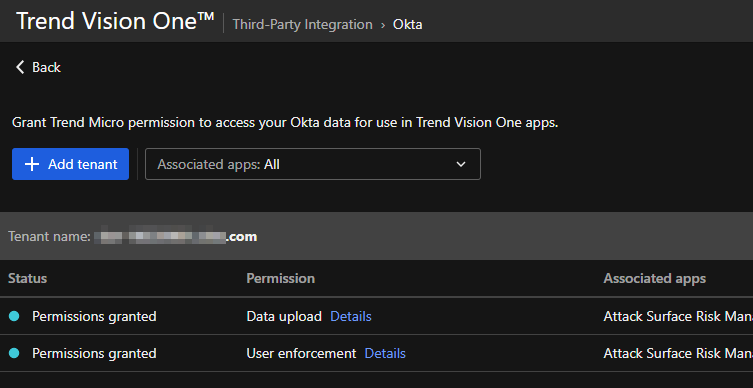
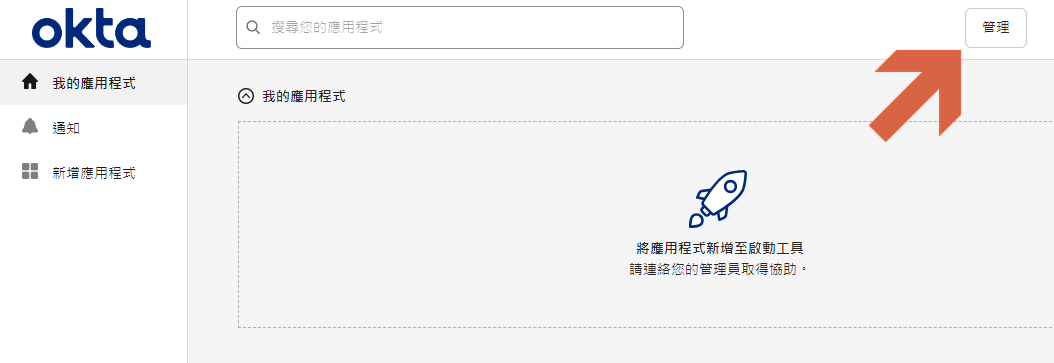
Okta Identity
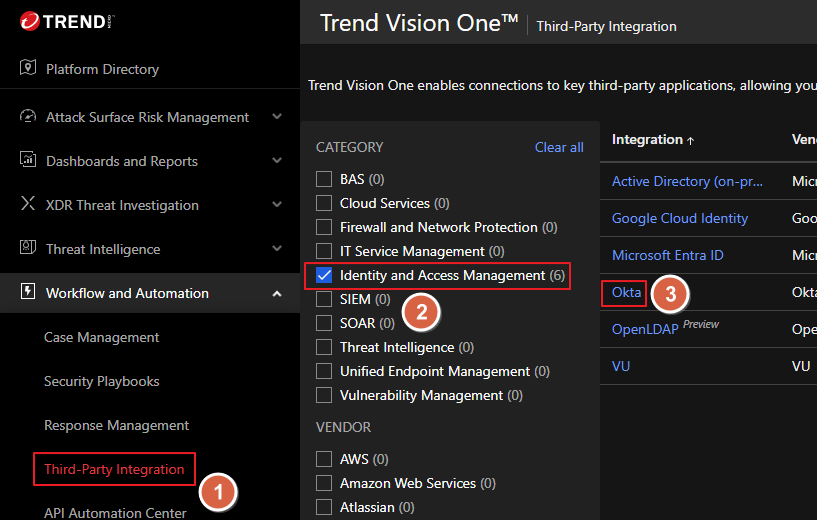
在 Workflow and Automation > Third-Party Integration 勾選 Identity
and Access Management 找到 Okta
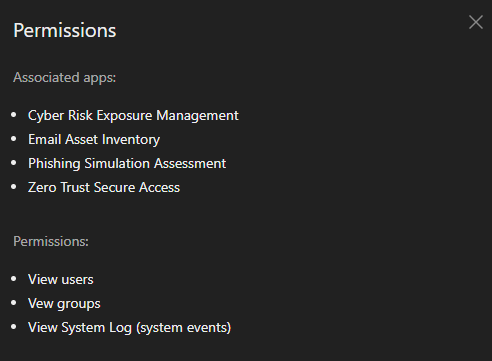
點擊 Details 確認所需要的權限與受影響的 Apps
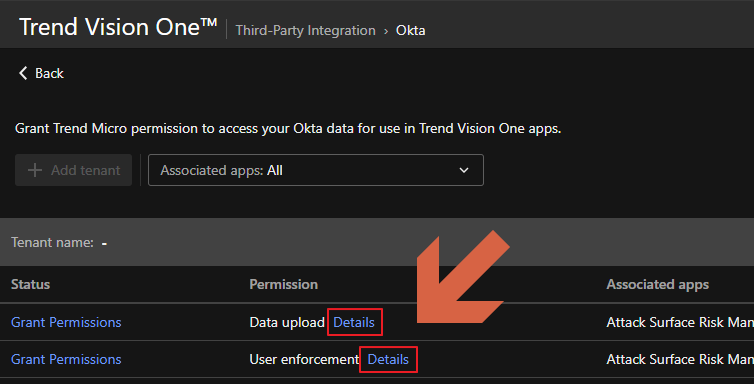
以其中一項為例,點擊後會看到右側彈出 Permissions 的畫面
這些也可以在點擊了 Grant Permissions 後在右側看見
確認需要的權限與受影響的 Apps 後,登入到 Okta 的 Admin Console,如果登入後不是 Admin
Console 可由右上方存取
Note
在建立 API token 之前,確保您的帳號已經依照要啟用的功能分配以下任一角色。
| Feature |
User roles allowed |
| Data upload |
Super admin |
| Org admin |
| API access management admin |
| Mobile admin |
| Read-only admin |
| App admin |
| User enforcement |
Super admin |
| Org admin |
| Group admin |
API token 具有與建立它們的使用者相同的權限。如果使用者權限變更,API token 權限也會變更。
詳細資訊參考:Obtaining your Okta URL domain and API token
進入 Okta 的 Admin Console 後,點擊左上方的選單圖示並在 Security 瀏覽
API 頁面
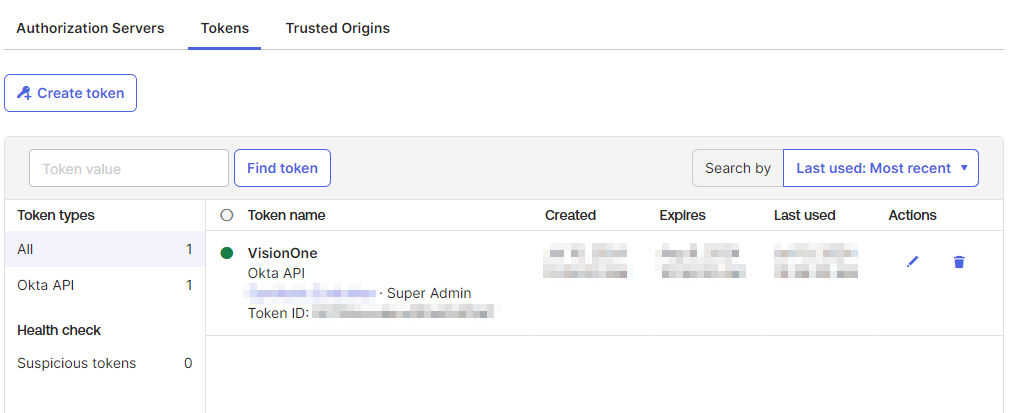
在該頁面中繼續點擊 Tokens > Create token
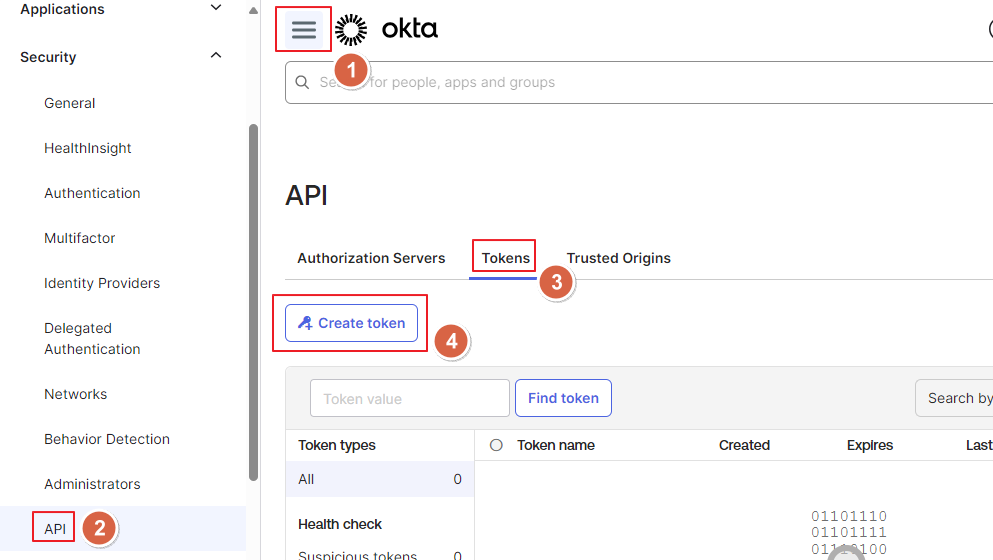
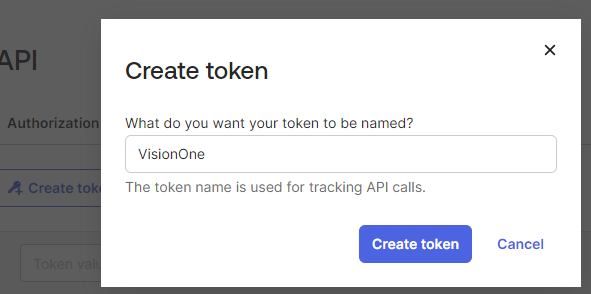
首先為本次建立的 token 命名
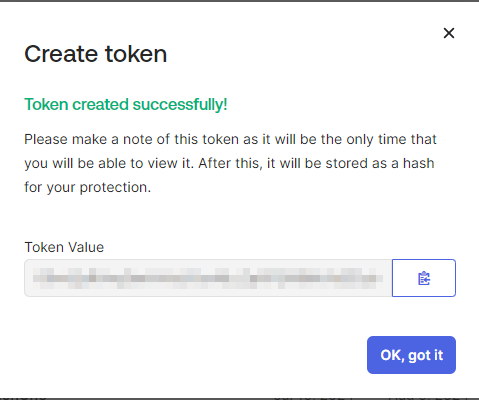
建立完成後複製並保存 Token Value
Warning
一旦關閉此視窗就無法再次取得本次建立的 token
建立完成後可以看到新增的 Okta API
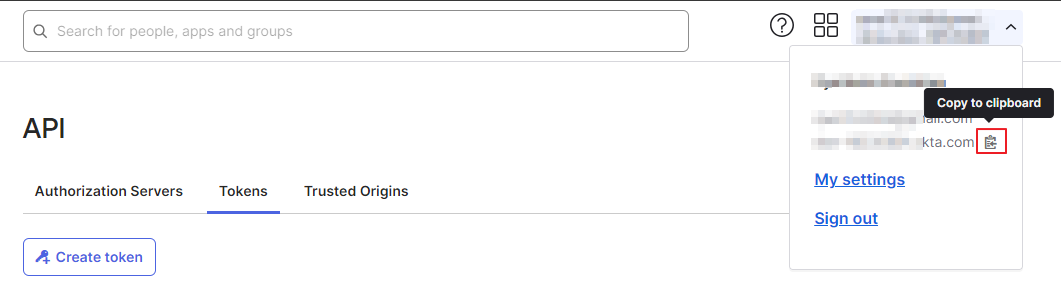
在右上方的帳號資訊可以點擊 Copy to clipboard 複製 Domain
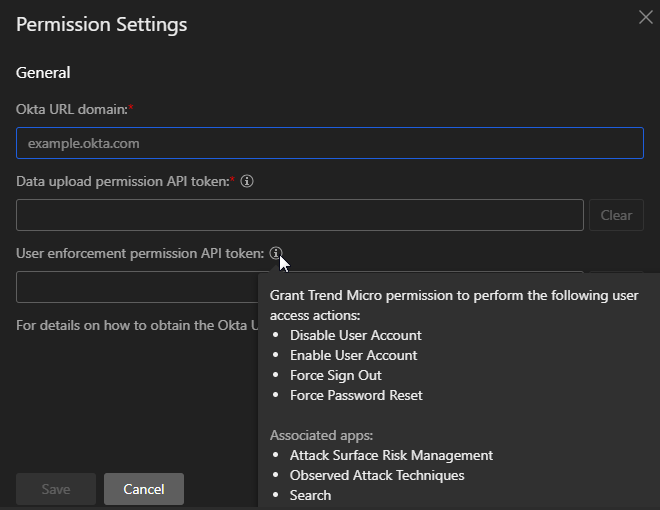
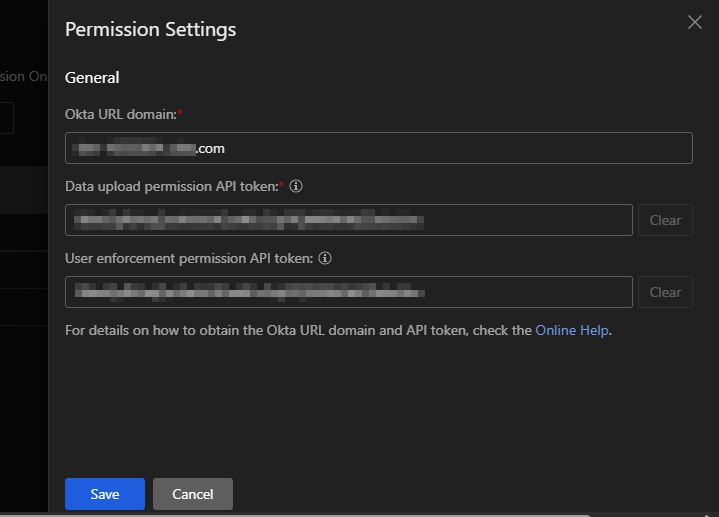
回到 Vision One 的 Permission Settings 貼上稍早取得的資訊
完成後畫面